



Aerial mast
1. Note that the aerial mast can be unscrewed from the mounting on the roof and is available as a separate component. To remove the complete assembly, proceed as follows.
2. Carefully prise the courtesy light from the roof panel and disconnect the wiring plug.
3. Pull the suppressor can from the bottom of the aerial (see illustration).
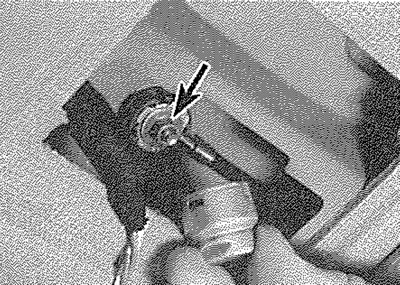
22.3. Pull the suppressor can from the aerial for access to the securing nut (arrowed)
4. Unscrew the aerial securing nut, then disconnect the aerial lead from the stud and pull the aerial from the roof.
5. Refitting is a reversal of removal.
Upper aerial lead
6. Disconnect the lead from the aerial mast as described in paragraphs 2 to 4.
7. Carefully pull the front pillar trim panel from the pillar to expose the aerial lead. Take care not to break the trim panel securing clips.
8. Where applicable, unscrew the securing nuts and unclip the trim panel from under the facia.
9. Pull the carpet panel from the edge of the footwell (if necessary, prise the weatherstripfrom the front edge of the door aperture), to expose the lower aerial connector. Where applicable, pull the insulation from the connector.
(Information copied from the resource Peugeotbook.ru)
10. Separate the two halves of the connector, then tie a length of string to the top of the aerial lead.
11. Release the lead from the clips on the body pillar, then carefully pull the lead down through the roof lining, pillar and facia. Untie the string from the end of the lead and leave it in place to aid refitting.
12. Refitting is a reversal of removal, bearing in mind the following points:
- a) Use the string to pull the lead up through the facia, body pillar and roof panel.
- b) Make sure that the lead is securely clipped to the body pillar.
Lower aerial lead
13. Remove the radio/cassette player as described in Section 20.
14. Separate the two halves of the aerial connector as described in paragraphs 8 to 10.
15. Tie a length of string to the upper end of the lead, then pull the lead down into the footwell. Untie the string and leave it in place in the facia to aid refitting.
16. Commence refitting by using the string to pull the lead back into position. With the lead correctly routed, untie the string.
17. Reconnect the lead connector, then refit the carpet panel and, where applicable, the trim panel.
18. Refit the radio/cassette player as described in Section 20.