
Interior door handle
Removing
1. Remove the interior door trim panel as described in paragraph 11.
2. Slide the handle assembly towards the front of the door to release the mounting lug, release it from the door and disconnect the link (pic. 12.2).
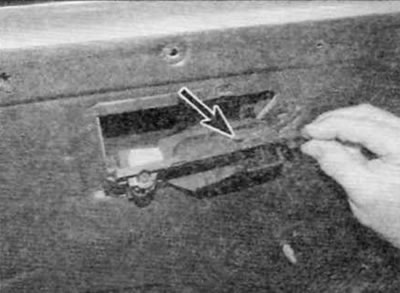
Pic. 12.2. Slide the inside front door handle towards the front of the door to release the mounting lug (marked with an arrow)
Installation
3. Installation is carried out in the reverse order of removal. Install the interior trim panel as described in paragraph 11.
External door handle
Note. The outer handle is riveted to the door. Prepare new rivets of the correct size for installation.
Removing
4. Using a 6.0 mm drill bit, drill out the rivet heads from the outside and remove the handle from the door (pic. 12.4). Disconnect the rod and remove the handle.
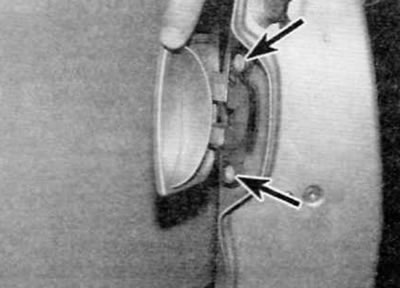
Pic. 12.4. Drill out rivet heads (marked with arrows) and remove the outside handle from the front door
Installation
5. Installation is carried out in sequence. reverse withdrawal. Use new explosive rivets to secure the handle.
Lock cylinder
Note. Upon installation, a new door waterproofing sheet may be required.
Removing
6. Remove the interior door trim panel as described in paragraph 11.
7. Using a sharp knife, carefully separate the plastic waterproofing sheet from the adhesive layer on the door and remove the sheet. If you are careful, you can remove the waterproofing sheet in one piece and reuse it when installing (pic. 12.7).
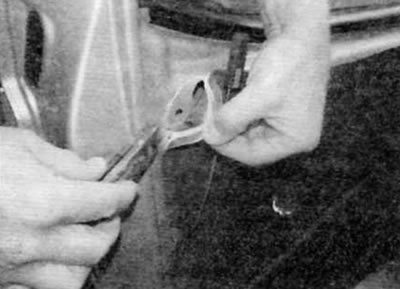
Pic. 12.7. Using a sharp knife, carefully separate the plastic waterproofing sheet from the adhesive layer on the door and peel off the sheet
8. Inside the door, disconnect the rod from the door lock cylinder.
9. Using a screwdriver, carefully remove the plastic cover from the opening on the back of the door (pic. 12.9). Be aware that the cover is made of very fragile plastic and may be damaged when removed.
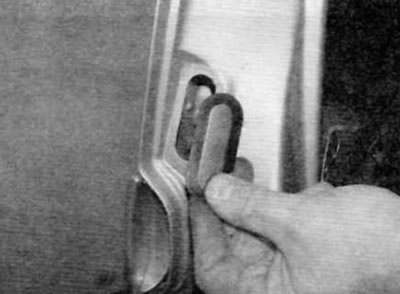
Pic. 12.9. Carefully remove the plastic cover from the opening on the back of the door
10. Working through the opening in the end of the door, remove the large horseshoe clip from the back of the lock cylinder. The clamp has a hole on the side that allows you to screw a threaded puller into it. A suitable tool can be made from a piece of rod with a self-tapping screw soldered to one end (pic. 12.10, a. b).

Pic. 12.10, a. There is a hole on the side of the lock cylinder clip (marked with an arrow), into which a threaded extractor can be screwed
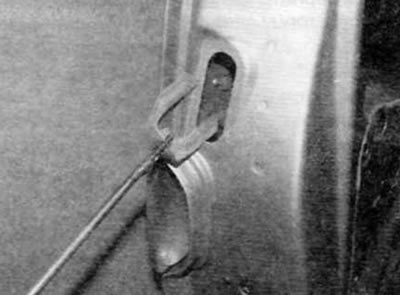
Pic. 12.10, b. Using a suitable puller, remove the clip from the lock cylinder
11. After removing the clip, remove the lock cylinder from the outside of the door (pic. 12.11).
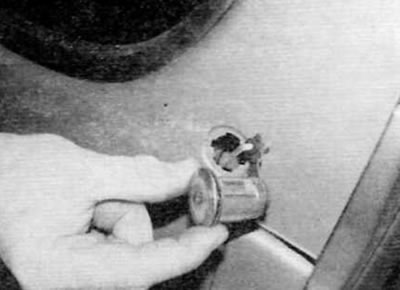
Pic. 12.11. Remove the lock cylinder from the outside of the door
Installation
12. Installation is carried out in the reverse order of removal. Fasten the lock cylinder clip securely. Install a new waterproofing sheet on the door if «old» was damaged upon removal. Finally, install the interior door trim panel as described in paragraph 11.
Door lock
Note. Upon installation, a new door waterproofing sheet may be required.
Removing
13. Remove the inner door trim panel as described in paragraph 11.
14. Using a sharp knife, carefully separate the plastic waterproofing sheet from the adhesive layer on the door and remove the sheet. If you are careful, you can remove the waterproofing sheet in one piece and reuse it when installing (pic. 12.7).
15. Inside the door, disconnect the rods from the door lock cylinder.
16. Disunite an electric socket of the electric motor of the lock of a door.
17. Turn out three screws of fastening of the lock in gathering to an end face of a door.
18. Turn out the screw of fastening of the crank lever located over three screws of the lock of a door.
19. Remove the door lock assembly along with the crank arm through the opening in the door (pic. 12.19).
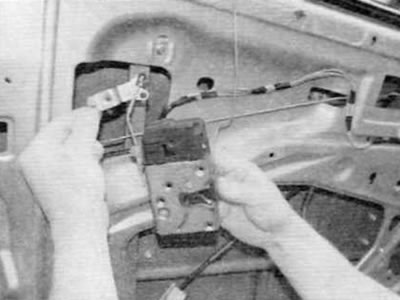
Pic. 12.19. Remove the door lock assembly with crank arm through the door opening
Installation
20. Installation is carried out in the reverse order of removal. Install a new waterproofing sheet on the door if «old» was damaged upon removal. Finally, install the interior door trim panel as described in paragraph 11.