
Front door
Removing
1. Disconnect the wire «masses» from battery (see «Disconnecting the battery»).
2. Open the door, then release the snap ring and disconnect the door electrical connector.
3. Turn out two bolts and disconnect the limiter of opening of a door from a rack of a door.
4. Install a secure support under the door, then unscrew the axles of the upper and lower hinges. Carefully remove the door from the vehicle.
Installation
5. Installation is carried out in the reverse order of removal. Finally, check the position of the door relative to adjacent body panels. If adjustment is required, the position of the door can be changed as far as the elongated bolt holes in the hinge plates attached to the door allow.
Sliding side door
Removing
6. Remove the top side door trim panel as described in paragraph 28.
7. Open the side door and install suitable supports under it to take the weight of the door. Place suitable stands on the supports so as not to damage the paintwork.
8. Remove the tip from the back of the top door rail. Loosen the screw and remove the end stop plate from the top guide. Please note that the tip and end stop plate are not available on all models.
9. Loosen the bolt and remove the bottom carrier end stop from the back of the bottom rail (pic. 10.9, a, b).
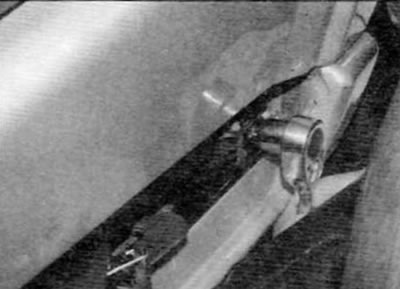
Pic. 10.9, a. Loosen the bolt...
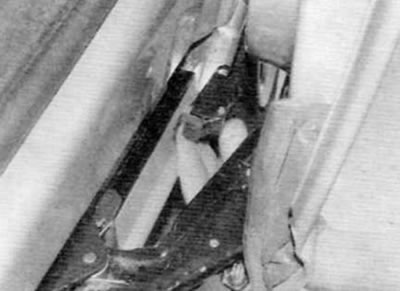
Pic. 10.9, b.... and remove the end stop of the lower bearing element of the side door from the rear end of the lower rail
10. Turn out two bolts of fastening of an arm of the central bearing element to a back part of a door.
11. Together with an assistant, release the upper and lower bearing elements from the guides and carefully remove the door from the car.
Installation
12. Installation is carried out in the reverse order of removal. Tighten the bolts to the specified torque.
Double-leaf rear door
Note. The following procedure applies to high trim models. On models with a lower trim level, some of the items mentioned in the text may be missing.
Removing
13. Disconnect the wire «masses» from battery (see «Disconnecting the battery» in the application).
14. Remove the rear door interior trim panel as described in paragraph 28.
15. Unhook the door opening limiter from the bracket on the body.
16. Disconnect the washer hose from the rear window cleaner motor and release the hose from the appropriate clips.
17. Disconnect the electrical connectors of the items listed below (referring to the relevant paragraphs of this chapter, if necessary, and chapter 12):
- A) rear window wiper motor:
- b) door lock motor:
- V) rear window heating elements:
- G) upper brake light:
- d) license plate lights.
18. Release the wiring harness clips from the door panel.
19. Make sure all electrical connectors are disconnected, then tie a piece of fishing line to the upper brake light electrical connector. The fishing line can be used when pulling electrical wiring through the door during installation of the wiring harness.
20. Release the grommet of the wiring harness, and then remove the wiring harness from the door (pic. 10.20).
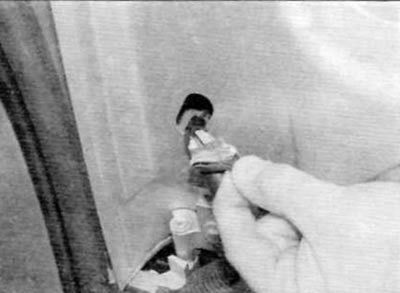
Pic. 10.20. Release the tailgate wiring harness grommet and pull the tailgate wiring harness out of the door
After the fishing line appears, untie it from the electrical connector and leave it in the door for now.
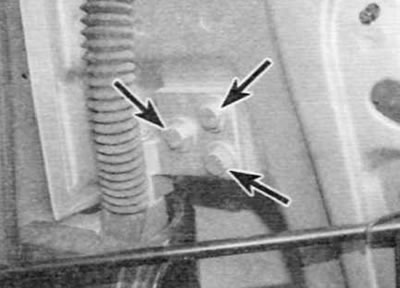
21. Working together with an assistant, remove the three upper and three lower bolts securing the hinges to the door (pic. 10.21, a, b). Carefully remove the door from the vehicle.
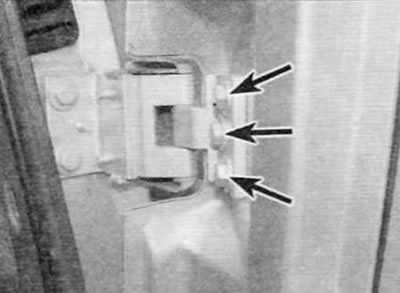
Pic. 10.21 a. Remove the top three screws (marked with arrows)...
Pic. 10.21 b....and three lower bolts (marked with arrows) attaching hinges to rear door
Installation
22. Installation is carried out in the reverse order of removal. Connect all electrical connectors securely.