



Table of contents: Front seat belt - 3-door models 🠇 Front seat belt - 5-door models 🠇 Front seat belt stalk 🠇 Rear side seat belt 🠇 Rear centre belt and buckles 🠇
Front seat belt - 3-door models
Removal
1. Remove the rear passenger compartment side trim panel, as described in Section 26.
2. Prise off the trim cap from the lower belt anchorage bolt. Remove the bolt and washers, then pull out the anchorage bar and free the seat belt from the bar (see illustration).
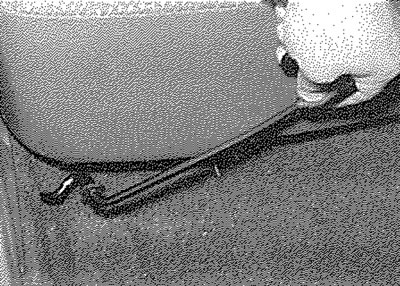
25.2. Freeing the seat belt from the lower anchorage bar - 3-door model
3. Prise the trim cap from the upper seat belt mounting bolt (see illustration), then unscrew the bolt and release the seat belt mounting plate. Note the locations of any washers and spacers.
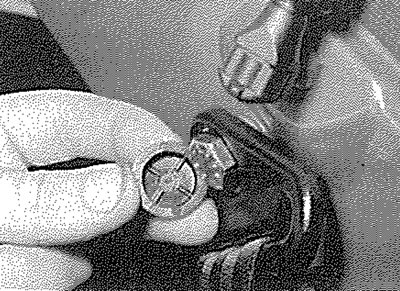
25.3. Remove the trim cap from the upper seat belt mounting bolt
4. Feed the seat belt and the upper mounting plate through the aperture in the trim panel.
5. Remove the inertia reel securing bolt (see illustration) and withdraw the seat belt from the vehicle.
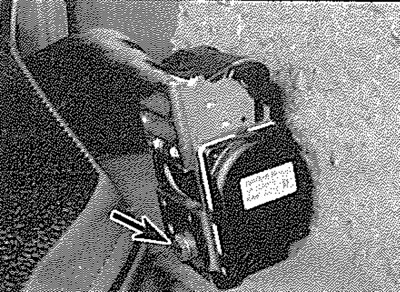
25.5. Front seat belt inertia reel securing bolt (arrowed)
Refitting
6. Refitting is a reversal of removal. Ensure that all washers and/or spacers are positioned as noted before removal and tighten all mounting bolts to the specified torque.
Front seat belt - 5-door models
Removal
7. Prise off the trim cap, then remove the lower belt anchorage bolt and recover the washer.
8. Similarly, remove the upper anchor bolt.
9. Remove the two securing screws, then unclip the centre pillar trim panel from the body (see illustrations).
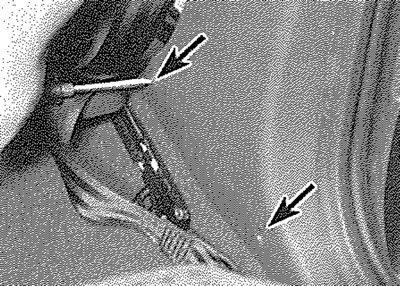
25.9a. Remove the two securing screws (arrowed)...
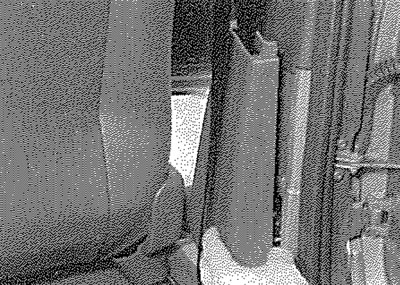
25.9b.... and withdraw the centre pillar trim panel...
10. Remove the inertia reel securing bolt (see illustration), then withdraw the seat belt assembly from the vehicle.
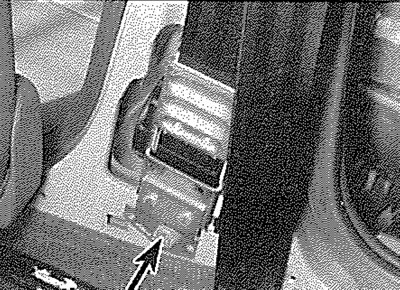
25.10. ... for access to the inertia reel securing bolt (arrowed)
Refitting
11. Refitting is a reversal of removal. Tighten the mounting bolts to the specified torque.
Front seat belt stalk
Warning: On models with seat belt pre-tensioners, do not attempt to remove the seat belt stalk assembly, which incorporates the pre-tensioner assembly. Refer the operation to a Peugeot dealer.
Removal
12. Each stalk is secured to the front seat frame by a bolt and washer.
Refitting
13. Tighten the securing bolt to the specified torque.
Rear side seat belt
Removal
14. Remove the parcel shelf support panel as described in Section 26.
15. Fold the rear seat cushion forwards to expose the lower seat belt anchorage.
16. Unbolt the lower seat belt mounting plate from the floor panel. Note the locations of any washers and spacers on the bolt.
17. Prise off the trim cap and unbolt the upper seat belt anchorage from the body. Again, note the locations of any washers and spacers.
18. Remove the bolt securing the inertia reel assembly to the body and withdraw the seat belt assembly from the vehicle (see illustration).
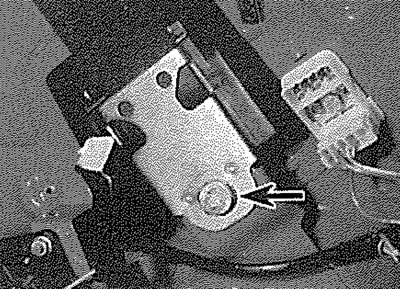
25.18. Rear side seat belt inertia reel securing bolt (arrowed) - 3-door model
Refitting
19. Refitting is a reversal of removal. Ensure that all washers and/or spacers are positioned as noted before removal and tighten all mounting bolts to the specified torque.
Rear centre belt and buckles
Removal
20. The assemblies can simply be unbolted from the floor panel, after folding the rear seat cushion forwards (see illustration). Note the locations of any washers and spacers, to ensure correct refitting.
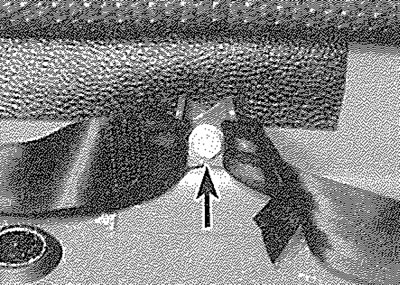
25.20. Rear seat belt buckle mounting bolt (arrowed)
Refitting
21. Refitting is a reversal of removal. Ensure that all washers and/or spacers are positioned as noted before removal and tighten all mounting bolts to the specified torque.