
Note. It is recommended to use two people to remove and install the bumper.
Release models prior to September 2002
Removing
1. Fully apply the parking brake. Raise the front of the vehicle and securely jack stands under it (see «Lifting and placing the car on supports»). For easier access to the bumper mounting elements, remove both front wheels.
2. Remove the grille as described in paragraph 25.
3. Release the front section of the wheel arch locker on each side as described in paragraph 23.
4. Turn out two bolts of fastening of the bottom forward part of a bumper to a basic platform of a radiator (pic. 6.4).
Pic. 6.4. Remove the bolts (one of them is marked with an arrow) attaching lower front bumper to radiator support platform (early models)
5. Working under the wheel arch on each side, remove the bolt securing the rear edge of the bumper to the front fender (pic. 6.5). Similarly, unscrew the two bolts securing the bumper to the support bracket and the inner fender panel.
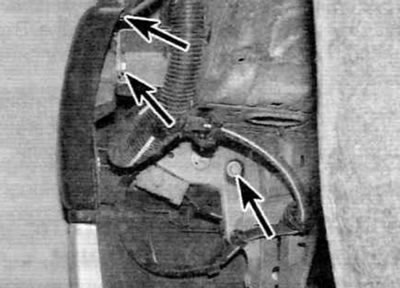
Pic. 6.5. Fastening elements of the front bumper under the wheel arch (marked with arrows) (early models)
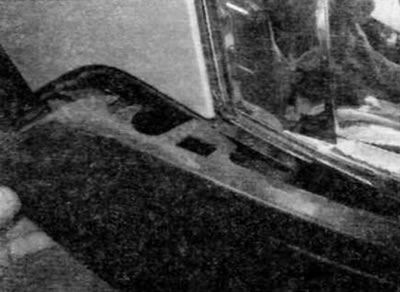
6. Together with an assistant, gently pull the bumper forward and remove it from the vehicle (pic. 6.6).
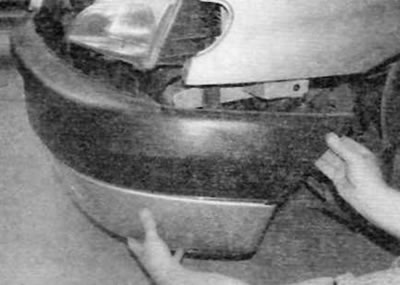
Pic. 6.6. Gently pull the bumper forward and remove from the vehicle (early models)
Installation
7. Installation is carried out in the reverse order of removal.
Release models after September 2002
Removing
8. Fully apply the parking brake. Raise the front of the vehicle and securely jack stands under it (see «Lifting and placing the car on supports»). For easier access to the bumper mounting elements, remove both front wheels.
9. Remove the grille as described in paragraph 25.
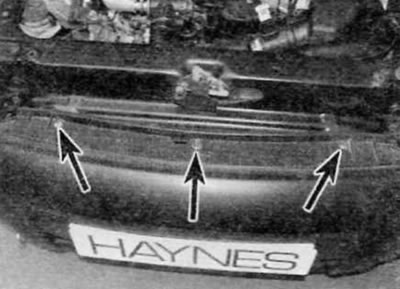
10. Turn out three bolts of fastening of the bottom forward part of a bumper to a basic platform of a radiator (pic. 6.10).
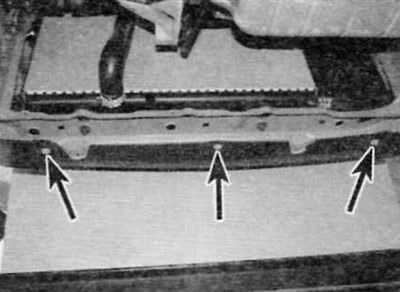
Pic. 6.10. Remove the bolts (marked with arrows) fastening the bumper to the radiator support platform (later models)
11. Remove the three bolts securing the upper front edge of the bumper to the bumper bracket (pic. 6.11).
Pic. 6.11. Remove the bolts (marked with arrows) fastening the upper front edge of the bumper to the bumper bracket (later models)
12. Release the front section of the wheel arch locker on each side as described in paragraph 23.
13. Remove the bolt securing the rear edge of the bumper to the front fender on each side (pic. 6.13).
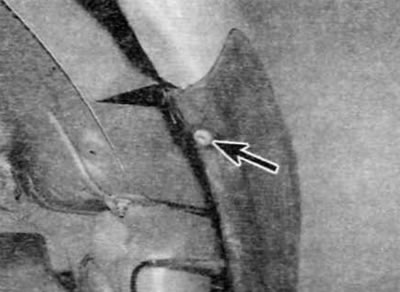
Pic. 6.13. Remove the bolt (marked with an arrow) fastening the rear edge of the bumper to the front fender (later models)
14. On models equipped with fog lamps, disconnect the electrical connectors for the fog lamps and release the electrical wiring from the clamps on the bumper.
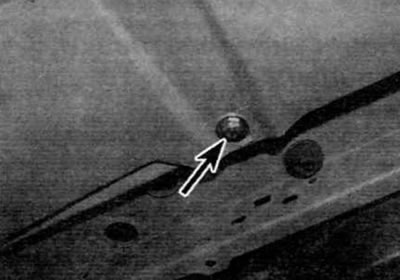
15. Working on one side of the approach, slide your hand under the wheel arch and release the latch securing the upper rear bumper section to the front fender. To do this, insert a screwdriver through the square hole in the fender and press the latch while moving the rear of the bumper outward (pic. 6.15).
Pic. 6.15. To release the bumper, insert a screwdriver through the square hole (marked with an arrow) and press the inner latch in the wing (later models)
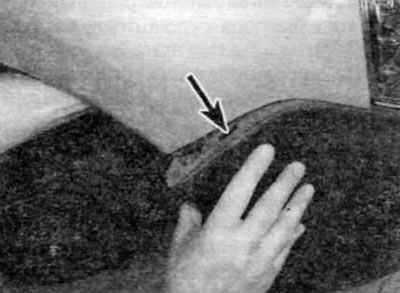
16. With the latch released, pull the bumper out and sharply forward to release the last clip (pic. 6.16).
Pic. 6.16. Pull the bumper out and sharply forward to release the last latch (later models)
17. Similarly, release the other side of the bumper, and then, together with an assistant, gently pull the bumper forward and remove it from the car.
18. To remove the bumper bracket, remove two bolts on each side and remove the bracket.
Installation
19. Installation is carried out in the reverse order of removal. When removing the bumper to a regular place, make sure that the latches on each side are correctly fixed on the front fenders.