
General information
1. Refer to point 1 paragraph 5.
Interior lighting
2. Using a small screwdriver, carefully remove the cover from its original place (pic. 6.2).
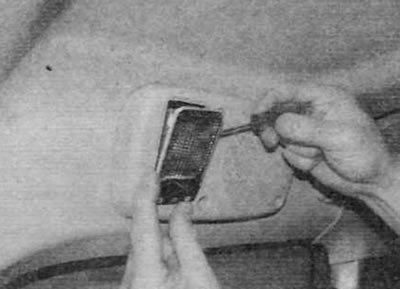
Pic. 6.2. Carefully remove the interior light
3. Press the tabs and remove the lamp socket from the lamp. The lamp is inserted into the socket by a snug fit (pic. 6.3, a, b).
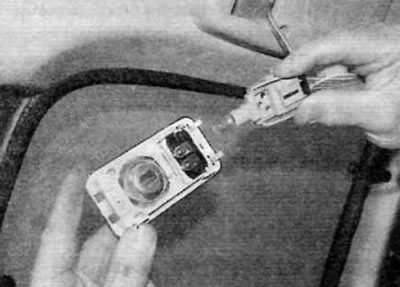
Pic. 6.3, a. Press the tabs and remove the lamp socket from the lamp
Pic. 6.3b. The lamp is installed in the cartridge by a tight fit
4. Installation is carried out in the reverse order of removal.
Illumination and control lamps of the instrument panel
Note. Replacement of instrument panel lamps is only possible on vehicles up to model year 2001. On later models, LEDs are used as instrument panel and indicator lamps. They cannot be replaced separately from the instrument panel.
5. Remove the instrument panel as described in paragraph 9.
6. Turn the corresponding lamp socket counterclockwise to remove it from the back of the shield.
7. Lamps are combined with sockets.
8. Finally install the instrument panel (see paragraph 9).
Heating/ventilation control panel lighting
9. Remove the heater/ventilation control unit as described in chapter 3.
10. Turn the lamp sockets counterclockwise to remove them. To remove the baseless lamp from the socket, simply pull on it.
11. Installation is carried out in the reverse order of removal.
Multifunction display backlight
12. Remove the multifunction display as described in paragraph 10.
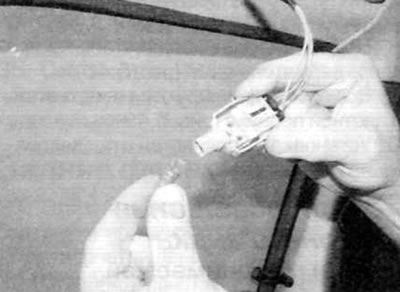
13. Turn the lamp sockets counterclockwise and remove them (pic. 6.13). To remove the baseless lamp from the socket, simply pull on it.
Pic. 6.13. Remove the multifunction display lamp sockets. The lamps are fixed in the sockets by a tight fit
Switch indicators
14. LEDs are used as indicators on the switches. These LEDs are an integral part of the switch and cannot be replaced separately. Therefore, replacement requires the replacement of the entire switch block assembly (Withsee paragraph 4).