English Русский
Български
Беларускі
Український
Српски
Hrvatski
Română
Polski
Slovenský
Magyar
Bookmark Articles Sitemap Contacts
Company Hyundai Company Opel Company Skoda Company Kia Company Mitsubishi Company LADA Company Audi
PeugeotBook.ru


Series 100   Series 200   Series 300   400-500   Series 600   Crossovers   Others
 
Peugeot 405 (1987-1997) Peugeot 406 (1995-2004)

Instrument panel — removal and installation (Peugeot 406)

  • Main
  • 40X
  • Peugeot 406 (1995-2004)
  • Body and interior
  • Interior (internal elements)
  • Instrument panel — removal and installation
0
Table of contents: Removal 🠇 Installation 🠇

Removal


1. Remove the center console.

2. Remove the components and elements in the following sequence:
  • instrument cluster;
  • central panel and switches on the driver's side;
  • radio;
  • watch;
  • dashboard speakers;
  • driver airbag and its contact;
  • windshield wiper motor.

3. Remove the steering column.

4. Unscrew the screws securing the heater panel and remove it from the instrument panel.
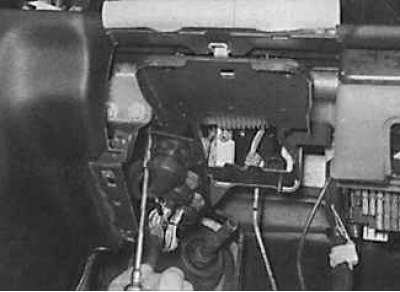
5. Unscrew the nuts securing the electrical connector mounting plate.
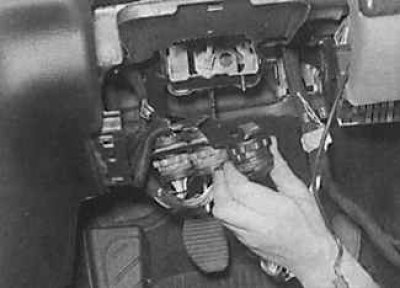

5. Unscrew the nuts securing the electrical connector mounting plate.

6. Remove the instrument panel wiring connector mounting plate from the bracket.

6. Remove the instrument panel wiring connector mounting plate from the bracket.

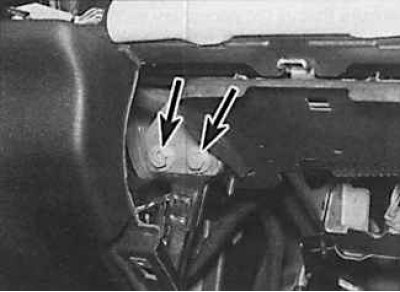
7. Unscrew the top ones (indicated by arrows in the photo on the left) and lower (indicated by…

7. Unscrew the top ones (indicated by arrows in the photo on the left) and lower (indicated by arrows in the photo on the right) instrument panel support pillar mounting bolts on the driver's side.
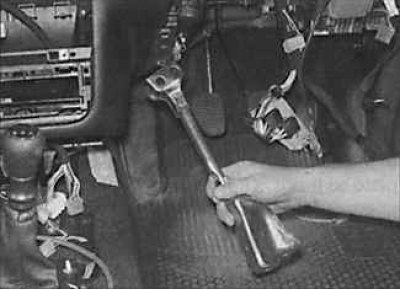


8. Remove the instrument panel support pillar from the driver's side.


Source can be seen at: peugeotbook.ru

8. Remove the instrument panel support pillar from the driver's side.
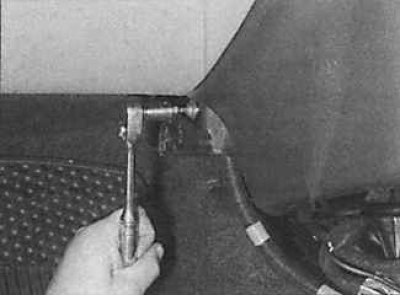
9. Unscrew the 2 screws securing the heater casing to the instrument panel.

9. Unscrew the 2 screws securing the heater casing to the instrument panel.

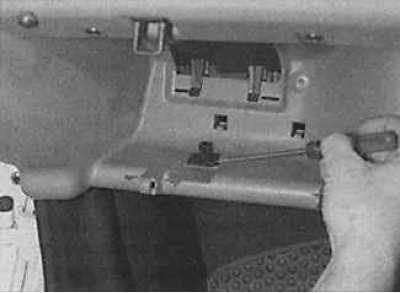
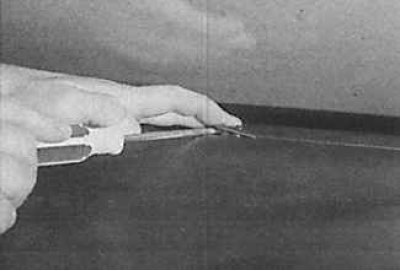
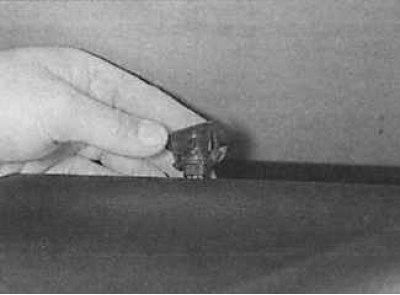
10. Remove the glove compartment cover. Use a screwdriver to remove the switch (photo on the left)…

10. Remove the glove compartment cover. Use a screwdriver to remove the switch (photo on the left) and a light bulb (photo on the right) glove compartment lights and disconnect the electrical connector from them.


11. On vehicles with air conditioning, remove the sensor from the top center of the instrument…


11. On vehicles with air conditioning, remove the sensor from the top center of the instrument panel.
12. Remove the mounting plate from the sensor so that the sensor can pass through the hole in the…


12. Remove the mounting plate from the sensor so that the sensor can pass through the hole in the instrument panel.
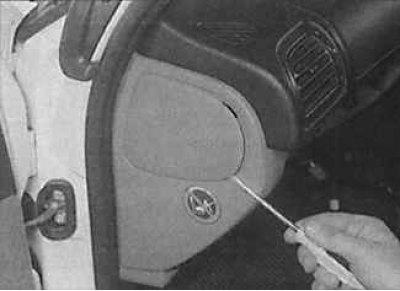
13. Using a screwdriver, remove the side instrument panel cover on the passenger side.

13. Using a screwdriver, remove the side instrument panel cover on the passenger side.


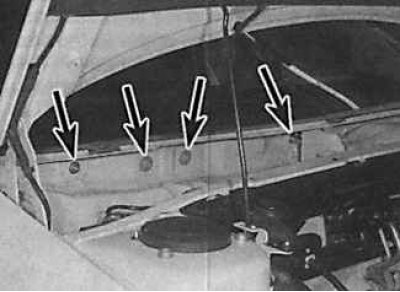
14. Remove the nuts and bolts from the engine compartment (indicated by arrows), securing the…


14. Remove the nuts and bolts from the engine compartment (indicated by arrows), securing the instrument panel mounting suspension to the engine compartment bulkhead.
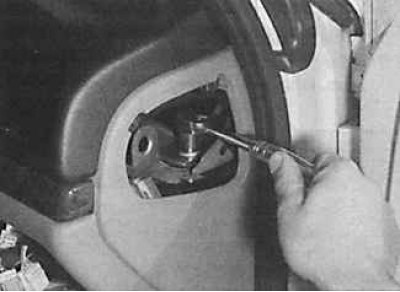
15. In the car interior, unscrew the bolts securing the left and right ends of the instrument panel…


15. In the car interior, unscrew the bolts securing the left and right ends of the instrument panel to the installation suspension.
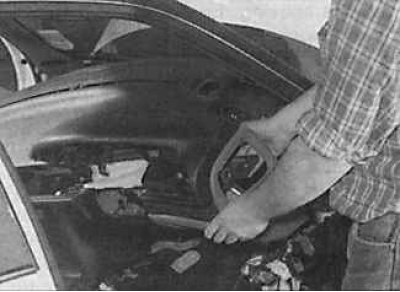
16. Carefully remove the panel from the engine compartment bulkhead.


16. Carefully remove the panel from the engine compartment bulkhead.


Installation


Installation is performed in the reverse order of removal. Check that the air supply pipes from the heater are correctly aligned with the heater. Before securing the instrument panel with nuts and bolts, check that all electrical connectors are visible through the corresponding holes in the instrument panel. Connect the battery and check that all electrical components and switches are working properly.
This article is available at russian, bulgarian, belarusian, ukrainian, serbian, croatian, romanian, polish, slovak, hungarian
Article reviewed by editor: Vinogradov Robert
Share information:
Previous
Peugeot 406: Interior (internal elements)
Next

Center console — removal and installation
Interior trim — removal and installation
Seat belts — removal and installation
Front seat belt tensioner mechanism
Seats — removal and installation
 
See similar information for other Peugeot models

➨ Instrument panel — removal and refitting Peugeot 106 (1991-2003)
➨ Liquid crystal display on the instrument cluster Peugeot 207 (2006-2014)
➨ Instrument panel — removal and installation Peugeot 305 (1977-1989)
➨ Instrument panel Peugeot 605 (1989-2000)
➨ Instrument panel Peugeot 806 (1994-2002)
Link to this article in different formats
Comments and feedback from visitors
No comments yet


Add two numbers 13 + 30


Peugeot 406 (1995-2004) 
  • General information
  • User manual
  • Maintenance (gasoline)
  • Maintenance (diesel)
  • Power unit
  • Gasoline engines
  • Diesel engines
  • Engine overhaul
  • Cooling and heating
  • Fuel system (gasoline)
  • Fuel system (diesel)
  • Engine electrical equipment
  • Transmission
  • Clutch and drive shafts
  • Mechanical gearbox
  • Automatic gearbox
  • Chassis, running gear
  • Brake system
  • Car suspension
  • Steering
  • Body and interior
  • Exterior (external elements)
  • Interior (internal elements)
  • Doors, locks and windows
  • Electrical equipment
  • Equipment and devices
  • Electrical circuits
Peugeot 405 (1987-1997) 
  • General information
  • User manual
  • Maintenance
  • Power unit
  • Petrol engines 1.4 l
  • Petrol engines 1.6-2.0 l
  • Diesel engines
  • Ignition system
  • Fuel system (carburetor)
  • Single point fuel injection
  • Multipoint fuel injection
  • Cooling and lubrication system
  • Exhaust system
  • Transmission
  • Clutch
  • Manual gearbox MA
  • Manual gearbox BE
  • Automatic gearbox
  • Drive shafts
  • Chassis, running gear
  • Steering
  • Front suspension
  • Rear suspension
  • Brake system
  • Body and interior
  • Exterior (external elements)
  • Interior (internal elements)
  • Doors, locks and windows
  • Electrical equipment
  • Equipment and devices
  • Electrical circuits
PeugeotBook.ru © 2018–2026 | Mobile version | Sitemap: EN BG BY UA RS HR RO PL SK HU | Write message | Site search | Add to bookmarks | Peugeot owners
106 (1991-2003) | 206 (1998-2012) | 207 (2006-2014) | 305 (1977-1989) | 306 (1993-2002) | 307 (2001-2008) | 405 (1987-1997) | 406 (1995-2004) | 605 (1989-2000) | Partner-I (1996-2008) | Eurovans-807 (2002-2014) | Eurovans-806 (1994-2002) | J5 (1981-1993) |
Cookies are used to ensure the correct display of pages on the site.