



Share information:
Gasoline engines «XU» series Peugeot 605

Specifications of XU Series Gasoline Engine Vehicles
Specifications of XU Series Gasoline Engine Vehicles
Specifications of XU Series Gasoline Engine Vehicles

General information
Peugeot 605 cars are equipped with 4-cylinder petrol engines of the XU series: XU10M/Z, XU102C/K, XU10J2Z, XU10J2, XU10J2TEZ with one camshaft and the XU10J4R engine with two camshafts (see illustrations 1.0, 1.0a,...
Peugeot 605 cars are equipped with 4-cylinder petrol engines of the XU series: XU10M/Z, XU102C/K, XU10J2Z, XU10J2, XU10J2TEZ with one camshaft and the XU10J4R engine with two camshafts (see illustrations 1.0, 1.0a,...

Timing belt of the gas distribution mechanism drive — removal
Caution! Mark the direction of the timing belt with chalk, marker or paint if it is to be reinstalled. Failure to maintain the previous timing belt direction during its further use will result in its damage or rupture....
Caution! Mark the direction of the timing belt with chalk, marker or paint if it is to be reinstalled. Failure to maintain the previous timing belt direction during its further use will result in its damage or rupture....
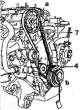
Timing belt of the gas distribution mechanism drive — installation
33. Install belt pulley 4 on the crankshaft and secure it with a bolt without performing final tightening (see illustration). 2.33 Install belt pulley 4 on the crankshaft and secure it with a bolt without performing...
33. Install belt pulley 4 on the crankshaft and secure it with a bolt without performing final tightening (see illustration). 2.33 Install belt pulley 4 on the crankshaft and secure it with a bolt without performing...

Camshaft — Removal
1. Remove the timing belt of the gas distribution mechanism drive (see the relevant chapter). 2. Remove the ignition distributor cap and disconnect the wire harnesses from it. 3. Vehicles with XU102C engines: Remove the...
1. Remove the timing belt of the gas distribution mechanism drive (see the relevant chapter). 2. Remove the ignition distributor cap and disconnect the wire harnesses from it. 3. Vehicles with XU102C engines: Remove the...

Camshaft — Installation
Caution: To prevent the pistons from hitting the valves, turn the crankshaft approximately a quarter turn so that the pistons are positioned approximately in the middle of the cylinder bores. 29. Install the camshaft...
Caution: To prevent the pistons from hitting the valves, turn the crankshaft approximately a quarter turn so that the pistons are positioned approximately in the middle of the cylinder bores. 29. Install the camshaft...

Cylinder head — removal
1. Vehicles with XU102C engines. Disconnect the air intake duct 1, then disconnect and move aside the fuel lines 2 (see illustration). 4.1 Disconnect the air intake duct 1, then disconnect and move aside the fuel lines...
1. Vehicles with XU102C engines. Disconnect the air intake duct 1, then disconnect and move aside the fuel lines 2 (see illustration). 4.1 Disconnect the air intake duct 1, then disconnect and move aside the fuel lines...

Cylinder head — installation
50. Clean the cylinder head surface from the remains of the previous seal. To remove traces of carbon deposits, it is recommended to use DECAPLOC (D2). Do not allow dirt and seal residue to enter the cylinder bores....
50. Clean the cylinder head surface from the remains of the previous seal. To remove traces of carbon deposits, it is recommended to use DECAPLOC (D2). Do not allow dirt and seal residue to enter the cylinder bores....

Engine — removal
1. Open the hood and fix it in this position. 2. Drain the coolant. 3. Remove the battery. 4. Cars with XU102C engine. Remove the air intake 1 (see illustration 5.0). 5.0 Remove the air intake 1 5. Vehicles with XU10J2...
1. Open the hood and fix it in this position. 2. Drain the coolant. 3. Remove the battery. 4. Cars with XU102C engine. Remove the air intake 1 (see illustration 5.0). 5.0 Remove the air intake 1 5. Vehicles with XU10J2...

Engine — installation
The engine is installed in the reverse order of removal, taking into account the following: 24. Self-locking nuts and bolts must always be replaced. 25. The tightening torque of bolt 14 for fastening the power unit...
The engine is installed in the reverse order of removal, taking into account the following: 24. Self-locking nuts and bolts must always be replaced. 25. The tightening torque of bolt 14 for fastening the power unit...
This section is available on russian, bulgarian, belarusian, ukrainian, serbian, croatian, romanian, polish, slovak, hungarian
See similar information for other Peugeot models
➨ Power unit: Petrol engines Peugeot 106 (1991-2003)
➨ Power unit: Gasoline engines Peugeot 206 (1998-2012)
➨ Power unit: Petrol engines TU3 and TU5 Peugeot 307 (2001-2008)
➨ Power unit: Petrol engines 1.4 l Peugeot 405 (1987-1997)
➨ Power unit: Petrol engines Peugeot Partner I (1996-2008)
Link to this section in different formats
TEXTHTMLBB Code
- General information
- User manual
- Maintenance
- Troubleshooting
- Power unit
- Petrol engines «XU»
- Petrol engines «ZPJ»
- Petrol engines «ES9J4»
- Diesel engines
- Cooling and heating
- Fuel system
- Exhaust system
- Transmission
- Clutch
- Mechanical gearbox
- Automatic gearbox
- Chassis, running gear
- Brake system
- Car suspension
- Steering
- Body and interior
- Body elements
- Electrical equipment
- Power devices
- Electrical circuits