
If the steering mechanism is replaced, then it is necessary to change both tie rod ends, as well as the internal tie rod joints.
1. Secure the removed tie rod in a vise.
2. Place a wrench on the tie rod to keep the tie rod from turning, and use a second wrench to unscrew the tie rod end (see illustration).
11.2 Install a wrench on the tie rod to keep the tie rod from turning, and use a second wrench to unscrew the tie rod end
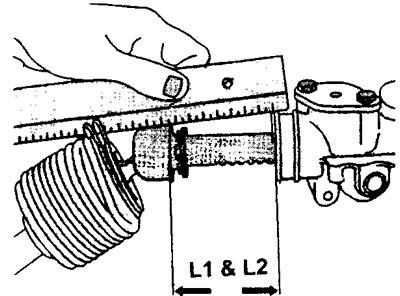
3. Turn away a tip of cross steering draft, having counted at the same time the number of turns necessary for a complete disconnection of a tip. Record these values for the left and right handpieces.
In order to disconnect the inner joint, it is necessary to remove the bellows, and then unscrew the joint from the rack. In the workshops, a special key is used for this. If the work is done independently, then you can use an adjustable gas wrench or tongs. The fit of the inner hinge is quite tight and after dismantling it must be replaced with a new one.
4. Disconnect the tie rod. Before unscrewing the inner tie rod joint, knock out the stopper that locks the joint (see illustration).
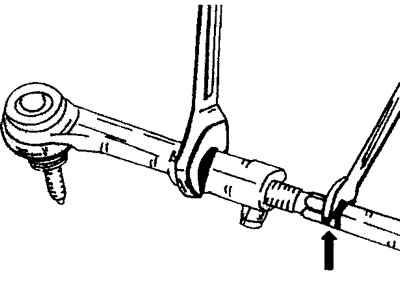
11.4 Before unscrewing the inner tie rod joint, knock out the stopper that locks the tie rod
5. Attach a new tie rod with a new inner joint to the gear rack and tighten the joint as far as possible with an adjustable gas wrench or pliers.
6. Lock the inner hinge. To do this, drive the bar on the ball joint housing into the groove on the rack (see illustration 11.4). At the same time, the plank cannot be crushed.
7. Screw on the ends of the tie rods, observing the number of revolutions required to unscrew the corresponding tip.
8. Check wheel alignment and adjust camber and toe if necessary.