



Table of contents: Camshaft oil seal (from the flywheel…🠇 Crankshaft oil seal (from the timing…🠇 Crankshaft oil seal (from the…🠇
Note: The procedure for replacing seals described here applies to the engine being installed in the vehicle. With the engine removed, skip the instructions regarding preparation steps to gain access to the oil seal. Camshaft oil seal (from the timing belt side).
1. Follow the instructions in paragraphs 1-12 section 5.
2. Remove the timing belt from the camshaft sprocket and tie it to the side, making sure not to bend it.
3. Unscrew the M8 bolt holding the camshaft sprocket in the position corresponding to the required valve timing.
4. Secure the sprocket using a suitable tool inserted into two of the sprocket holes (see D/Figure 1.11). You can make such a tool yourself from a metal plate and two long bolts. Alternatively, you can secure the sprocket using a belt wrench used to remove the oil filter.
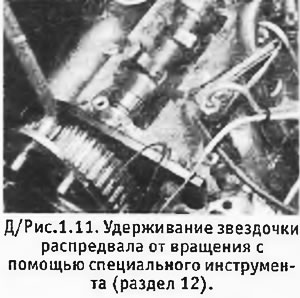
5. Unscrew the sprocket bolt and remove it from the camshaft. Be careful not to turn the camshaft, as this will cause the pistons to hit the valves in cylinders 1 and 4. Remove the woodruff key if it is loose.
6. Pull out the old seal using a suitable hook.
7. Clean the nest.
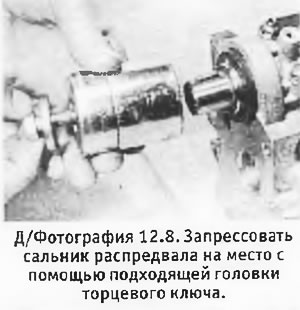
9. Install the woodruff key onto the camshaft (if it was filmed) and the sprocket, insert the bot and tighten it, holding the camshaft from rotating.
10. Install the M8 mounting bolt onto the sprocket.
11. Install and adjust the timing belt (see section 4, paragraphs 20-25). The remaining operations are performed in reverse order.
Camshaft oil seal (from the flywheel side)
12. Remove the air cleaner.
13. If necessary, remove the air intake duct.
14. Loosen the brake booster vacuum pump pivot and adjusting bolts, rotate the pump forward and remove the drive belt from the pulleys. Where applicable, also remove the power steering pump drive belt.
15. Unscrew the central bolt and remove the pump pulley from the camshaft. If this bolt is too tight, you will have to remove the timing case sections and block the camshaft sprocket while you loosen the bolt (this is necessary to avoid damaging the timing belt). Remove the woodruff key (if it falls out).
16. Pull out the old oil seal using a suitable hook.
17. Clean the oil seal seat.
18. Lubricate the sponge of the new oil seal with oil and install it on the end of the camshaft with the open end inward. Press the oil seal in until it is flush with the end surface of the cylinder head (see photo). The seal can be pressed in using a bolt, washers and a suitable socket head.
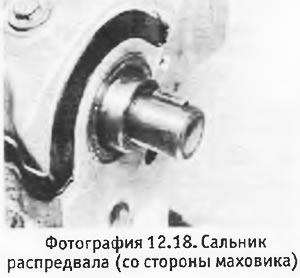
19. Install the woodruff key onto the camshaft (if it was filmed) and the pump pulley, insert the central bolt.
20. Install the drive belt onto the camshaft and vacuum pump pulleys and then rotate the pump back until, when pressing firmly with your thumb, the belt deflection at the midpoint between the pulleys is approximately 5.0 mm. Tighten the adjusting bolt and then the pump pivot bolt. Where applicable, install the power steering pump drive belt in the same manner.
21. Install the air cleaner.
22. Install the air intake duct.
Crankshaft oil seal (from the timing belt side)
23. Remove the timing belt (see section 4).
24. Remove the sprocket and woodruff key from the crankshaft (if the last one falls out).
25. Note the installation depth of the oil seal and pull it out of the housing using a suitable hook. Alternatively, you can drill a small hole in the oil seal, screw a screw into it and use it to pull out the oil seal.
26. Clean the oil seal housing and crankshaft, dip the new oil seal in engine oil and press it in (open end inward) onto the crankshaft so that it stands at the required depth. To avoid damaging the seal, you can use a thin plastic strip (see photo).
27. Install the woodruff key and sprocket onto the crankshaft.
28. Install the timing belt (see section 4).
Crankshaft oil seal (from the flywheel side)
29. Remove the flywheel (see section 16).
30. Using a vernier caliper, measure the installation depth of the seal and record it.
31. Pull out the oil seal using a suitable hook. Alternatively, you can drill a small hole in the oil seal, screw a screw into it and use it to pull out the oil seal.
32. Clean the oil seal seat and crankshaft flange.
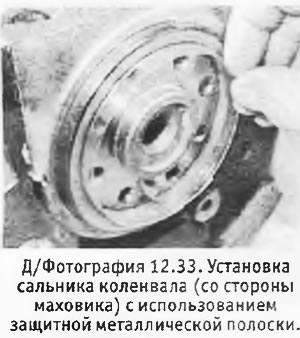
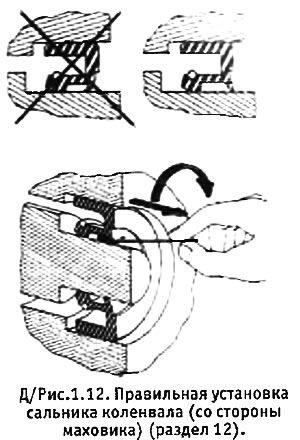
33. Dip the new oil seal in engine oil and install it on the crankshaft (open end inward) and press it in so that it stands at the required depth. To avoid damaging the seal, you can use a thin plastic strip (see photo). When the seal is installed, the sponge should be facing outward. If it is bent inward, you need to pull it out using a hooked wire (see D/Figure 1.12).
 |
 |
34. Install the flywheel (see section 16).