
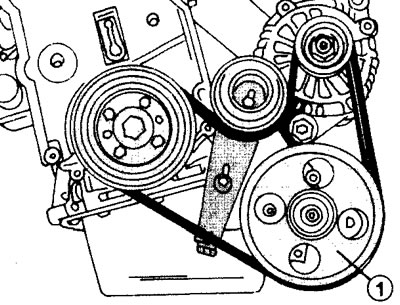
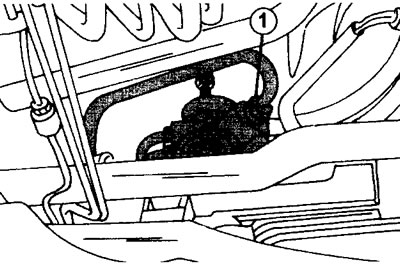
9.0 Location of power steering pump 1 on vehicles without air conditioning
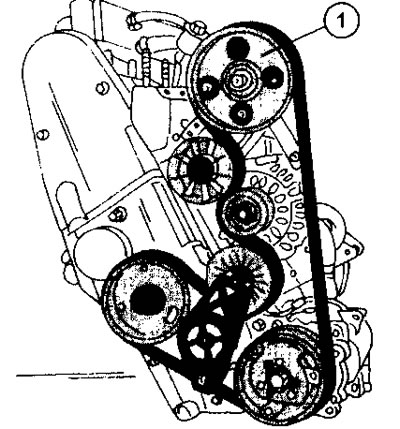
9.0a Location of power steering pump 1 on vehicles with air conditioning
Removing
Attention! Before disconnecting the steering shaft from the rack, block the steering wheel with the wheels straight ahead. Once the steering gear has been removed, the steering wheel must not be turned. For this purpose, it is recommended to tie the steering wheel with twine.
Attention! If the car is equipped with airbags, then the rules and safety measures necessary in such cases must be observed. In such cases, we recommend that you carry out work on the removal and installation of the steering mechanism yourself only if you have some experience.
In most cases, the steering gear is replaced only after a long period of use due to wear and therefore we recommend having this work done by a workshop.
Attention! After removing the steering mechanism, the tie rod ball pin nuts and the steering shaft cross nut on the rack must be replaced with new ones, so purchase them in advance. To press out the pins of the tie rod ends, you will need an appropriate puller.
1. Disconnect the battery. Make a note of the access code before doing so, if your car radio is equipped with one.
2. Loosen the wheel nuts and jack up the front of the car. Remove the front wheels.
3. Turn away nuts of 1 fingers of supports of tips of cross-section steering draft (see illustration).
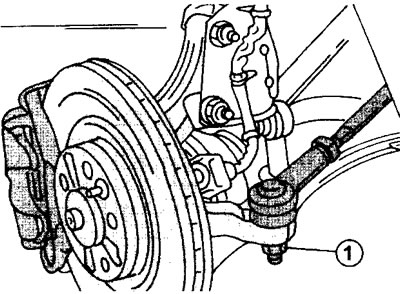
9.3 Loosen the nuts of the pins of the tie rod ends
4. Press out the pins of the tips on both sides of the tie rod using an appropriate puller (see illustration).
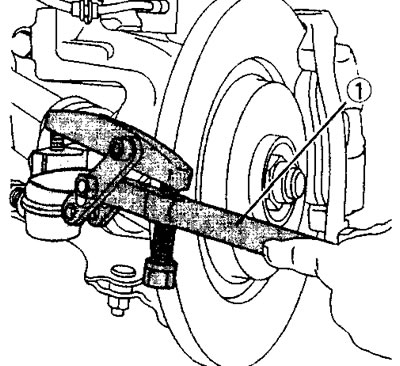
9.4 Press out the pins on both sides of the tie rod using a suitable puller
To prevent damage to the threads on the pin when using a puller, it is recommended to use the following technique. Do not completely unscrew the nut from the tip support pin, but only until it is at the end of the pin. The puller cam will be on the nut, which is removed when it begins to prevent further extrusion.
5. Remove the tie rod end. If the tip finger sits too tightly in the hole of the steering knuckle and is not squeezed out by the puller's cam, then you should hit the cam attached to the tip finger with a hammer.
6. Remove the heat shield attached to the bottom of the car (see illustration).

9.6 Remove the heat-reflecting shield 1, mounted on the bottom of the car
7. Remove the bending shaft of the speedometer drive, as well as the speedometer sensor plug, because they will interfere with further work.
8. Disconnect, acting from salon, a steering shaft from a rack. To do this, squeeze out the latch and remove the bolt, and then press the crosspiece to the side (see illustration).
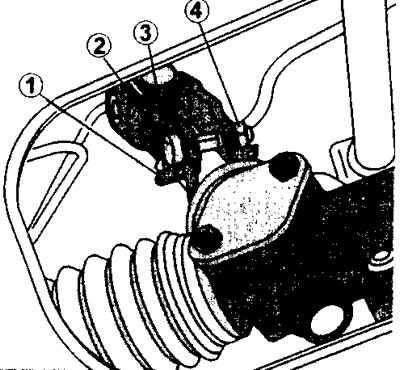
9.8 Disconnect the steering shaft from the rack
1 - retainer
2 - tightening bolt
3 - cross
4 - bolt nut
9. Loosen both power steering hoses on the subframe and release them.
10. Turn away cap nuts of delivery and taking away pipelines of the hydraulic booster of a steering. In this case, a certain amount of liquid will flow out of the system, which can be collected with a rag. After disconnecting the hoses, the holes should be plugged to prevent dirt from getting in (see illustration).
9.10 Attaching the power steering pressure pipe
11. Turn out two bolts of fastening of a case of a steering.
12. Submit the steering mechanism with the fixed transverse steering rods to the right side and remove it by dropping it down.
In case of replacement of the tie rod ends, it is necessary to unscrew the lock nuts and disconnect the tie rod ends from the rod. When unscrewing the tips, you need to count and remember the number of revolutions required to disconnect each tip from the rod. Subsequently, new tips will need to be screwed onto the rod with the same number of revolutions. This ensures the same length of the tie rod and, accordingly, the angle of the wheels. The camber and toe-in must be checked and, if necessary, adjusted both after replacing the tie rod ends and after installing the old ones on a new steering gear.