



Table of contents: Removal 🠇 Installation 🠇
Headlights and direction indicator
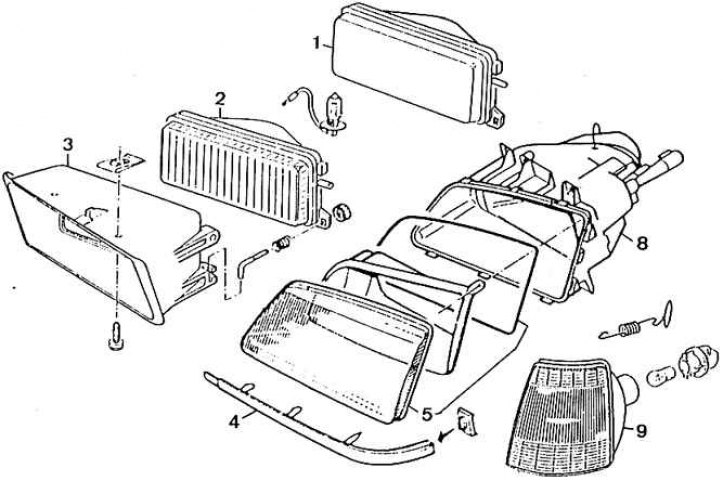
1 – optical element, 2 – side light, 3 – housing, 4 – strip, 5 – optical unit, 8 – headlight housing, 9 – direction indicator
Attention! Before removing the optical units of the headlights, it is necessary to mark on the wall (for example, in an underground garage) the light trail from the low and high beam headlights, as well as the position of all four wheels.
Removal
1. Open the hood.
2. Remove the radiator grille.
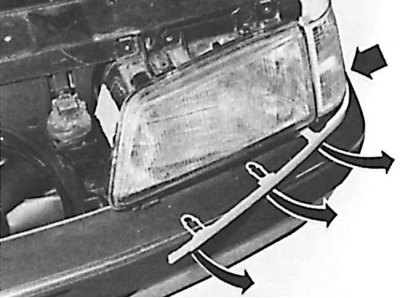
3. Unhook the bar (pull forward), located under the headlight, paying attention not to damage the fastening near the edge of the wing.
4. Unhook the spring that secures the turn signal to the wheel well.
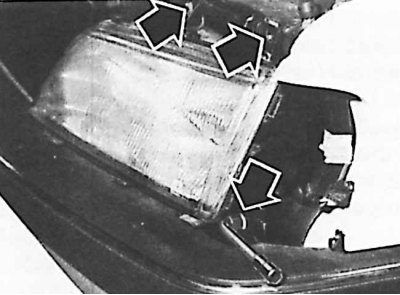
5. The outer headlight mounting components are accessible after removing the front turn signal.
6. Using a bent open-end wrench, unscrew the two fastening elements from the front plastic frame (on each side of the optical node).
7. Unscrew the two upper fastening elements.
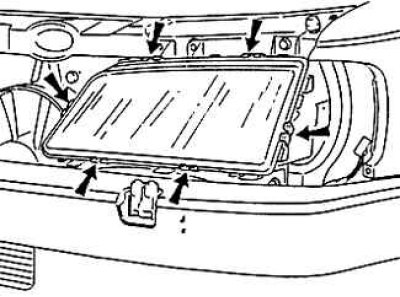
8. Unscrew the six clamps securing the headlight diffuser glass.
9. Carefully remove the optical unit to disconnect it.
10. Remove the plastic cover located on the bulb holder.
11. Disconnect the electrical wires.
12. Carefully remove the optical assembly from its socket.
Installation
1. Perform the steps in reverse order to the removal process.
2. Check that all bulbs are functioning properly.
3. Adjust the headlights.