



Table of contents: Removal 🠇 Installation 🠇
Each section of the exhaust system can be removed individually or the entire system can be removed as a unit. Even if only one part of the system needs servicing or replacement, it is often easier to remove the entire system and separate the required section in the garage.
Removal
To remove the exhaust system or part of the system, it is necessary to lift the front or rear part of the car and secure it on stands or install the car on an inspection pit.
Front pipe
1. Unscrew the nuts securing the exhaust inlet pipe to the exhaust manifold, then unscrew the bolt securing the exhaust inlet pipe to the unit's suspension.
2. Disconnect the exhaust inlet pipe from the manifold and remove the gasket.
3. Unscrew the nuts securing the flange of the rear part of the exhaust pipe, remove the pipe and take it out from under the car.
Front exhaust pipe
Unscrew the nuts securing the flanges of the front and rear parts of the front exhaust pipe, remove the pipe and take it out from under the car.
Intermediate exhaust pipe
Unscrew the nuts securing the flanges of the front and rear parts of the intermediate exhaust pipe, remove the pipe and take it out from under the car.
Central muffler
1. Loosen the clamping ring bolts and disconnect the clamps from the front and rear flange connections.
2. Disconnect the central muffler from the rubber mounts and remove it from under the vehicle.
Exhaust pipe and muffler
1. Loosen the exhaust pipe clamp ring bolts and disconnect the clamp from the flange connection.
2. Disconnect the exhaust pipe from the rubber mounts and remove it from under the vehicle.
Complete exhaust system
1. Unscrew the nuts securing the exhaust inlet pipe to the exhaust manifold, then unscrew the bolt securing the exhaust inlet pipe to the unit's suspension.
2. Disconnect the exhaust inlet pipe from the manifold and remove the gasket.
Original publication on the website (PeugeotBook.ru)
3. Free the exhaust system from the rubber mounts and remove it from under the vehicle.
Heat-resistant shields
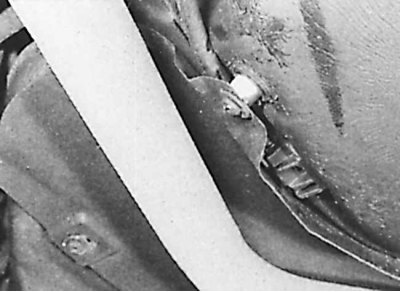
Location of the heat shield on the back of the fuel tank
Heat-resistant shields are attached to the bottom of the car (and on some models on the fuel tank) nuts and bolts.
1. The heat shields can be removed after removing the corresponding section of the exhaust system.
2. If the heat shield is removed, in some cases it may be sufficient to remove the nuts or bolts and simply lower the heat shield to access the component located behind the shield (without removing the exhaust system).
Installation
1. Installation is carried out in the reverse order of removal, taking into account the following points.
2. Check that all traces of corrosion have been removed and replace all gaskets.
3. Check the rubber cushions for wear and damage and replace if necessary.
4. Before assembling flange connections, lubricate the mating surfaces with high-temperature lubricant.
5. Before final tightening of the exhaust system connectors, check that all rubber mounts are correctly positioned and that there is adequate clearance between the underbody of the vehicle and the exhaust system.
6. Move the exhaust system sideways and up and down and check that the system moves freely without touching the vehicle components.