
Attention! Before removing any switch, remove the negative terminal from the battery.
Steering column switch
1. Unscrew the screws securing the lower casing of the steering column and remove the upper and lower casings from the steering column. Disconnect the electrical connector from the cruise control.
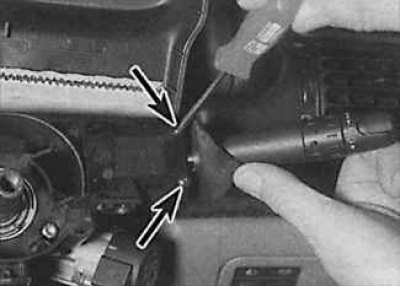 | 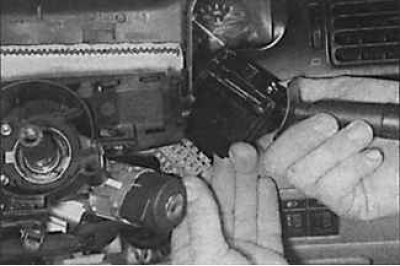 |
2. Disconnect the electrical connector from the switch, unscrew the fastening screws (indicated by arrows in the photo on the left) and remove the switch from the steering column (photo on the right).
3. Installation is carried out in the reverse order of removal (fastening screws are indicated by arrows).
Cruise control switch
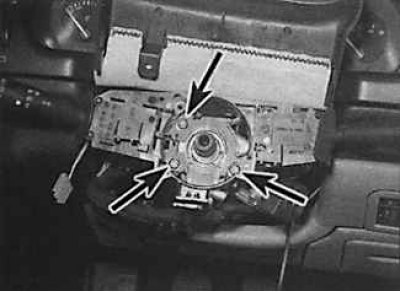
1. Unscrew screws of fastening of the bottom casing of a steering column, disconnect an electric socket and remove the bottom casing.
2. Loosen the fixing screws (indicated by arrows) and remove the cruise control switch from the lower steering column cover.
3. Installation is made in sequence, return to removal.
Instrument panel switches
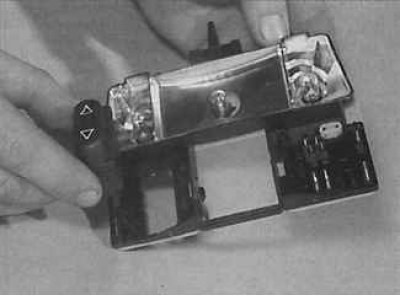
1. Open the immobilizer cover, rotate the clip 90°and remove the fuse box cover.
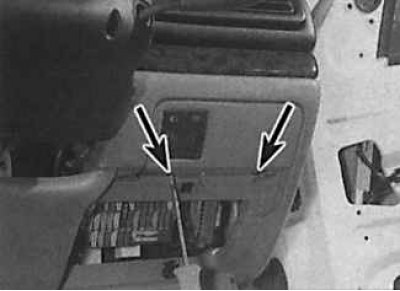
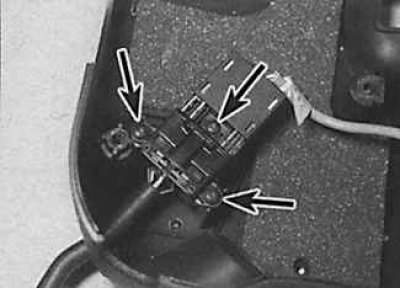
2. unscrew the screws (indicated by arrows) fixing the base of the group of switches.

3. Remove the group of switches from the instrument panel and disconnect the electrical connector.
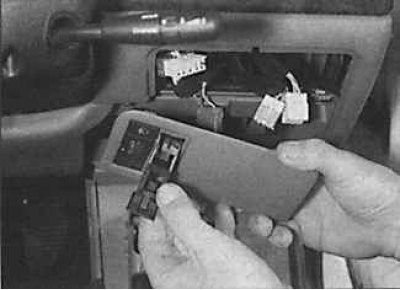
4. To remove an individual circuit breaker from a group of circuit breakers, release the locking brackets and remove the circuit breaker.
5. Installation is made in sequence, return to removal.
Switches of the central part of the instrument panel
1. Remove the multifunction display. On vehicles without a display, pry off the right side of the switch using a thin screwdriver from the side of the glove box.
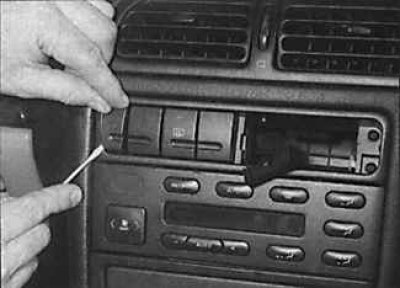
2. Remove the switch bezel.
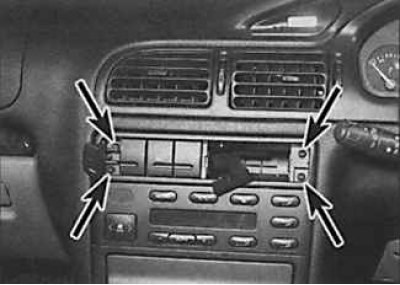
3. unscrew the screws (indicated by arrows) fasteners and remove the switch group from the instrument panel.
4. Disconnect the electrical connectors and remove each switch separately from the others.
5. Installation is made in sequence, return to removal.
Center console switches
The center console switch can be removed from its socket after the center console is unscrewed from the vehicle floor.
Group of switches on the door
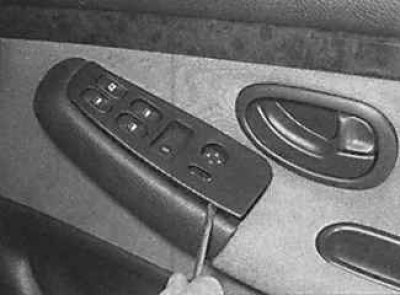
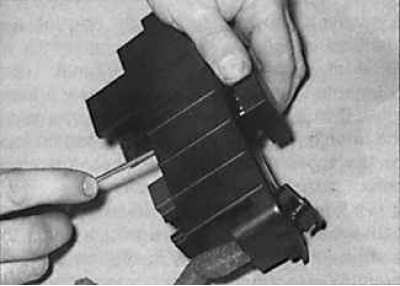
1. Using a thin screwdriver, remove the decorative trim of the switches on the car door.
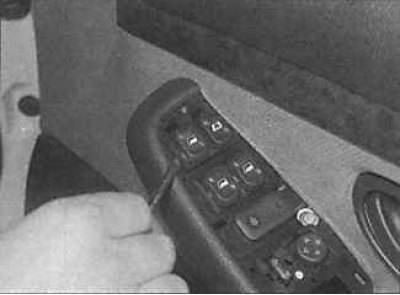 | 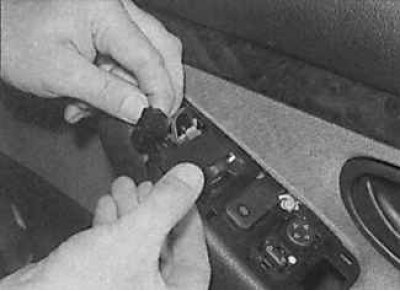 |
2. Using a lever, remove the switch from the socket on the door (photo on the left) and disconnect the electrical connector from it (photo on the right).
3. Installation is made in sequence, return to removal.
Overhead Console Switches
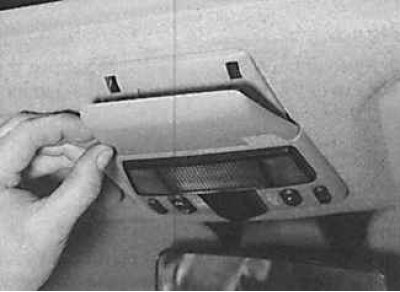
1. Remove the cover from the back of the overhead console.
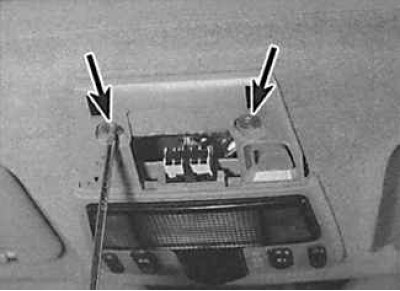
2. Unscrew 2 screws (indicated by arrows) fasteners and lower the top console down.
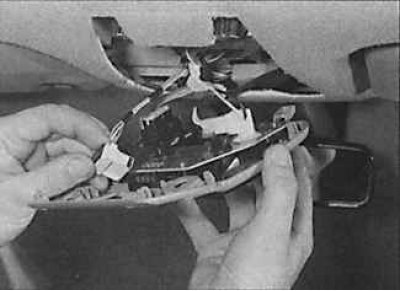
3. Disconnect the electrical connectors and remove the top console from the vehicle.
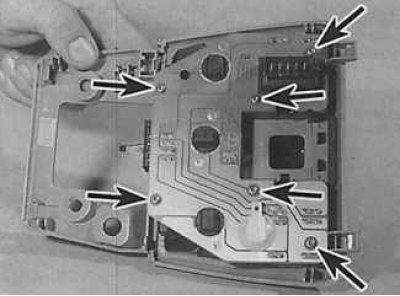 |  |
4. Remove the screws to remove the sunroof switch (indicated by arrows in the photo on the left) fixing the printed circuit board and remove the switch from the top (photo on the right). The rest of the switches are part of the upper console and cannot be replaced separately.
5. Installation is made in sequence, return to removal.
Seat switches
1. Being careful, use the lever to remove the switch from the lower side of the seat and disconnect the electrical connector from it.
2. Connect the electrical connector to the switch and install it in place.
The switch of a control lamp of inclusion of a manual brake
1. Remove the center console.
2. Disconnect an electric socket from the switch of a control lamp of inclusion of a manual brake, disconnect the switch and remove from the lever of a manual brake.
3. Installation is made in sequence, return to removal.
Interior light switch

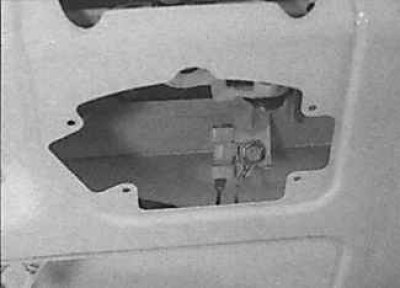
1. Open the door and remove the rubber boot from the switch located on the door pillar.
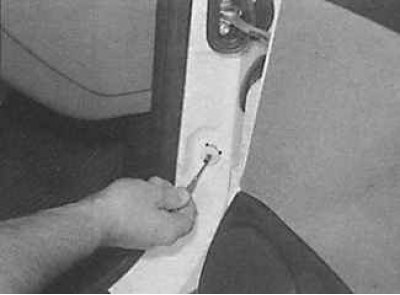
2. Release the latches and carefully remove the switch from the rack.
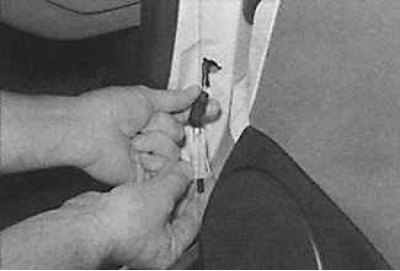
3. Disconnect the electrical connector from it, tie a thin cord to the wires going to the switch.
4. Installation is made in sequence, return to removal.
Trunk light switch
1. On sedan cars (Saloon) open the trunk lid, remove the caps and remove the trunk trim.
2. On combi models (Estate) open the rear door, unscrew the screws and remove the rear door inner handle. Using a thin screwdriver, remove the decorative trim of the inner button of the lock.
3. Unscrew bolts, remove the switch and disconnect from it an electric socket.
4. Installation is made in sequence, return to removal.
Wiper rain sensor
1. Remove the interior rearview mirror housing from the inside of the windshield by pulling it down.
2. Disconnect the electrical connector, disconnect the mounting brackets and remove the rain sensor from the windshield.
Attention! Do not touch the rain sensor lens or the windshield in the sensor installation area with your hands, as for the sensor to work properly, its lens and windshield must be absolutely clean.
3. Installation is made in sequence, return to removal.