
Removing the Top Cover
Engines 1.4 l
1. Remove two bolts (one in front and one in back) and remove the upper timing cover from the cylinder head (pic. 5.1, a, b).
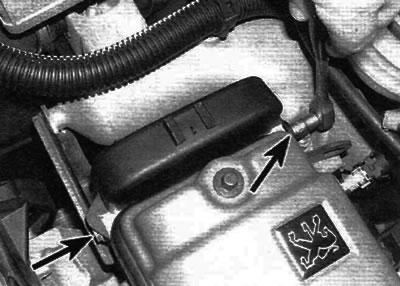
Pic. 5.1, a. Remove the bolts (marked with arrows)...
Pic. 5.1, b....and remove the upper timing belt cover
Engines 1.6 l
2. Place a rolling jack under the engine with a piece of wood between the jack head and the oil pan to prevent damage. Raise the jack to relieve the engine mounts.
3. Remove the two bolts and move the accelerator pedal position sensor and support bracket away from the right engine mount (pic. 5.3).
Pic. 5.3. Bolts of fastening of a basic arm of the gauge of position of a pedal of an accelerator (marked with arrows)
4. Release the purge valve vapor hose from the clip on the right engine mount and move the hose slightly to the side.
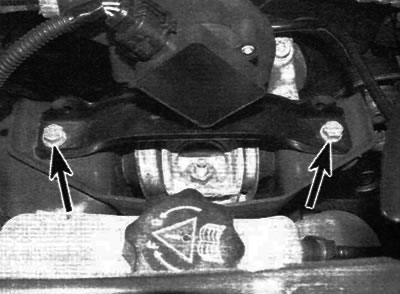
5. Turn out three bolts of fastening of the top bracket of the right support of the engine to an arm on the engine and unscrew the central nut of fastening of an arm to a rubber support on a body (pic. 5.5). Remove the upper support bracket, then remove the three bolts and remove the engine support bracket from the engine.

Pic. 5.5. Remove three screws (A), unscrew the central nut (IN) and remove the upper engine support bracket
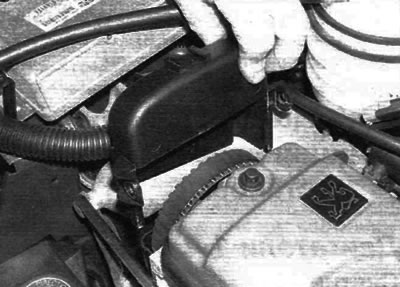
6. Loosen the two lower bolts, remove the five upper bolts and remove the upper timing belt cover (pic. 5.6).
Pic. 5.6. Bolts of fastening of the top cover of a timing belt (marked with arrows)
Removing the center cover (engines 1.4 l)
Note. On later engines, the center cover is integrated with the bottom cover and is not a separate item.
7. Remove the top cover as described in step 1, and then release the electrical wiring from the appropriate clips on the center cover.
8. Turn out three bolts (one on the back of the cover, under the engine baseplate, and two directly above the crankshaft pulley) and remove the center cover from the engine compartment (pic. 5.8).
Pic. 5.8. Remove three screws (marked with arrows) and remove the center cover
Removing the bottom cover
9. Remove the accessory drive belt as described in Chapter 1A.
10. Remove the top and, if applicable, center cover as described above.
11. Remove the three bolts securing the crankshaft pulley and remove the pulley, noting for yourself how it is installed (pic. 5.11, a, b).
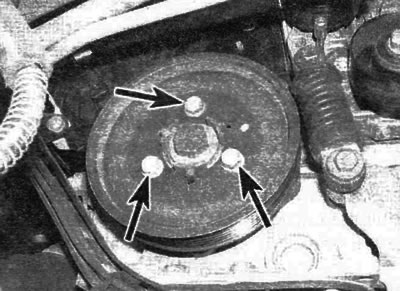
Pic. 5.11, a. Remove the bolts (marked with arrows)
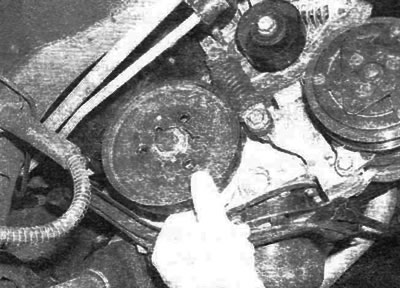
Pic. 5.11b....and remove the crankshaft pulley
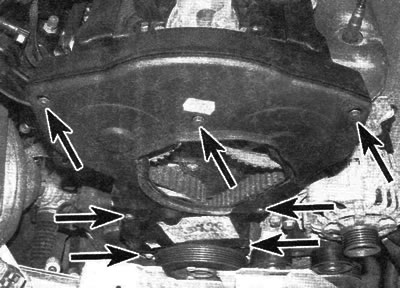
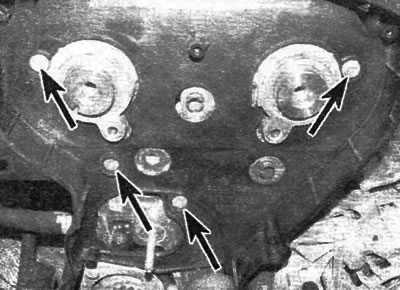
12. Turn out bolts, and then remove the bottom cover from the engine (pic. 5.12).
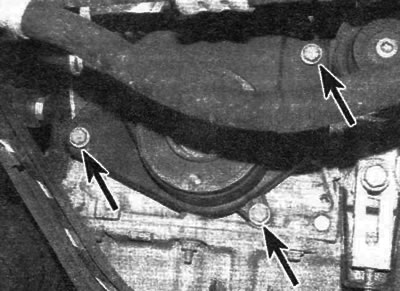
Pic. 5.12. Remove the bolts (marked with arrows) and remove the lower timing belt cover
Removing the inner cover (engines 1.6 l)
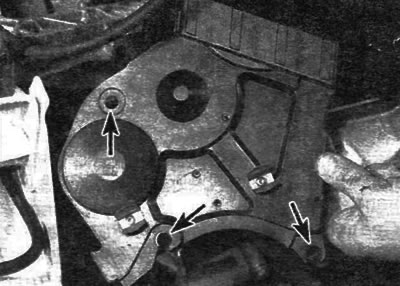
13. Remove the camshaft sprocket and idler pulley as described in paragraph 7.
14. Turn out bolts and remove an internal cover (pic. 5.14).
Pic. 5.14. Remove the bolts (marked with arrows) and remove the inner cover
Installation
Top cover
15. Installation is performed in the reverse order of removal. On 1.6L engines, tighten the engine mount bolts to the specified torque.
Central cover (engines 1.4 l)
16. Bring the center cover to its original position, correctly orienting it relative to the bottom cover, and tighten the appropriate bolts.
17. Attach the wiring harness to the appropriate clips on the front of the center cover, and then install the top cover as described in step 15.
Bottom cover
18. Install the bottom cover over the timing belt sprocket and tighten the appropriate bolts.
19. Install the pulley on the end of the crankshaft, correctly orienting it, and tighten the appropriate bolts to the prescribed torque.
20. Install the center (if applicable) and top covers as described above.
21. Install and tension the accessory drive belt as described in Chapter 1 A.
Inner lid (engines 1.6 l)
22. Installation is carried out in the reverse order of removal. Make sure that the cup-shaped lower edge of the cover engages correctly with the protrusion on the top of the crankshaft seal housing when installing the cover.