



Removal
1. Remove the gearbox as described in chapter 7, and then remove the clutch assembly as described in chapter 6.
2. Lock the flywheel by blocking its ring gear (figure 15.2). Alternatively, install and bolt a strip of metal between the flywheel and the cylinder block/crankcase.
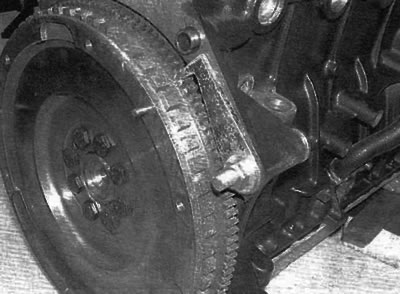
Figure 15.2. Using a special tool, lock the flywheel ring gear
Warning. Do not attempt to lock the flywheel using the locking tool described in paragraph 3.
3. Remove the flywheel mounting bolts.
4. Remove the flywheel. Don't let it fall, it's very heavy. If the dowel pin on the end of the crankshaft is not damaged, remove it and store it in a safe place along with the flywheel.
Inspection
5. If there are deep scratches, cracks or other damage on the mating surface of the flywheel with the clutch, the flywheel must be replaced. However, sometimes they can be removed by grinding, consult your dealer or engine specialist.
If there is significant wear or missing teeth on the ring gear, the ring gear should be replaced. This type of work is best left to a dealer or engine overhaul specialist. The temperature to which a new ring gear must be heated for installation is very important. If it is not maintained precisely, the hardness of the teeth will be compromised.
Installation
7. Clean the flywheel mating surfaces.
8. If the threads of the new flywheel mounting bolts do not have thread locking compound applied, apply thread locking compound to the threads of each bolt.
9. Make sure the mounting pin is in place. Install the flywheel onto the crankshaft, using the dowel pin as a guide, and screw in new bolts.
10. Lock the flywheel using the method used during removal. Then, working in a crisscross pattern, tighten the bolts evenly and gradually to the specified torque.
11. Install the clutch assembly (see chapter 6). Remove the locking tool and install the gearbox as described in chapter 7.