



Table of contents: Fuel injectors 🠇 Fuel pressure regulator 🠇 Throttle potentiometer 🠇 Electronic control unit (ecu) 🠇 Idle Speed Control Motor 🠇 Manifold Absolute Pressure Sensor 🠇 Incoming air temperature sensor 🠇 Crankshaft position sensor 🠇 ECU system relay 🠇 Vehicle speed sensor 🠇
Fuel injectors
Removal
1. Disconnect the negative battery terminal.
2. Remove the air filter.
3. Remove the two bolts securing the wire bracket to the top of the manifold.
4. Remove the electrical connectors from the injectors.
5. Unscrew the bolts and remove the injector mounting plates. Injectors #1 and #2 are mounted with one plate, and #3 and #4 with another.
6. Remove the injectors and remove the O-rings from them. When installing the injectors in their original place, install new O-rings on each injector. Lubricate the O-rings with engine oil to facilitate installation of the injectors.
Installation
1. Install the injectors in place and secure them with plates. Connect the electrical connectors to the injectors.
2. Install the wire bracket to the top of the manifold and bolt it in place.
3. Install the air filter and connect the battery. Start the engine and check the injectors for leaks.
Fuel pressure regulator
Removal
1. Disconnect the negative battery terminal.
2. Disconnect the vacuum tube from the regulator.
3. With a clean rag placed under the regulator, loosen the clamp and remove the fuel regulator from the line.
Installation
Installation is carried out in the reverse order of removal.
Throttle potentiometer
The throttle potentiometer is mounted on the side of the throttle body.
Removal
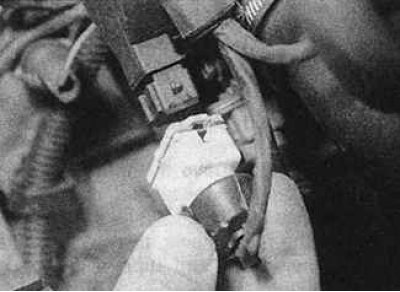
1. Loosen the clamp and remove the electrical connector from the potentiometer.
2. Remove the two screws and remove the potentiometer from the throttle shaft.
Installation
Installation is carried out in the reverse order of removal.
Electronic control unit (ecu)
The ECU is located in a plastic box, which is mounted on the front right side member.
Removal
1. Before removing the ECU box cover, make sure the ignition is off. On models with an automatic transmission, there are two ECUs in the box. The unit that controls the fuel and ignition system is located closer to the engine.
2. Disconnect the electrical connector by first lifting the locking lever at the top of the connector. Remove the connector from the rear, disconnect the front and remove the ECU from the pins.
3. Lift the ECU unit up and out of the vehicle.
Installation
Installation is carried out in the reverse order of removal.
Idle Speed Control Motor
The idle speed control motor is located on the side of the throttle body.
Removal
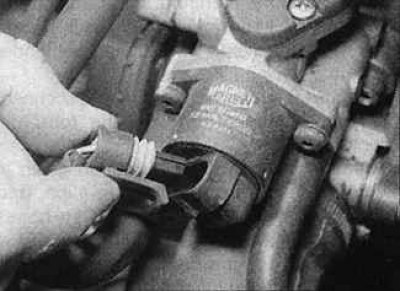
1. Release the bracket and remove the connector from the engine.
2. Remove the two screws and remove the idle speed control motor.
Installation
Installation is carried out in the reverse order of removal.
Manifold Absolute Pressure Sensor
The sensor is located on the intake manifold.
Removal
1. Remove the electrical connector and vacuum hose.
2. Remove the sensor from the manifold.
Installation
Installation is carried out in the reverse order of removal.
Incoming air temperature sensor
The incoming air temperature sensor is located in the throttle body.
Removal
1. Before removing the sensor, remove the throttle position potentiometer.
2. Release the bracket and remove the electrical connector from the temperature sensor.
3. Unscrew the sensor mounting screw and remove the sensor from the throttle body.
4. Check the sensor O-ring and replace if necessary.
Installation
Installation is carried out in the reverse order of removal.
Crankshaft position sensor
The crankshaft position sensor is located on the front side of the clutch housing.
Removal
1. Trace the wiring from the sensor to the wiring connector and disconnect it from the main harness.
2. Unscrew the mounting bolt and use a lever to remove the sensor from the rubber sealing ring.
Installation
Installation is carried out in the reverse order of removal.
ECU system relay
The ECU relay is located in a plastic box, which is mounted on the front right side member.
Removal
1. Check that the ignition is off and remove the gearbox cover.
2. Disconnect the electrical connector and remove the relay from the mounting plate.
Installation
Installation is carried out in the reverse order of removal.
Vehicle speed sensor
The vehicle speed sensor is an integral part of the speedometer drive.