



Table of contents: Removal 🠇 Installation 🠇
Removal
1. Remove the center console.
2. Raise the front of the vehicle and support it on stands.
3. Remove the exhaust system and heat shield. Loosen the nut and remove the pivot bolt securing the shift rod to the shift lever base.
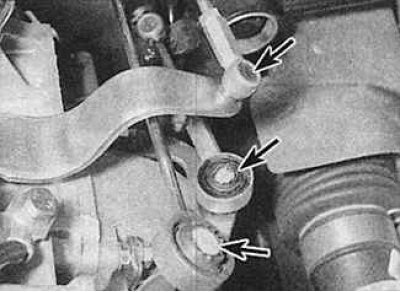
4. Using a screwdriver, remove the lock washers securing the three link rods (indicated by arrows) to the ball joints on the transmission. Disconnect the shift rod from the pivot point of the bell crank and remove it from underneath the vehicle.
5. Use a pry bar to pry the plastic head off the bolt that secures the shift lever to the wishbone and the lower frame.
6. Unscrew the pivot bolt securing the corner arm and remove the corner arm and rod from under the vehicle.
7. Inspect all components for wear or damage. If necessary, remove the gearshift lever as follows.
8. Loosen the gear shift lever lock nuts and lift the mounting plate.
9. Remove the lower cover from the base of the arm, then disconnect the arm mounting plate and remove the upper arm cover to access the arm pivot ball joint.
Installation
Installation is carried out in the reverse order of removal, taking into account the following points:
- lubricate all moving joints with molybdenum disulfide based grease;
- check that all protective rubber covers of the gearshift lever are in place;
- install heat shields and exhaust system.