
Drive shaft sealing ring
1. Raise the front of the car and secure it on stands. Remove the corresponding front wheel and mudguard from under the engine.
2. Drain the gearbox oil.
3. On models equipped with ABS, remove the sensor located on the suspension.
4. Unscrew the nut securing the ball joint to the hub and remove the ball joint from the lower arm.
Right o-ring
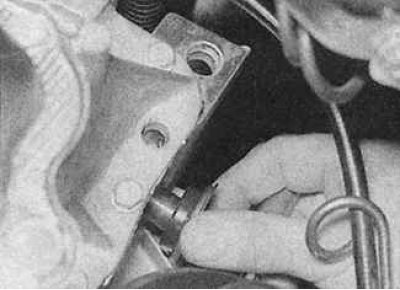
5. Loosen the two nuts of the intermediate bearing bolts, then turn the bolts 90°so that their heads are offset from the bearing outer race.
6. Move the front wheel hub away from the vehicle, while pulling the intermediate bearing from the installation suspension.
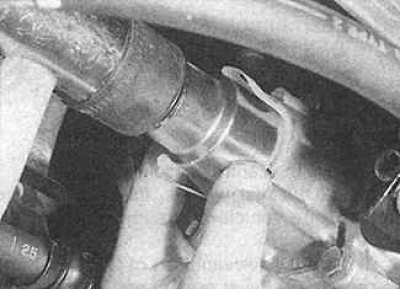
7. When the drive shaft is removed from the differential, remove the dust seal from the inside of the drive shaft, marking the installation location, and support the drive shaft so as not to damage the constant velocity joint or the protective cover of the joint.
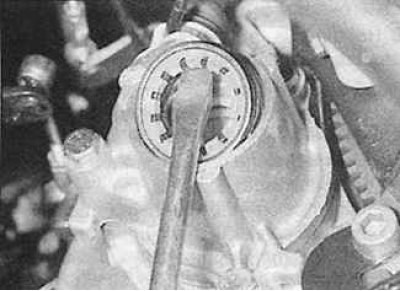
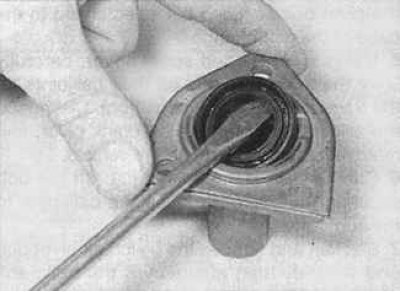
8. Using a large screwdriver, remove the O-ring from the differential.
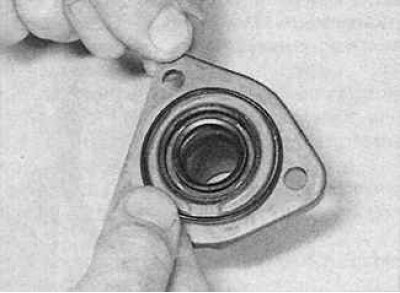
9. Thoroughly clean the O-ring seat, then fill the groove between the sealing lips of the new O-ring with lubricant. Install a new o-ring in place using an appropriate arbor.
10. If the O-ring has a protective plastic sleeve, also install it before installing the drive shaft.
11. Clean the splines of the drive shaft, lubricate with a thin layer of grease the working edges of the sealing ring and the splines of the drive shaft.
12. Install the dust seal on the drive shaft.
13. Align the internal splines of the drive shaft with the side gears of the differential so as not to damage the O-ring, then align the intermediate bearing with the suspension of the unit and install the drive shaft completely.
14. Check that the intermediate bearing is properly seated, then turn the mounting bolts back 90°so that their heads are against the bearing outer race and tighten the mounting nuts to the correct torque.
15. Connect the lower ball joint to the lower arm. Install a new ball joint nut and torque to specification.
16. Install the ABS sensor.
17. Install the wheel and mudguard. Lower the car to the ground.
18. Add oil to the gearbox to the required level.
Left O-ring
19. Move the left hub away from the vehicle and remove the inner end of the driveshaft from the differential, being careful not to damage the driveshaft O-ring. Support the drive shaft so as not to damage the constant velocity joint or the protective cover of the joint.
Gearbox BE3
20. Using a large screwdriver, remove the O-ring from the differential.
22. Thoroughly clean the O-ring seat, then fill the groove between the sealing lips of the new O-ring with lubricant. Install the new O-ring in place using an appropriate arbor (see above). If the O-ring has a protective plastic sleeve, also install it before installing the drive shaft.
23. Clean the splines of the drive shaft, lubricate with a thin layer of grease the working edges of the sealing ring and the splines of the drive shaft.
Gearbox ML5T
24. Unscrew the bolt with the differential bearing mounting plate and remove the sealing ring from the plate using the lever. Also remove the O-ring. Clean the plate and fill the space between the sealing lips of the new O-ring with lubricant. Install a new O-ring using an appropriate arbor. Install a new O-ring and install the plate on the gearbox.
25. Align the splines of the drive shaft with the splines of the differential side gear and push the drive shaft into place taking care not to damage the O-ring.
26. Connect the lower ball joint to the lower arm. Install a new ball joint nut and torque to specification. Install the ABS sensor. Install the wheel and mudguard. Lower the car to the ground. Add oil to the gearbox to the required level.
O-ring, input shaft
1. Remove the gearbox.
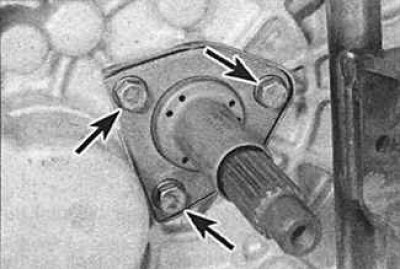 | 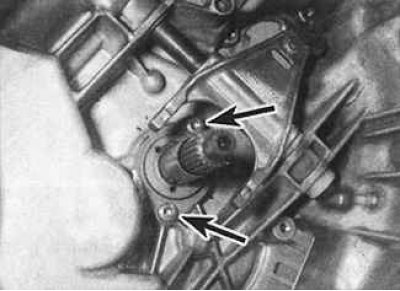 |
2. Unscrew the three bolts securing the guide sleeve of the release bearing of the gearbox BE3 (mounting bolts are indicated by arrows in the photo on the left) or two ML5T gearbox mounting bolts (indicated by arrows in the photo on the right) and remove the sleeve from the input shaft along with the O-ring or gasket.
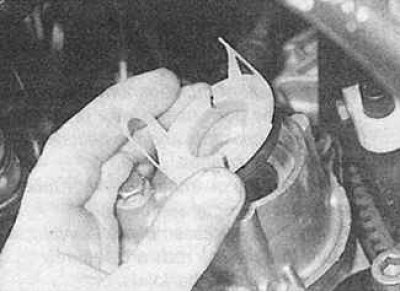
3. Remove the O-ring from the release bearing guide bush.
4. Check the surface of the input shaft in contact with the O-ring for wear, nicks, scratches, or other damage that may have caused the O-ring to fail. If there are minor defects, they can be polished, however, more serious defects will require replacement of the input shaft.
5. Dip a new O-ring in clean oil and install it in the guide bush.
6. Install a new O-ring or gasket on the back of the guide bush. Install the bushing in place. Screw in the bolts and tighten them to the required torque.
7. Inspect the clutch and reinstall the gearbox.
Sealing ring of a shaft of a choice of transfers (ve3 gearbox)
1. Raise the front of the car and secure it on stands. Remove the left front wheel and fender guard.
2. Using a large screwdriver as a lever, disconnect the link rod ball joint from the select shaft.
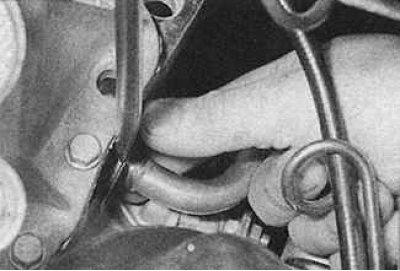 |  |
3. Using a lever, remove the selector shaft seal from the housing.
4. Check the surface of the selector shaft in contact with the o-ring for gouging, nicks, scratches, or other damage that may have caused the o-ring to fail. If there are minor defects, they can be polished, however, more serious defects will require the replacement of the gear shaft.
5. Lubricate the outer edges of the new O-ring and install by sliding it over the selector shaft until it stops.
6. Connect the link rod to the gear selection shaft.
7. Install the wheel arch protection, wheel and lower the vehicle.