
Removing
1. Disconnect the negative battery terminal.
2. Raise the front of the car and secure it on stands. Remove the front wheels and wheel arch protectors.
3. Drain the oil from the gearbox, tighten the drain and filler plugs to the required torque.
4. Remove both drive shafts.
5. Under the car, unscrew the bolts securing the drive shaft intermediate bearing housing to the engine mount and lower frame. Move the suspension to the side.
6. Remove the air filter housing and intake pipe system.
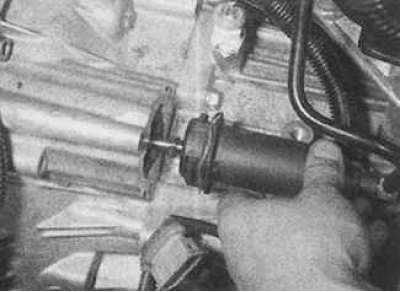
7. Remove the clutch slave cylinder by pushing it inwards and turning it 90°counterclockwise in this position. Remove the working cylinder together with a pusher.
8. Using a rubber band, secure the pusher to the cylinder. Support the clutch pedal with a block of wood.
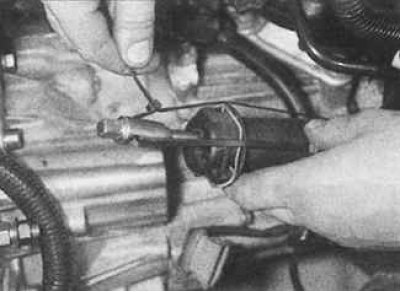
9. Using a lever, remove the two cable ball joints from the selector levers on the transmission. Remove the cable from the mounting brackets on the gearbox.
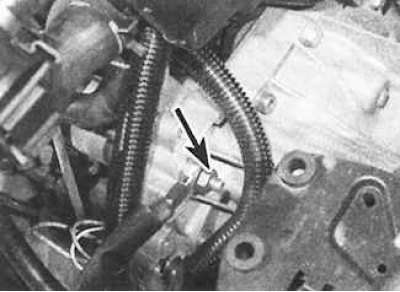
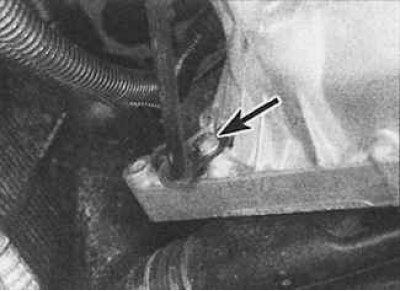
10. Disconnect electrical connectors from transmission such as reversing light switch, speedometer drive sensor and ground bar (the arrow indicates the connection point of the ground bus). Unscrew the bolt and remove the TDC sensor from the top of the gearbox.
11. Unscrew the starter mounting bolts and move the starter to the side without disconnecting the wires from it.
12. Remove the turbocharger air intake pipe located between the oil pan and transmission.
13. Unscrew fastening bolts and remove a protective plate of a flywheel.
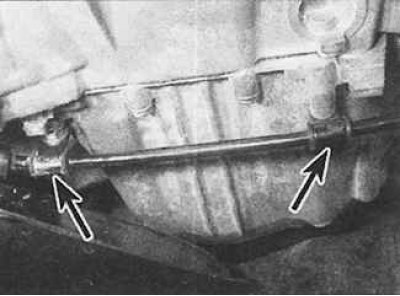 |  |
14. Unscrew the fastening bolts (indicated by arrows in the photo on the left) power steering pipes. In the photo on the right, the arrow shows the location of the bolt on the housing.
15. Remove the front suspension lower frame.
16. Use the winch to raise the left side of the power unit until the weight of the power unit is supported by the winch.
17. Place a jack under the gearbox and raise it just enough so that the weight of the gearbox is supported by the jack.
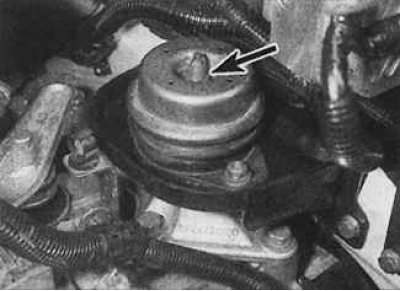
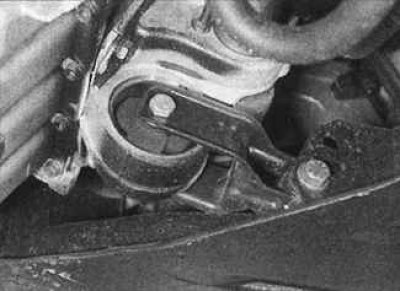
18. Unscrew the central nut (arrow) from the left suspension of the power unit installation. Unscrew the bolts and remove the rubber suspension pad. Unscrew the bolts and remove the suspension.
19. Slightly lower the jack so that it still supports the gearbox, and unscrew the bolts securing the gearbox to the engine block.
20. Lower the engine and jack, move the transmission to the left and remove it from the guide pins. Lower the gearbox support jack and remove the gearbox from under the vehicle.
Preparing to install the gearbox
Peugeot 0216E special tool for connecting the release bearing to the pressure plate

1. Remove the release bearing from the clutch pressure plate and reinstall it on the transmission before installing the transmission in place. In this case, the release bearing will fit correctly on the pressure plate using a special tool.
2. The Peugeot 0216E special tool for installing the release bearing in place consists of a T-handle, universal joint and a special tip. The tool is inserted through the hole for the slave cylinder in the gearbox housing so that the working part of the tool enters the groove of the clutch release fork. When the tool is rotated 90°, the working end closes the ends of the locks in the grooves of the clutch release fork. Pulling out the tool rotates the clutch release fork and installs the release bearing in the pressure plate lock.
3. Remove the clutch assembly.
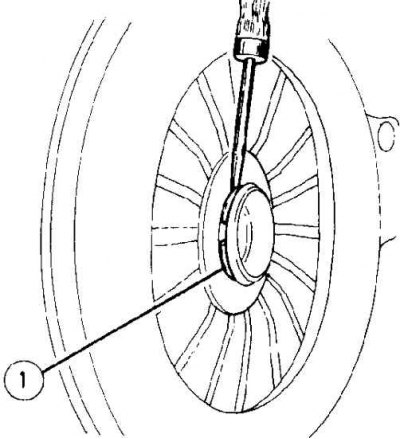
4. Using a screwdriver, remove the release bearing by depressing the ferrule (1) from the inside of the pressure plate diaphragm spring.
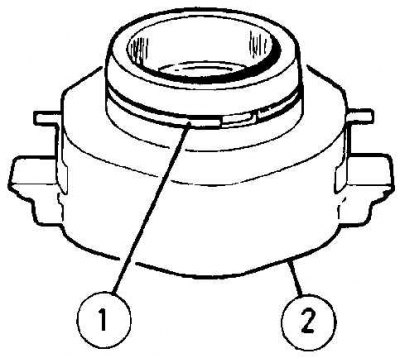
5. Remove the release bearing from the pressure plate, then install the ferrule (1) into the groove of the release bearing housing (2).
6. Install the clutch assembly.
7. Install the release bearing on the transmission input shaft and connect it to the clutch release fork. Check that the release fork moves the release bearing easily and smoothly and that the release forks are properly seated on the bearing lugs.
8. Check that the Peugeot special tool fits into the groove of the clutch release fork and locks into it when rotated through 90°. Remove the special tool.
9. Replace crankshaft o-rings.
Installation
Installation is carried out in the reverse order of removal, taking into account the following points:
- check that the release bearing is correctly installed on the input shaft of the gearbox;
- check that the guide pins are in place;
- after the gearbox is bolted to the engine, install the Peugeot special tool as described earlier, pull the tool towards you so that the release bearing ferrule is connected to the clutch pressure plate
- install the front suspension lower frame;
- tighten all nuts and bolts to the required torque;
- Reinstall the clutch slave cylinder after lubricating the tappet with a molybdenum disulfide grease. Install the slave cylinder on the gearbox housing, push it in as far as it will go and at the same time turn it 90°clockwise. Slowly depress the clutch pedal and lift it back manually. Repeat this operation after 10 seconds. Press the clutch pedal again, release it and check that it returns to its original position;
- install the cables so that the 13 mm ball joint connects to the top arm and the 10 mm ball joint connects to the side arm;
- add oil to the gearbox.