



Note: There is no need to drain the transmission oil to remove the automatic transmission.
1. Jack up the car and place it on jack stands.
2. Remove the air filter 1 (see illustration).
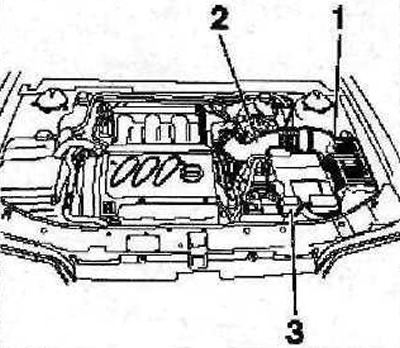
7.2 Remove the air filter 1
3. Disconnect the air duct 2 (see illustration 7.2).
4. Remove the battery and its tray 3 (see illustration 7.2).
5. Disconnect plugs 4, 5, 6, 7 (see illustration).
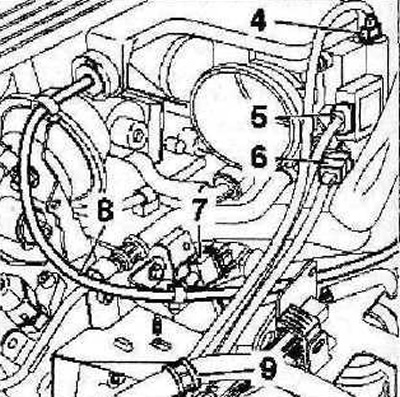
7.5 Disconnect plugs 4, 5, 6, 7
6. Remove clamp 9 fastening (see illustration 7.5).
7. Move the accelerator cable 8 upwards (see illustration 7.5).
8. Disconnect the plugs 10 (see illustration).
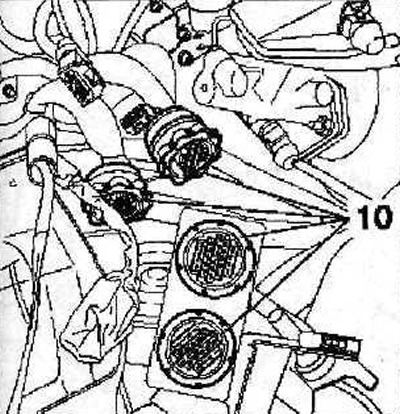
7.8 Disconnect the plugs 10
9. Unscrew bolt 11 (see illustration).
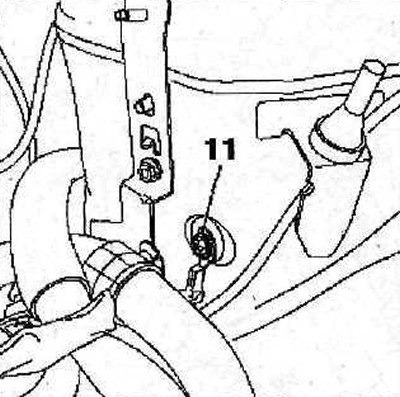
7.9 Unscrew bolt 11
10. Clamp the hoses with 12 suitable clamps, disconnect them and move them away from the work area (see illustration).
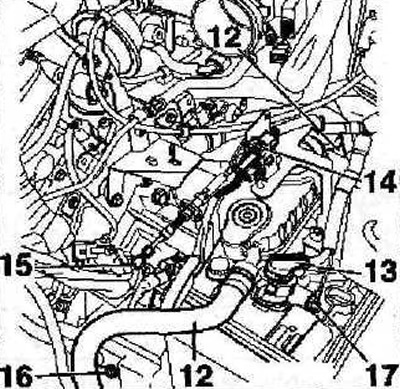
7.10 Clamp the hoses 12 with suitable clamps, disconnect them and move them away from the work area
11. Disconnect plugs 13 and 14 (see illustration 7.10).
12. Disconnect the gear selection/shift cable tip from the ball joint 15 on the rod using special puller 0336-G (see illustration 7.10).
13. Unscrew bolts 16 and 17 (see illustration 7.10).
14. Disconnect the plug from the speedometer sensor (see illustration).
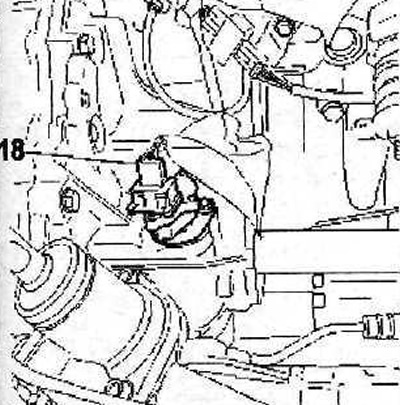
7.14 Disconnect the plug 18 of the speedometer sensor
15. Remove the subframe 19 and disconnect the drive shafts 20 of the gearbox (see illustration).
(Material copied from the resource PEUGEOTBOOK.ru)
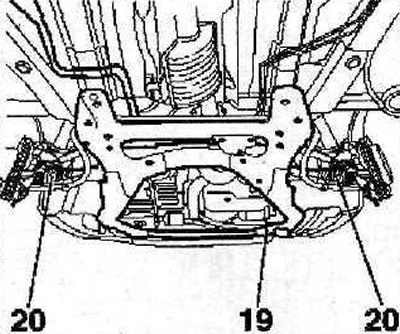
7.15 Remove subframe 19 and disconnect drive shafts 20 from gearbox
16. Remove the intake pipe 21 (see illustration).
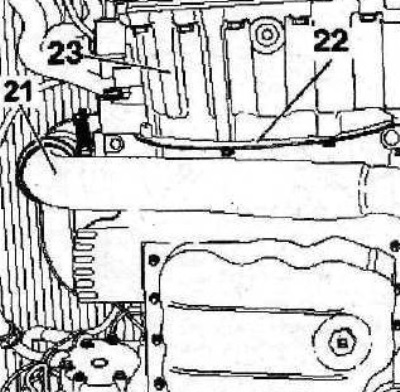
7.16 Remove the exhaust pipe 21
17. Remove protective cover 22 of gearbox housing 23 (see illustration 7.16).
18. Unscrew the three torque converter mounting bolts 24 (see illustration), turning the crankshaft to gain access to the bolts.
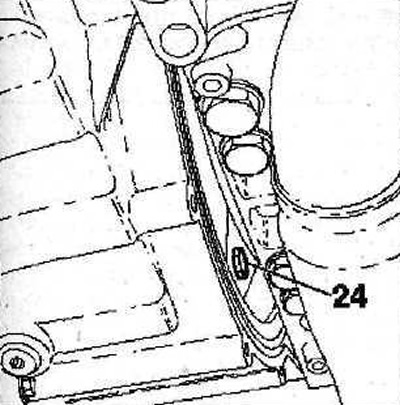
7.18 Unscrew the three torque converter mounting bolts 24
19. Install a support beam on the front end to raise the engine and relieve the load on the power unit supports (see illustration), or secure the gearbox to a cable and lift it with a crane. If there is no crane to lift the gearbox, it can be removed by sliding a garage lift under it. When installing the gearbox on a lift, place it on wooden slats or blocks to avoid damaging the crankcase.
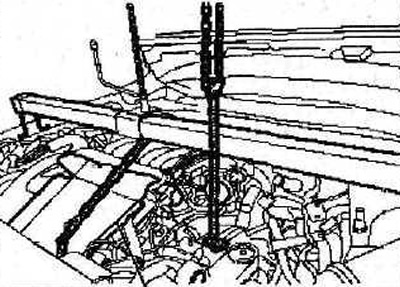
7.19 Install a support beam on the front to raise the engine and relieve the load on the power unit mounts
Caution! Cover the cylinder head cover with a piece of cardboard 25 (see illustration 7.19), to prevent damage.
20. Unscrew nut 26 and then remove bracket 27 (see illustration).
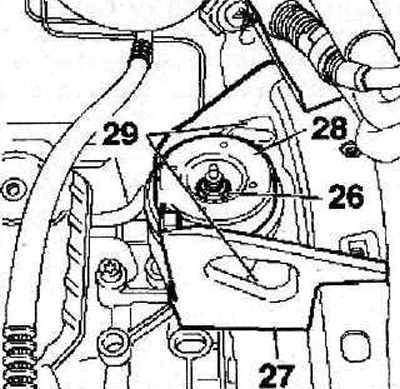
7.20 Unscrew nut 26 and then remove bracket 27
Attention! The position of support 28 relative to bracket 27 is adjusted at the factory, therefore it is not recommended to loosen bolts 29 (see illustration 7.20).
21. Unscrew bolts 30 (see illustration) fasten the gearbox to the engine and separate the engine and gearbox.
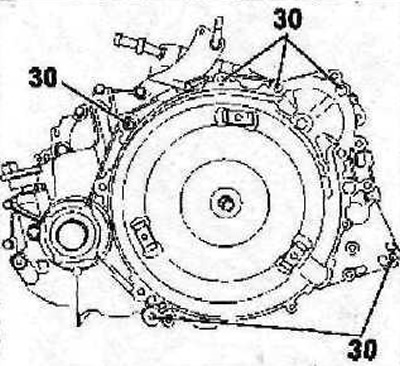
7.21 Unscrew the bolts 30 of the gearbox to the engine and separate the engine and the gearbox
22. Remove the speedometer sensor 31 (see illustration).
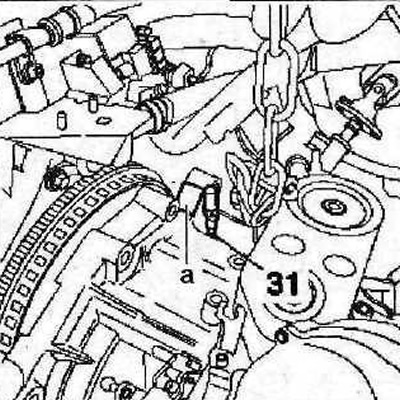
7.22 Remove speedometer sensor 31
23. Lock the torque converter by installing a suitable stop "a" in the appropriate hole (see illustration 7.22).
24. Carefully remove the gearbox from under the vehicle.