
English Русский
Български
Беларускі
Український
Српски
Hrvatski
Română
Polski
Slovenský
Magyar
Bookmark Articles Sitemap Contacts
Company Hyundai Company Opel Company Skoda Company Kia Company Mitsubishi Company LADA Company Audi
PeugeotBook.ru


Series 100   Series 200   Series 300   400-500   Series 600   Crossovers   Others
 
Peugeot 106 (1991-2003)

Gearchange linkage — general information and adjustment (Peugeot 106)

  • Main
  • 10X
  • Peugeot 106 (1991-2003)
  • Transmission
  • Manual gearbox
  • Gearchange linkage — general information and adjustment
0
Table of contents: General information 🠇 Adjustment 🠇

General information


1. If a stiff, sloppy or imprecise gearchange leads you to suspect that a fault exists within the linkage, dismantle it completely and check it for wear or damage as described in Section 4. Reassemble the linkage, applying a smear of multi-purpose grease to all bearing surfaces.

2. If this does not cure the fault, the car should be examined by an expert, as the fault must lie within the transmission itself. There is no adjustment as such in the linkage.

3. While the length of the link rods can be altered as described below, this is for initial setting-up only and is not intended to provide a form of compensation for wear. If the link rods have been renewed, or if the length of the originals is incorrect, adjust them as follows.

Adjustment


4. Chock the rear wheels, then jack up the front of the vehicle and support it on axle stands (see "Jacking and vehicle support"). Access to the link rods is poor, but they can be reached both from above and below the vehicle.

5. Working in (or under) the engine compartment, measure the length of each link rod and compare this to the relevant specified length (see illustration). Note the measurements given are the distances between the centre points of the link rod balljoints and not the total length of the rod.
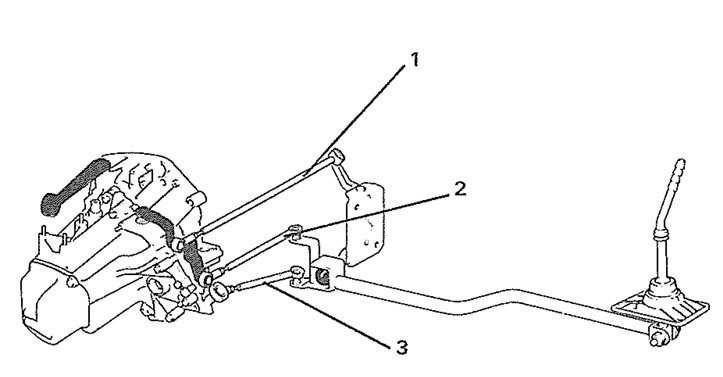
3.5. Gearchange linkage link rod specified lengths 1. 331 mm; 2. 186 mm; 3. 186 mm

3.5. Gearchange linkage link rod specified lengths 1. 331 mm; 2. 186 mm; 3. 186 mm


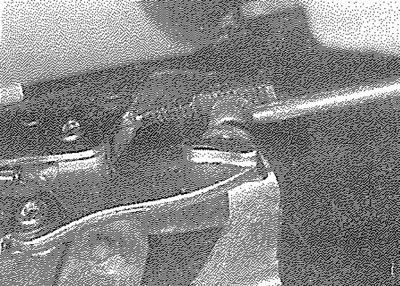
6. If adjustment is necessary, slacken the locknut, then carefully lever the relevant link rod off its balljoint on the transmission unit. Screw or unscrew (as applicable) the end of the rod until the specified distance between the link rod balljoint centres is obtained, then press the disconnected end of the rod firmly back onto its balljoint and securely tighten the link rod locknut (see illustrations).
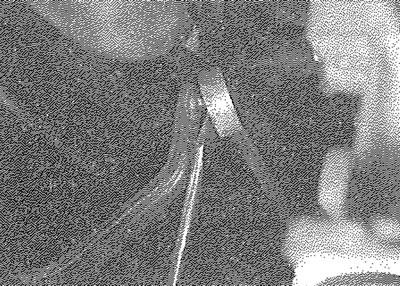
3.6a. Carefully lever the link rods off their balljoints using a large flat-bladed screwdriver
3.6a. Carefully lever the link rods off their balljoints using a large flat-bladed screwdriver


3.6b. When refitting, securely press the link rod back onto its balljoint

3.6b. When refitting, securely press the link rod back onto its balljoint


(Information posted on the website: PeugeotBook.ru)

7. Once all link rod lengths are correctly set, check that all gears can be selected and that the gearchange lever returns properly to its correct at-rest position.
This article is available at russian, bulgarian, belarusian, ukrainian, serbian, croatian, romanian, polish, slovak, hungarian
Article reviewed by editor: Matveev Demid
Share information:
Previous
Peugeot 106: Manual gearbox
Next

Manual transmission — draining and refilling
General information
Manual transmission — specifications
Gearchange linkage — removal and refitting
Oil seals — renewal
Reversing light switch — testing, removal and refitting
Speedometer drive — removal and refitting
Manual transmission — removal and refitting
See similar information for other Peugeot models

➨ Headlight adjustment Peugeot 207 (2006-2014)
➨ Cylinder liner protrusion value — checking and adjustment Peugeot 305 (1977-1989)
➨ Seat belts — description and adjustment Peugeot 405 (1987-1997)
➨ High pressure fuel pump — removal, installation and adjustment Peugeot 605 (1989-2000)
➨ Height adjustment of the seat belt fastening Peugeot 806 (1994-2002)
Link to this article in different formats
Comments and feedback from visitors
No comments yet


Add two numbers 41 + 46


Peugeot 106 (1991-2003) 
  • General information
  • Introduction to manual
  • Weekly checks
  • Maintenance (petrol)
  • Maintenance (diesel)
  • Troubleshooting
  • Power unit
  • Petrol engines
  • Diesel engines
  • Engine overhaul
  • Cooling and heating
  • Fuel system (carburetor)
  • Single point injection (petrol)
  • Multipoint injection (petrol)
  • Fuel system (diesel)
  • Emission control system
  • Engine electrical equipment
  • Ignition system
  • Diesel heating
  • Transmission
  • Clutch
  • Manual gearbox
  • Automatic gearbox
  • Drive shafts
  • Chassis, running gear
  • Brake system
  • Car suspension
  • Steering
  • Body and interior
  • Exterior (external elements)
  • Interior (internal elements)
  • Doors, locks and windows
  • Electrical equipment
  • Equipment and devices
  • Electrical diagrams
PeugeotBook.ru © 2018–2026 | Mobile version | Sitemap: EN BG BY UA RS HR RO PL SK HU | Write message | Site search | Add to bookmarks | Peugeot owners
106 (1991-2003) | 206 (1998-2012) | 207 (2006-2014) | 305 (1977-1989) | 306 (1993-2002) | 307 (2001-2008) | 405 (1987-1997) | 406 (1995-2004) | 605 (1989-2000) | Partner-I (1996-2008) | Eurovans-807 (2002-2014) | Eurovans-806 (1994-2002) | J5 (1981-1993) |
Cookies are used to ensure the correct display of pages on the site.