
Front Panel
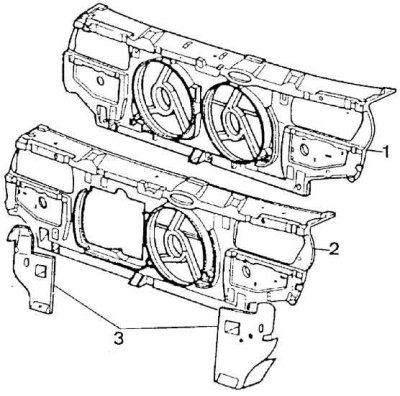
1 - front cross member with two fans, 2 - front cross member with one fan, 3 - side members
Removing
1. Open the hood.
2. Remove the negative cable from the battery.
3. Raise the front of the car and secure it on stands.
4. Remove the plastic mud guards located in the wheel wells.
5. Remove the front bumper.
6. Remove the front direction indicators.
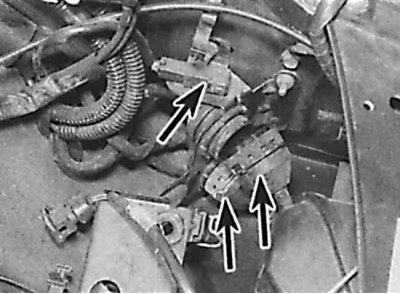
7. Disconnect the front headlight and radiator fan electrical connectors.
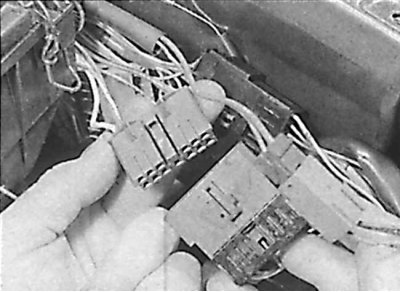 |  |
8. These connectors are located in the front corners of the engine bay on pre-1992 models (drawing on the left) or in the right corner of the engine compartment on models from 1993 (drawing on the right).

9. Unscrew the ground bus mounting bolt from the front corner of the engine compartment.
10. Disable headlight adjustment tools.
11. Disconnect the headlight washer hoses.
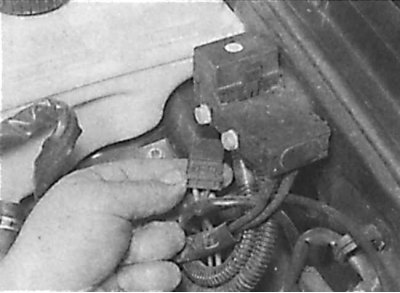
12. In the engine compartment, remove the cable connecting plate located behind the front panel above the radiator.
13. If present, remove the anti-bounce element and disconnect the cable from the connector.
14. Remove the hood release cable from the front panel.
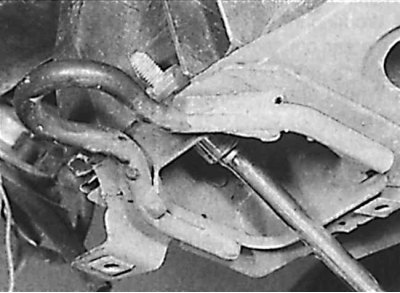
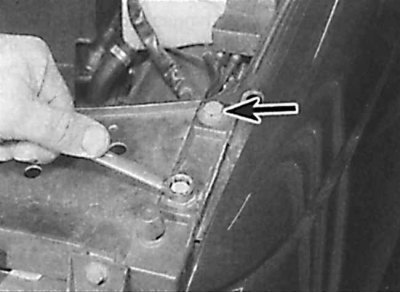
15. unscrew the bolts (two or three bolts depending on the model) attaching the base of the front panel to the lower beam.
16. Using a screwdriver and special pliers, remove the two upper latches holding the radiator. Lift the radiator to remove it from the projections and leave it in the engine compartment without disconnecting the hoses from it.
17. Unscrew the two top bolts on each side of the front panel.
18. Release the brackets securing the lower headlamp trim strips to the front fenders.

19. Unscrew the four elements of the upper fastening of the front upper cross member.
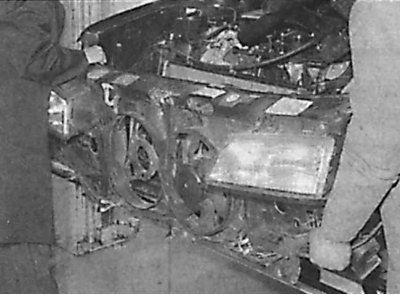
20. Remove the front cross member by pulling it forward.
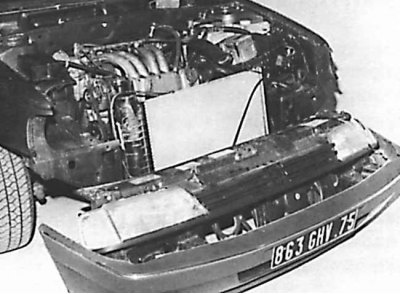
21. You can remove the front panel assembly and bumper together.
Repair
front cross member (attached directly to the side wheel arches) is an element to which the optical units of the headlights, fans and radiator are attached.
The front cross member is molded from synthetic material and cannot be repaired with classic polyester resin. However, fusion welding is possible with a hot air blower or with a large electric soldering iron.
Installation
1. Installation is made in sequence, return to removal.
2. Check that all electrical devices are functioning correctly.