
Rear Working Brake Cylinder Girling with Pressure Regulator
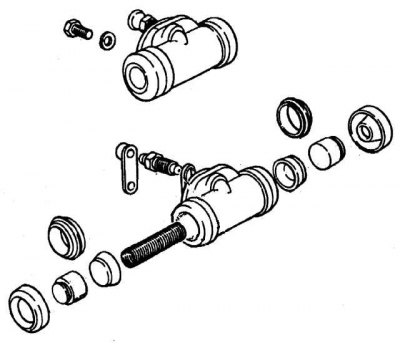
Bendix rear slave cylinder with pressure regulator
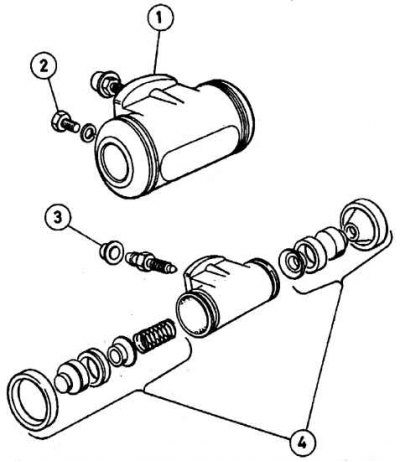
1 - cylinder, 2 - mounting bolt, 3 - bleeder valve, 4 - repair kit
Arrangement of a nut of fastening of a brake tube and bolts of fastening of the working brake cylinder
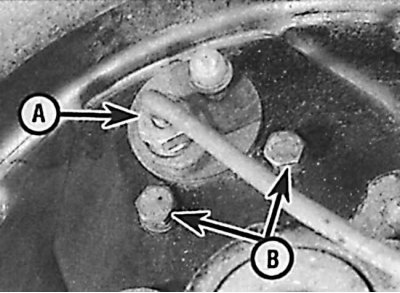
And - a nut of fastening of a brake tube
B - bolts of fastening of the working brake cylinder
Removing
1. Remove brake drum.
2. Using pliers, remove the upper spring that compresses the brake pads.
3. Remove the upper ends of the brake pads from the pistons of the working brake cylinder.
4. Using a G-clamp, pinch the brake hose at the point closest to the working brake cylinder.
5. Remove dirt from around the junction of the brake hose and the rear of the working brake cylinder.
6. Unscrew the union nut.
7. Carefully remove the brake pipe from the working brake cylinder.
8. Close the tube and the brake cylinder with plugs.
9. Unscrew the two bolts securing the working brake cylinder to the brake shield.
10. Carefully remove the slave brake cylinder.
Repair
If the brake cylinder is defective, it must be completely replaced, as individual parts are not supplied.
Installation
1. Check that the mating surfaces on the brake shield and the working brake cylinder are clean.
2. Install the brake cylinder.
3. Install the brake pipe in the brake cylinder and screw on the union nut 2-3 turns.
4. Screw in the two bolts securing the working brake cylinder to the brake shield, and tighten them to the required torque.
5. Finally tighten the nut securing the brake pipe to the working brake cylinder.
6. Remove the clamp from the brake hose.
7. Install the upper parts of the brake pads into the grooves of the piston of the working brake cylinder.
8. Install the upper brake shoe return spring.
9. Install the brake drum.
10. Remove air from the brake system.