
- models with solid front discs - Bendix calipers;
- models with ventilated front discs - Girfing calipers.
Attention! It is imperative to replace all the pads on one axle of the vehicle, even if one pad has reached the wear limit. If the pads are to be reinstalled, they must be marked before removal.
Warning! Brake pads generate brake dust, which contains asbestos, which is harmful to health. Therefore, when cleaning brake pads, do not use compressed air or inhale dust.
1. Raise the front of the car and secure it on stands.
2. Remove front wheels.
3. Disconnect the electrical connector located on the wire going to the brake pad wear sensor.
4. Press the piston into the caliper, moving the caliper in the direction opposite to the piston.
Caliper Bendix
Attention! When installing the pads, you must use a new clamp to secure the brake pad mounting plate.
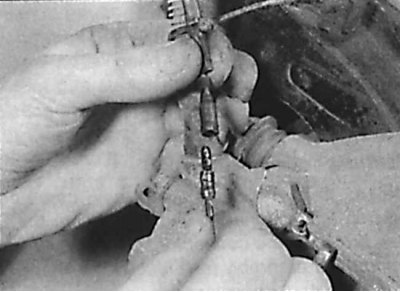
5. Using pliers, remove the small clamp securing the brake pad retaining plate.

6. Remove the pad retaining plate from the caliper.
7. Remove the brake pads from the caliper, noting the location of the anti-rattle spring and remove the spring from the pad.
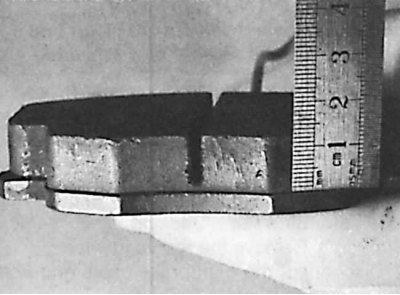
8. Measure the lining thickness of each brake pad.
9. If the condition of the brake pads allows their further use, clean them using a clean wire brush and rags.
10. Before installing the pads, check that the guide pins move freely in the caliper holder and check that the rubber protective boots of the guide pin are not damaged.
11. Clean dust and dirt from the caliper and piston.
12. Check the condition of the dust seal around the piston.
13. If new brake pads will be installed, press the piston into the caliper. This can be done with a wooden rod or a hammer handle. When doing this, make sure that the piston is not distorted and that the surfaces of the piston and boot are not damaged.
14. When the piston is pushed in, the brake fluid is forced out of the brake cylinder into the expansion tank. Therefore, constantly monitor the level of liquid in the tank and, if necessary, pump it out.
15. When installing old brake pads, put them in their original places.

16. Install the brake pad anti-bounce spring.
17. Install the brake pads in the caliper.
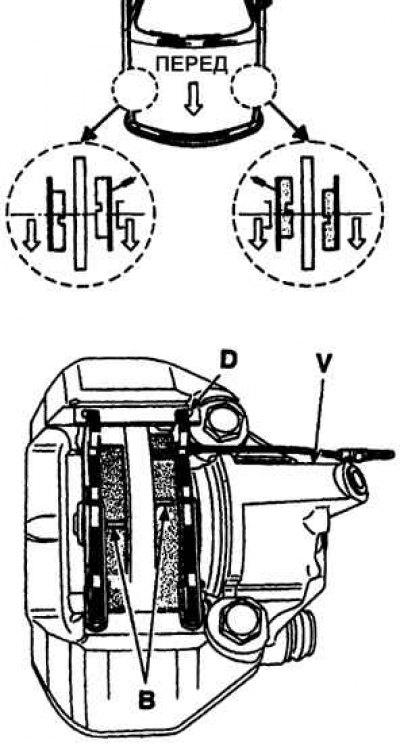
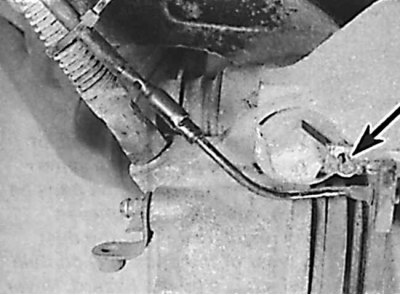
18. When the brake pads are installed correctly, when looking at the pads from the front of the vehicle, the groove on the inner pad should be higher than the groove on the outer pad (B - grooves on the brake pads, D - spring clamp, V - bleeder valve).
19. Install the brake pad fixing plate and secure it with a spring clip.
20. Connect the brake pad wear sensor connector.
21. Check the brake fluid level in the reservoir. It must not exceed the mark "max".
22. Press the brake pedal several times to press the pads against the disc and recheck the brake fluid level in the reservoir.
23. Perform the same steps on the second front wheel.
24. Install wheels and lower vehicle.
25. Recheck the brake fluid level.
Caliper Girling
Attention! When installing the brake pads, a new guide pin bolt must be used.
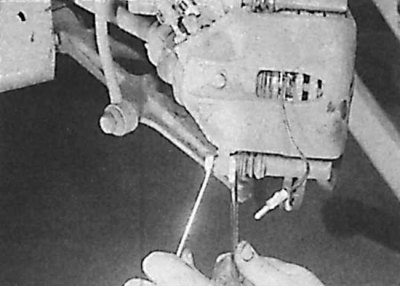
26. Loosen the lower guide pin bolt. At the same time, to keep the guide pin from turning, use a thin wrench. To fasten the guide pin, use only a new bolt.
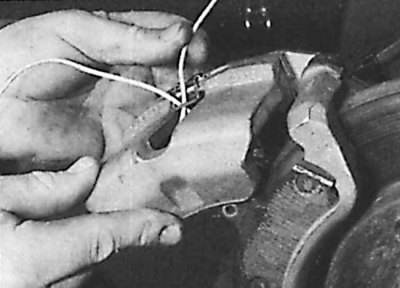
27. Rotate the caliper up on the top guide pin and tie it to the upright with soft wire.
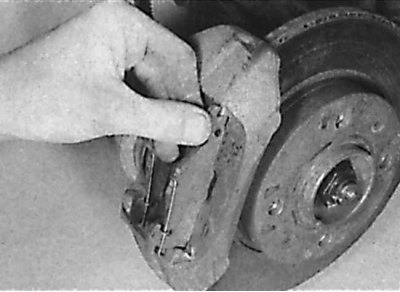
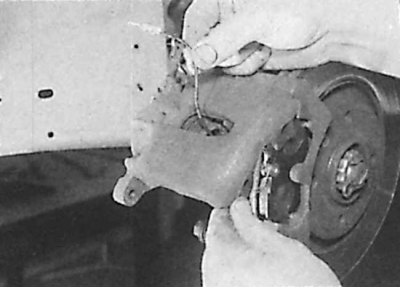
28. Remove the brake pads from the caliper holder.
29. Measure the lining thickness of each brake pad.
30. If the condition of the brake pads allows their further use, clean them using a clean wire brush and rags.
31. Before installing the pads, check that the guide pins move freely in the caliper holder and check that the rubber protective boots of the guide pin are not damaged.
32. Clean dust and dirt from the caliper and piston.
33. Check the condition of the dust seal around the piston.
34. If new brake pads will be installed, press the piston into the caliper. This can be done with a wooden rod or a hammer handle. When doing this, make sure that the piston is not distorted and that the surfaces of the piston and boot are not damaged.
35. When the piston is pushed in, the brake fluid is forced out of the brake cylinder into the expansion tank. Therefore, constantly monitor the level of liquid in the tank and, if necessary, pump it out.
36. When installing old brake pads, put them in their original places.
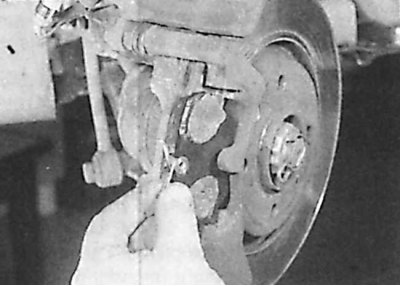
37. Insert the outer and inner brake pads into the caliper holder.
38. Lower the caliper onto the brake pads by passing the wire from the brake pad wear sensor through the window in the caliper.
39. Lubricate the threads of the guide pin mounting bolt with an anti-tightening agent (Peugeot recommends Loctite Frenetanch).
40. Press the caliper into position, then screw in the guide pin mounting bolt, tightening it to the required torque.
41. Connect the brake pad wear sensor electrical connector.
42. Check the brake fluid level in the reservoir. It must not exceed the mark "max".
43. Press the brake pedal several times to press the pads against the disc and recheck the brake fluid level in the reservoir.
44. Perform the same steps on the second front wheel.
45. Install wheels and lower vehicle.
46. Recheck the brake fluid level.