
Front caliper Bendix
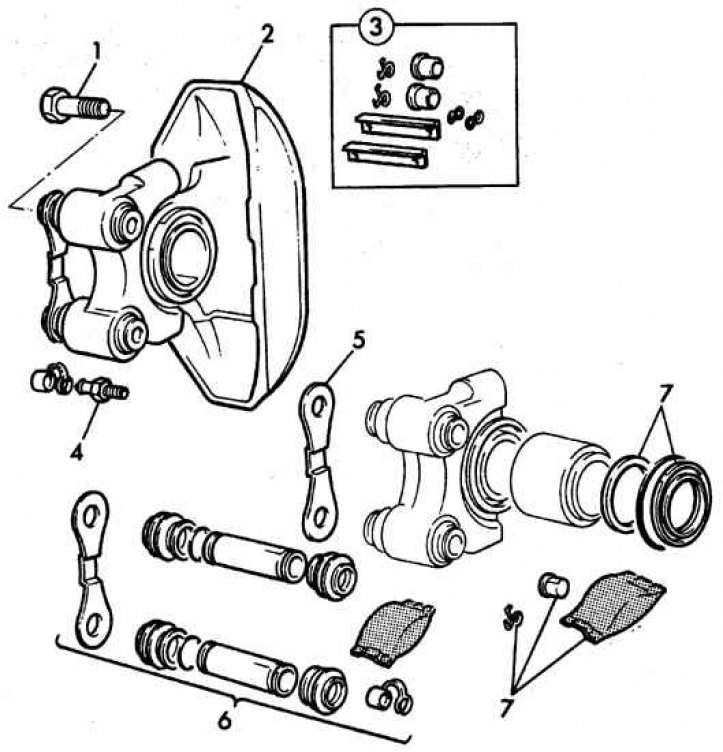
1 - guide bolt, 2 - caliper, 3 - brake pad mounting parts, 4 - bleeder valve, 5 - installation plates, 6 - guide pin assemblies, 7 - repair kit
Front Caliper Girling
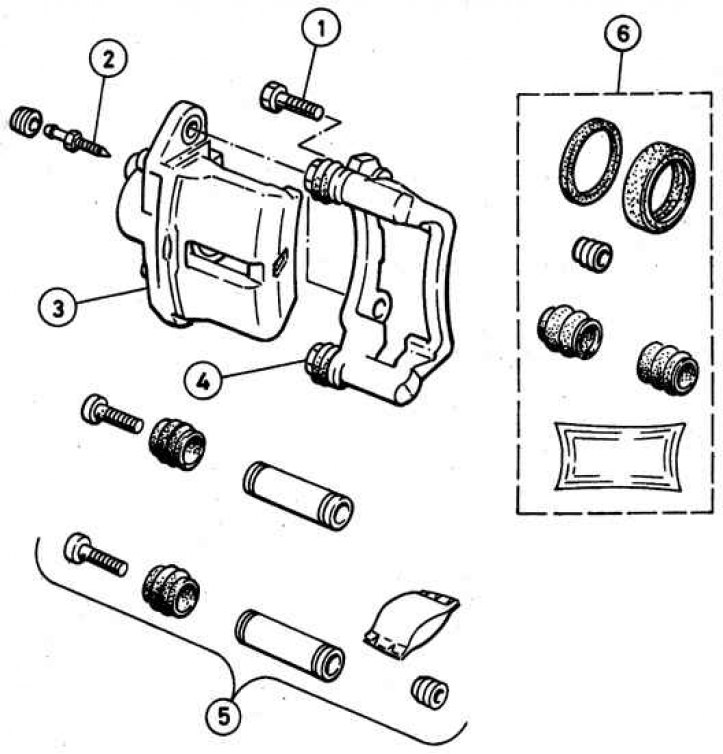
1 - suspension bolt, 2 - bleed valve, 3 - caliper, 4 - unit suspension, 5 - guide pin assembly, 6 - repair kit
Caliper Bendix
Removing
1. Raise the front of the car and secure it on stands.
2. Remove the relevant wheel.
3. Using a G-clip, pinch off the brake hose.
4. Remove brake pads.
5. Clean the area around the brake hose connector and caliper.
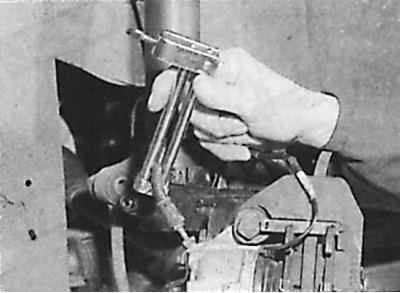
6. Loosen connection.
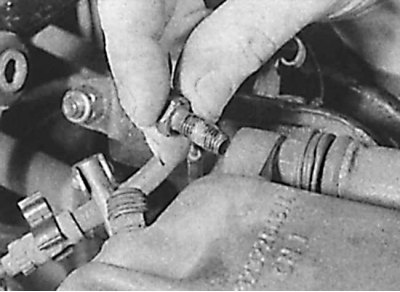
7. Disconnect the electrical connector from the brake pad wear sensor.
8. Unscrew the two bolts securing the caliper to the steering knuckle.
9. Remove the caliper from the brake disc, unscrew the caliper from the brake hose.
Caliper repair
1. Carefully clean the caliper of brake dust and dirt.
2. Remove the piston from the caliper body and remove the dust seal.
3. Using a small screwdriver, remove the piston o-ring. At the same time, be very careful not to damage the piston hole in the caliper.
4. Thoroughly clean all parts using methanol or isopropyl alcohol or special hydraulic brake cleaner. Do not use gasoline or other solvents that corrode the rubber o-rings.
5. Using compressed air, dry all parts and blow out the passages in the caliper.
6. Check all parts for wear and damage.
7. Pay special attention to the condition of the working surfaces of the cylinder and piston. If they are scratched or show signs of wear, the caliper assembly must be replaced.
8. Rubber o-rings and protective seals must be replaced.
9. Before assembly, check that all parts are clean and dry.
10. Lubricate the caliper cylinder, piston and new O-ring with clean brake fluid.
11. Install a new O-ring into the caliper cylinder with your fingers.
12. Install the dust cover on the piston so that the inner diameter of the cover fits into the piston groove.
13. Insert the piston into the caliper and at the same time insert the outer edge of the dust cover into the caliper until it locks into place.
14. If the guide pins are being replaced, lubricate them with special grease and install protective covers in the grooves of the guide pins.
15. Insert the guide pins into the caliper and position the outer part of the boot in the grooves.
Installation
1. Screw the caliper onto the brake hose, then install the caliper onto the brake disc.
2. Coat the threads of the caliper mounting bolts with an anti-tightening agent (Loctite Frenetanch).
3. Screw in the bolts together with the mounting plate and tighten them to the required torque.
4. Tighten the brake hose union nut and install the brake pads.
5. Tighten the brake hose union nut and install the brake pads.
6. Install the wheel and lower the car.
Caliper Girling
Removing
Attention! When reinstalling the caliper, use new guide pin bolts.
1. Raise the front of the car and secure it on stands.
2. Remove the corresponding wheel.
3. Using a G-clip, pinch off the brake hose.
4. Remove brake pads.
5. Clean the area around the brake hose connector and caliper.
6. Loosen connection.
7. Disconnect the electrical connector from the brake pad wear sensor.
8. Remove the upper caliper guide pin bolt. In this case, to keep the finger from turning, use a thin wrench.
9. Remove the lower caliper guide pin bolt. In this case, to keep the finger from turning, use a thin wrench.
10. Remove the caliper from the brake disc, unscrew the caliper from the brake hose.
Repair
Repair is carried out similarly to the Bendix caliper (see above).
Installation
1. Screw the caliper onto the brake hose.
2. Coat the threads of the guide pin bolts with an anti-tightening agent (Loctite Frenetanch), screw the bolt into the lower guide pin, press the caliper down and screw the bolt into the upper guide pin.
3. Tighten both bolts to the required torque.
4. Tighten the brake hose union nut and install the brake pads.
5. Remove the clamp from the brake hose and bleed the air from the brake system.
6. Install the wheel and lower the car.