



Table of contents: Removal 🠇 Installation 🠇
Warning! Never lower the vehicle onto its wheels with one or both drive shafts removed, as this will damage the wheel bearings. If it is necessary to move the vehicle, temporarily install the outer end of the hub drive shaft and secure it with a nut.
0606 AY Hub Locking Tool
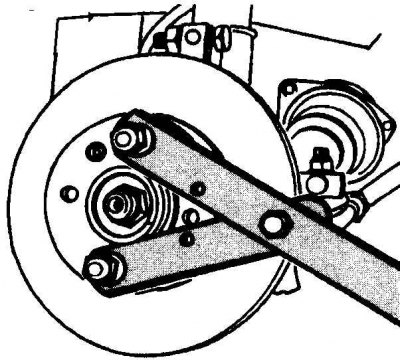
Removal
Caution: When installing the lower arm ball joint, a new nut must be used.
1. Remove the wheel hub cap and the locking elements of the drive shaft-to-hub nut. Loosen the drive shaft-to-hub nut with the vehicle standing with its wheels on the ground. Also loosen the wheel mounting bolts. Raise the front of the vehicle and secure it on stands. Remove the corresponding front wheel.
2. Drain the oil from the gearbox.
3. On models equipped with ABS, remove the sensor mounted on the vehicle's wheel.
4. Unscrew the nut securing the drive shaft to the hub.
Attention! To facilitate unscrewing the nut that secures the drive shaft to the hub, use hub locking bushings (fixture 0606 AY).
5. Remove the lower suspension ball joint nut. Remove the ball joint from the control arm using a universal ball joint puller.
Left drive shaft
6. Pull the hub away from the vehicle and remove the outer end of the drive shaft from the hub. If necessary, use a rubber mallet or hammer to pry the shaft out of the hub.
7. Support the drive shaft and remove the inner end of the shaft from the transmission, being careful not to damage the differential seal. Remove the drive shaft from underneath the vehicle.
Right drive shaft
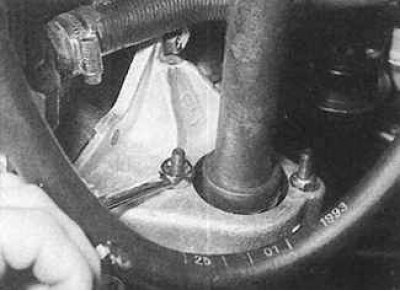
8. Loosen the two right drive shaft intermediate bearing mounting bolts.
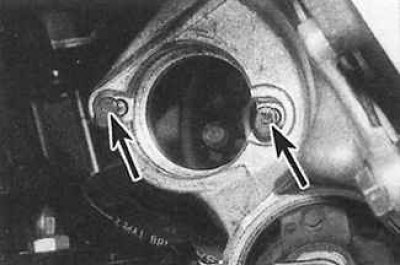
9. Then turn the bolts (indicated by arrows) by 90° so that their heads are offset from the outer end of the bearing.
10. Pull the hub away from the vehicle and remove the outer end of the drive shaft from the hub. If necessary, use a rubber mallet or hammer to pry the shaft out of the hub.
11. While supporting the outer end of the drive shaft, remove the inner end of the shaft from the gearbox and release the intermediate bearing from the unit mount.
12. After removing the drive shaft from the transmission, remove the protective boot from the inner end of the shaft, marking its installation location, and remove the drive shaft from under the vehicle.
Installation
1. Before installing the drive shaft, check the condition of the drive shaft seal ring in the gearbox.
2. Clean the drive shaft splines in the hub and gearbox. Apply a thin layer of grease to the sealing ring lips, drive shaft splines and flanges.
Left drive shaft
3. Install the drive shaft into the differential, aligning the splines of the drive shaft with the grooves of the differential axle gears. Insert the drive shaft into the gearbox until it stops.
4. Install the outer end of the drive shaft into the hub.
5. Install the skid plate to the lower ball joint, then connect the lower ball joint to the control arm.
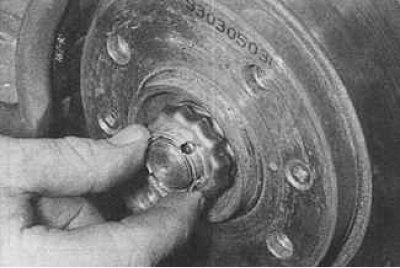
6. Install a new swivel nut and tighten it to the specified torque. Lubricate the inside and threads of the drive shaft nut with clean engine oil, screw it onto the drive shaft and tighten it to the specified torque. Check that the hub rotates freely, then install the locking washer.
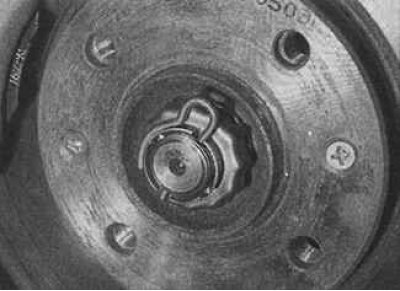
7. Secure the locking washer with a spring pin.
8. Install the ABS sensor.
9. Install the wheel, then lower the vehicle to the ground and finally tighten the bolts to the specified torque.
10. Check the gearbox oil level and top up if necessary.
Right drive shaft
11. Check that the intermediate bearing rotates smoothly and evenly. Make sure that there is no play between the outer ring and the inner ring.
12. Apply a thin layer of grease to the outer race of the intermediate bearing and the inner projection for the dust cover.
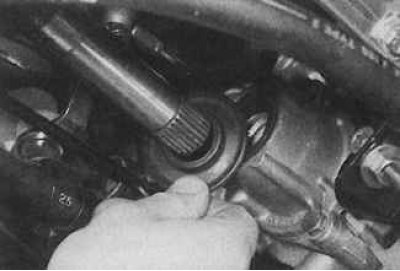
13. Insert the inner end of the shaft through the intermediate bearing installation hanger and install the dust cover on the drive shaft.
14. Align the internal splines of the drive shaft with the slots of the differential axle gear, and the intermediate bearing with the suspension of the unit. Insert the drive shaft into the gearbox until it stops.
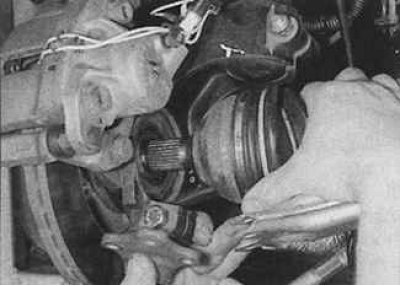
15. Install the outer constant velocity joint into the hub.
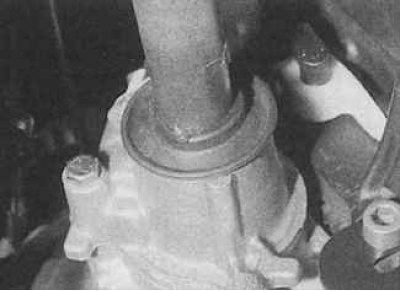
16. Check that the intermediate bearing is installed correctly, then turn the bolts 90° and secure them in this position with nuts. Cover the intermediate bearing with a dust cover.
17. Install the skid plate to the lower ball joint, then connect the lower ball joint to the control arm.
18. Install a new swivel nut and tighten it to the specified torque. Lubricate the inside and threads of the drive shaft nut with clean engine oil, screw it onto the drive shaft and tighten it to the specified torque. Check that the hub rotates freely, then install the locking washer and secure it with a spring pin.
19. Install the ABS sensor.
20. Install the wheel, then lower the vehicle to the ground and finally tighten the bolts to the specified torque.
21. Check the gearbox oil level and top up if necessary.