
2. Remove pistons and connecting rods as described in paragraph 10. If no work is to be done on the pistons and connecting rods, there is no need to remove the cylinder head or remove the pistons from the cylinders. You just need to move the pistons far enough up to move the connecting rods away from the crankshaft journals.
3. Check the crankshaft end play as described in paragraph 14, and then work as described below.
4. Turn out bolts and remove the case of a cuff of a cranked shaft from that end of the block of cylinders where the timing belt is located (pic. 11.4). Remove the appropriate gasket (in the presence of).
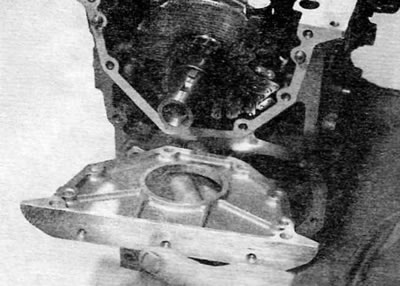
Pic. 11.4. Removing the cuff housing from the cylinder block
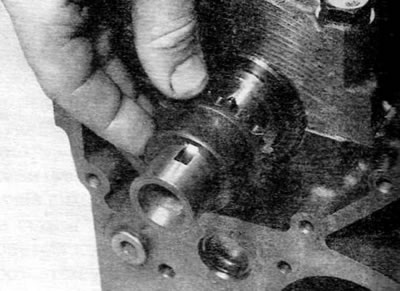
5. Remove the oil pump drive chain and remove the drive sprocket and spacer (in the presence of) from the end of the crankshaft. Remove the segment key and store in a safe place along with the sprocket (pic. 11.5, a-c).
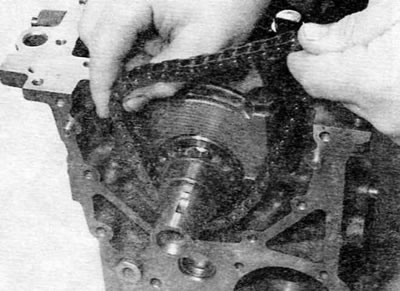
Pic. 11.5 a. Remove the oil pump drive chain...
Pic. 11.5b....then remove the drive sprocket...
Pic. 11.5, c....and remove the key from the crankshaft
6. The main bearing caps must be numbered 1 through 5, starting from the end of the engine where the gearbox is docked to it (flywheel) (pic. 11.6). If there is no marking, mark the caps accordingly with a center punch. Also note the installation depth of the collar in the bearing cap.
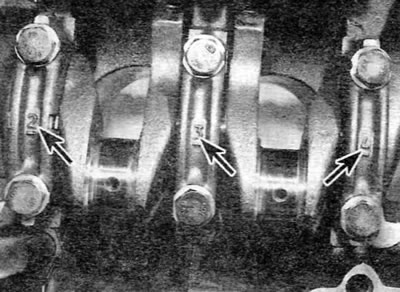
Pic. 11.6. Identification marks on main bearing caps (marked with arrows)
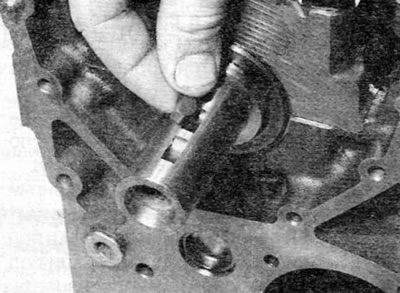
7. Turn out bolts of fastening of covers of radical bearings and remove covers. Remove the lower main bearing shells and tape them to their respective caps and store in a safe place. Also remove the bottom thrust washers (semirings) from No. 2 main bearing cap (pic. 11.7). Remove the sealing strips from the sides of the No. 1 main bearing cap and discard them.
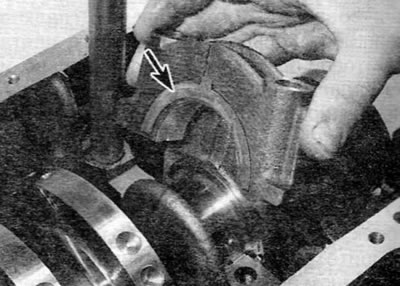
Pic. 11.7. No. 2 Main Bearing Cap Removal. Note Thrust Washer (marked with an arrow)
8. Carefully remove the crankshaft (pic. 11.8) and discard the cuff.
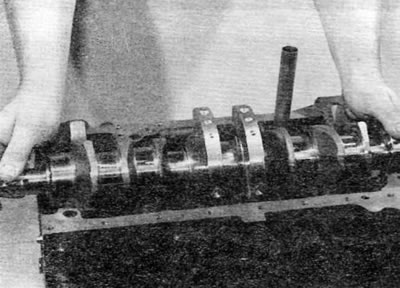
Pic. 11.8. Removing the crankshaft
9. Remove the top bearing shells from the cylinder block (pic. 11.9) and use adhesive tape to attach them to their respective lids and store them in a safe place. Remove the top thrust washers (semirings) from the No. 2 main bearing and store them in a safe place along with the bottom washers.
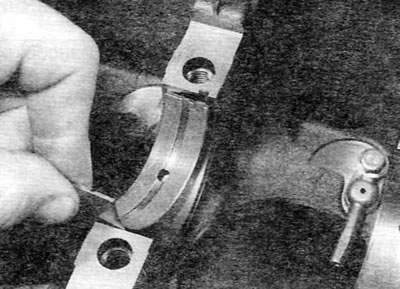
Pic. 11.9. Remove the upper main bearing shells from the cylinder block/crankcase and store them together with the lower bearing shells