
2. Compress the suspension coil springs by placing a suitable support under the lower arms (see illustration 6.4).
3. Remove both rear fender liner 5 by depressing the latches 6 and 7 and drilling out the heads of the rivets 8 and 9 (see illustration).
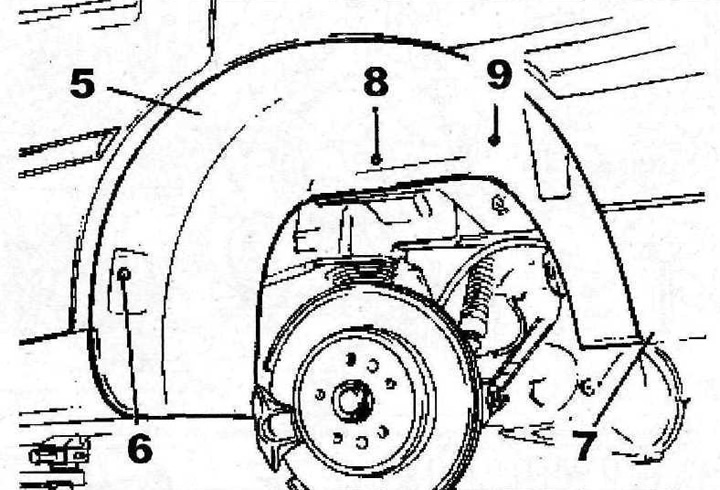
7.3 Remove both rear fender liner 5 by depressing the latches 6 and 7 and drilling out the heads of the rivets in and 9
4. Remove the fuel filler tube.
5. Disconnect the bar 10 of the anti-roll bar from its racks 11 (see illustration)
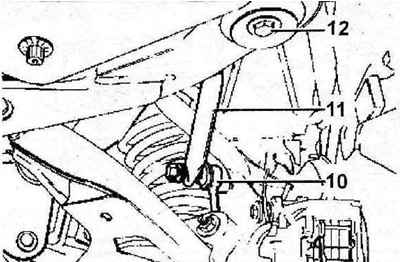
7.5 Disconnect the bar 10 of the anti-roll bar from its racks 11
6. Unscrew bolts 12 on both sides of the car, which fasten the front part of the upper arms to the body and lower the support (see illustration 7.5).
7. Remove shock absorber (see relevant chapter).
8. Release the harness 13 from the holders (see illustration).
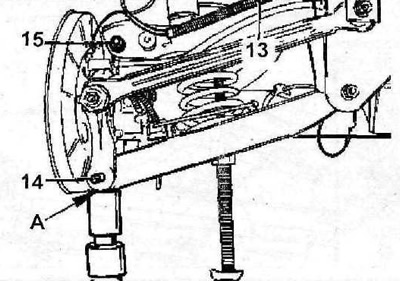
7.8 Release the harness 13 from the holders
9. Jack up the lower transverse arm (see arrow A in illustration 7.8), to make it easier to unscrew its bolts.
10. Unscrew bolts 14 and 15 (see illustration 7.8).
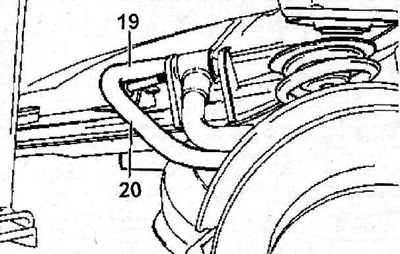
11. Unscrew the bolt 16 and remove the bracket 17 for fastening the anti-roll bar (see illustration).
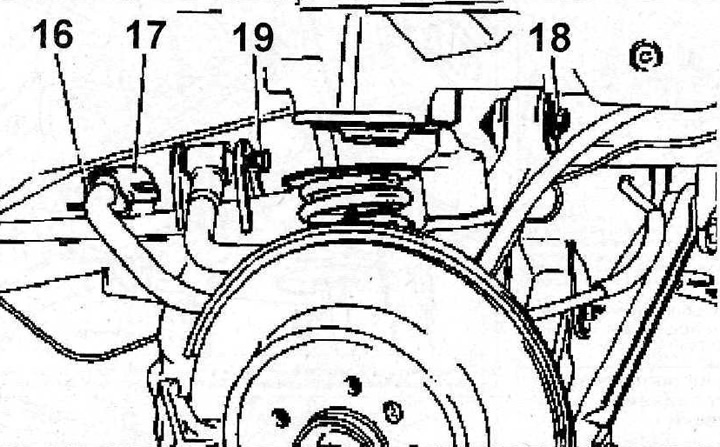
7.11 Unscrew the bolt 16 and remove the bracket 17 for fastening the anti-roll bar
12. Unscrew a back bolt 18 fastenings of the lever (see illustration 7.11).
13. Unscrew the bolt 16 and remove the bracket 17 for fastening the anti-roll bar (see illustration).
7.13 Unscrew the bolt 16 and remove the bracket 17 for fastening the anti-roll bar
14. Jack up the lower transverse arm (see arrow B in illustration) and remove the rear upper control arm.
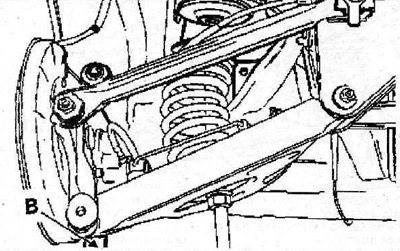
7.14 Jack up the lower transverse arm (see arrow B)
Installation of the upper transverse arm of the rear suspension is carried out in the reverse order of removal
15. Clean the threads of the lever mounting bolts, lubricate the bolts with a small amount of Molykote G Rapid Pius before screwing in.
16. Make sure that the slot C of the rubber cushion 21 faces the rear of the car, install the bracket 17 of the anti-roll bar, fix it with bolt 16, having previously lubricated it with Loctite sealant (see illustration).
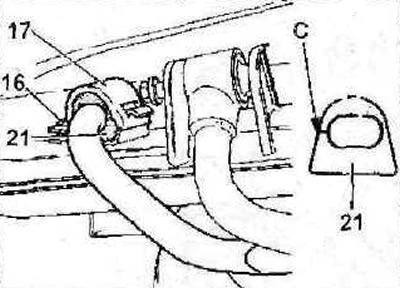
7.16 Make sure that the slot C of the rubber cushion 21 faces the rear of the car, install the bracket 17 of the anti-roll bar, fix it with bolt 16, having previously lubricated it with Loclite sealant
17. Jack up the transverse arm at point D (see arrow in illustration) so that the distance «A» between both holes for the bolts of the upper arm was 425 mm.
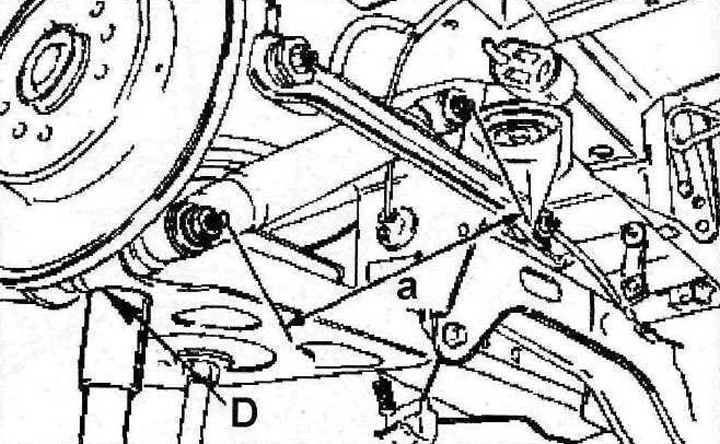
7.17 Jack up the transverse arm at point D so that the distance «A» between both holes for the bolts of the upper arm was 425 mm