



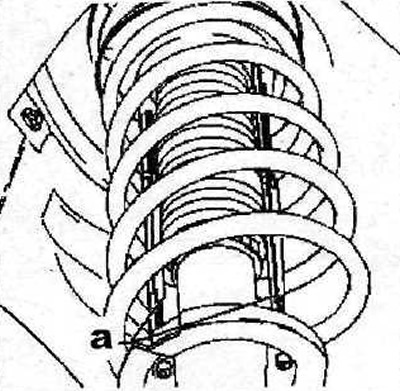
5.1 Secure the shock absorber spring with holders "a"
2. Jack up the front of the car, place it on jack stands and remove the front wheels.
3. Remove the mudguards 1 from both wheel arches (see illustration).
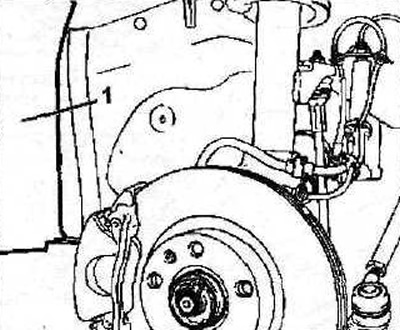
5.3 Remove the mudguards 1 from both wheel arches
4. Unscrew the upper bolts of the 2 brackets that secure the engine to the subframe (see illustration).
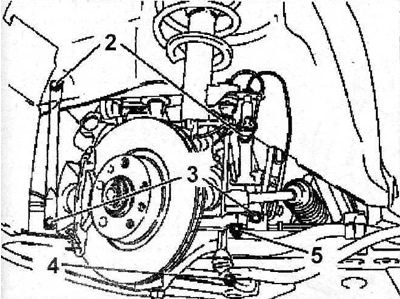
5.4 Unscrew the upper bolts of the 2 brackets that secure the engine to the subframe
5. Unscrew the lower bolts of the 3 engine mounting brackets to the subframe (see illustration 5.4).
6. Unscrew the 4 nuts securing the anti-roll bar to both of its struts (see illustration 5.4). The tightening torque of the nuts is 40 Nm.
7. Unscrew the nuts of the 5 ball joint pins of the tie rod ends (see illustration5.4). The tightening torque of the nuts is 35 Nm.
8. Unscrew nut 6 of the ball joint securing the lower wishbone to the steering knuckle (see illustration). Tightening torque of the nut 6-45 Nm.
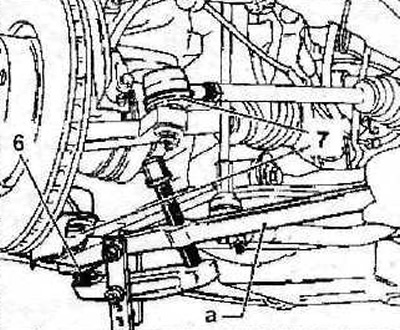
5.8 Unscrew nut 6 of the ball joint securing the lower wishbone to the steering knuckle
9. Press out the pins of the 7 ball joints using a suitable puller (see illustration 5.8).
10. Secure the steering knuckle to the subframe with wire to prevent the drive shaft from coming out of the gearbox and being damaged when disconnecting the wishbone.
11. Remove the ride height adjustment sensor 8 (if provided) (see illustration).
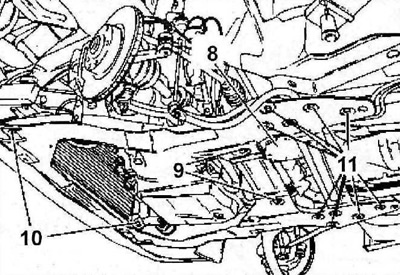
5.11 Remove the ride height adjustment sensor 8
12. Unscrew the bolts 9 securing the steering gear to the subframe (see illustration 5.11). The tightening torque of the bolts is 70 Nm.
13. Unscrew bolts 10 and 11 of the brackets securing the anti-roll bar to the subframe (see illustration 5.11). The tightening torque of the bolts is 70 Nm.
14. Unscrew bolt 12 and disconnect the anti-roll bar (see illustration).
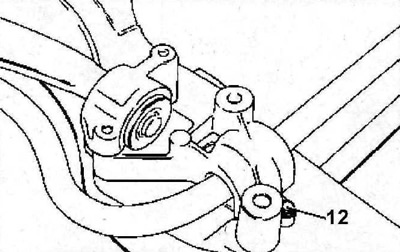
5.14 Unscrew bolt 12 and remove the anti-roll bar
The installation of the anti-roll bar is carried out in the reverse order of removal. To facilitate installation and maintain the mounting position of the stabilizer bar, use mounting gaskets A (see illustration 5.15).
15. Install a 30 mm thick gasket A under the subframe 13 (see illustration).
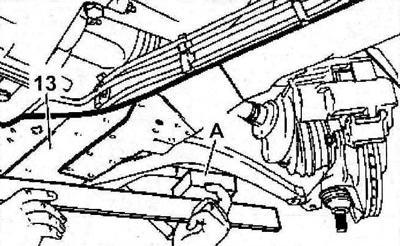
5.15 Install a 30 mm thick gasket A under subframe 13
16. Adjust the camber and toe-in of the front wheels.
Attention! It is recommended to entrust the adjustment of the camber and toe-in of the front wheels to a specialized workshop.