
27. Replace all self-locking nuts, lock washers, final drive shaft seals, and other wear parts with new ones.
28. Prepare the engine compartment so that the power package can be installed without interference.
29. Secure all freely hanging hoses, wire harnesses, pipelines to the body with adhesive tape.
30. Clean the joints and, if necessary, remove rust.
31. Replace the axle shaft seals in the corresponding holes on the gearbox. Oil seals are lubricated before installation.
32. Fill in coolant and engine oil after installing the power unit.
33. Install the power unit so that the suspension mounts are stress-free. Attach the engine/gearbox mount first. When installing the power unit, follow (illustration 2.22).
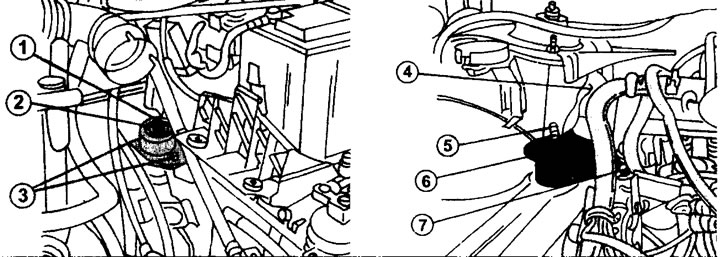
2.22 Release the supports of the right and left engine and gearbox mounts
1 - nut, tightening torque 80 Nm
2 - engine support cushion
3 - bolts for fastening the engine support cushion, tightening torque 25 Nm
4 - support bolts, tightening torque 65 Nm
5 - nut, tightening torque 45 Nm
6 - right engine mount
7 - support bolts, tightening torque 60 Nm
Lubricate the mounting bolts of the rubber pads of the suspension mounts with a thin layer of grease before installation.
34. Reinstall the wheel drive axles.
35. Check the tightness of the cooling system. Make sure all hoses and hose clamps are secure and that no coolant is leaking anywhere.
36. Check engine oil level.
37. Check and, if necessary, clean the battery terminals and terminals.
38. Carry out a test drive and check that the shift mechanism and clutch function properly.