



1. Remove the spark plugs if they have not already been removed.
2. Unscrew the bolt securing the timing belt gear on the camshaft. Remove the camshaft drive gear and use side cutters to extract the segment key securing the gear. To prevent the timing belt gear from turning, insert a drill or suitable punch into the gear hole and secure it to the cylinder head (see illustration 4.9).
3. Remove the oil line from the center of the cylinder head.
4. Loosen all 10 camshaft bearing cap nuts, working from the ends to the center.
5. Mark the mounting position of the bearing caps, and then remove them in order.
6. Remove the valve lifters from the holes in order. Also mark the mounting position of the pushers accordingly (see illustration).
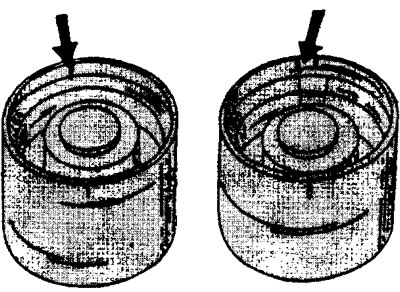
6.6 Mark the mounting position of the pushers.
Remove the tappet adjusting washers and place them together with the tappets.
In order to remove the valves from the cylinder head, a special tool is required to compress the valve springs (see illustration 6.0).
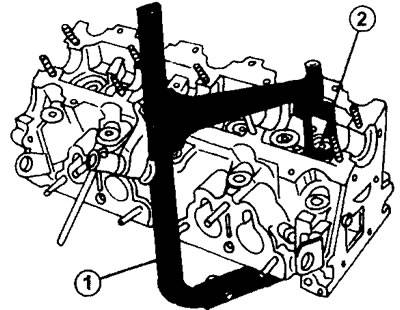
6.0 Removing valves
1 - special device for removing valves
2 - stamp for compressing the valve spring
The special device may differ in shape from that shown in the illustration.
If you don't have a special tool, the valves can be removed as follows.
7. Insert a wooden block into the combustion chamber so that it rests against the valve that will be removed.
8. Place a piece of pipe of the same diameter as the spring cup against the top of the valve spring cup and hit the pipe piece with a hammer. This will compress the valve spring and release both valve cotters. This method of removing the valves is complicated by the inclined position of the valves.
9. Remove the valve parts and remove the valve from the opposite side of the cylinder head. Immediately mark the mounting position of the valves accordingly, and place the valves and their parts together. Each valve guide has an oil deflector cap. Remove the caps using appropriate pliers or a screwdriver. The valve stem seals must be replaced with new ones (see illustration).
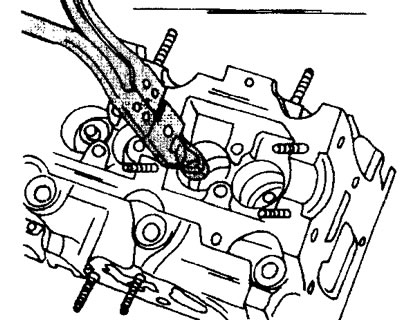
6.9 Remove the valve stem oil seals
XU10 engine (with two camshafts and 16 valves)
10. Insert the stop bolts "a" into the holes of the toothed belt gears and unscrew the gear mounting bolts. After this, remove the thrust bolts and remove both bushings from the camshafts (see illustration).
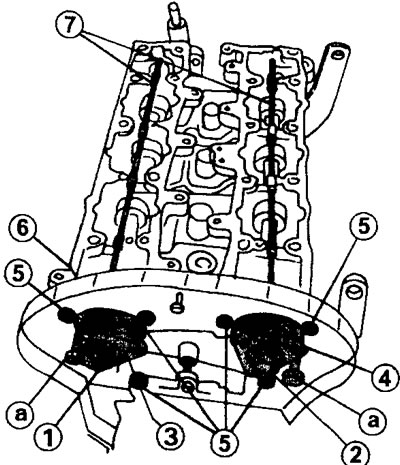
6.10 Disassembling the XU10 engine (with two camshafts and 16 valves).
1 and 2 - bolts for fastening the toothed belt gear bushings
a - thrust bolts
3 and 4 - timing belt gear bushings
5 - bolts for fastening the toothed belt protective cover
6 - toothed belt protective cover
7 - oil pipelines
11. Remove the timing belt protective cover mounting bolts.
12. Remove the timing belt guard
13. Remove the oil lines.
14. Remove the thermostat housing on the opposite side of the cylinder head.
15. Unscrew the 12 camshaft bearing housing mounting bolts in several passes and remove the housings.
To remove the camshafts and cylinder heads, press on the camshaft from the flywheel side of the engine. This will release the opposite end of the camshaft from the centering bearing.
16 Remove the oil seals from the camshafts (see illustration).
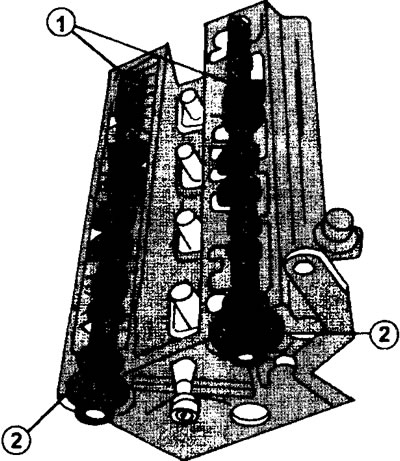
6.16 Position of camshafts after removing bearing housings.
1 - camshafts
2 - camshaft oil seals
17. Remove the valve tappets from the holes in order. Mark the mounting position of the pushers accordingly (see illustration 6.6). Remove the tappet adjusting washers and place them together with the tappets.
18. Remove the valves and valve stem seals. For the procedure, see. higher.