English Русский
Български
Беларускі
Український
Српски
Hrvatski
Română
Polski
Slovenský
Magyar
Bookmark Articles Sitemap Contacts
Company Hyundai Company Opel Company Skoda Company Kia Company Mitsubishi Company LADA Company Audi
PeugeotBook.ru


Series 100   Series 200   Series 300   400-500   Series 600   Crossovers   Others
 
Peugeot 305 (1977-1989) Peugeot 306 (1993-2002) Peugeot 307 (2001-2008)

Cylinder head — removal from the engine while it is on the vehicle (Peugeot 305)

  • Main
  • 30X
  • Peugeot 305 (1977-1989)
  • Power unit
  • Gasoline engines
  • Cylinder head — removal from the engine while it is on the vehicle
0
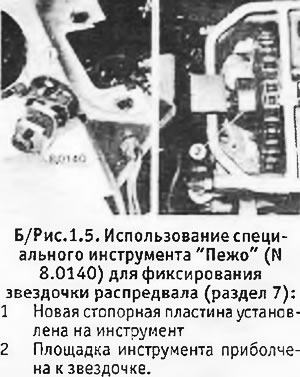
1. The cylinder head can be removed and refitted without removing the engine from the car, however you will need the special Peugeot tool (N 8.0140) to hold the camshaft sprocket in place and prevent the timing chain from falling into the timing case.

1. The cylinder head can be removed and refitted without removing the engine from the car, however…


2. When removing the cylinder head, there is a risk of displacement of wet liners. Therefore, it is necessary to check the position of the liners, and if it is found that it does not meet the requirements, it is necessary to install new gaskets between the liners and the cylinder block. This operation requires removing the engine and gearbox from the car and then disassembling the engine. Therefore, removing the cylinder head from an engine that is on the car can only be done if you have everything necessary to disassemble the engine (even if it is not needed). Otherwise, be prepared to take your car to a Peugeot workshop to have the cylinder head gaskets replaced.

3. Drain the liquid from the cooling system (see chapter 2), apply the handbrake and place the jack under the lower engine mount (near the right corner of the gearbox housing). Remove the bolts securing the exhaust pipe brackets to the bottom of the gearbox housing.


4. Disconnect the wires from the battery and remove it from the car. Remove the air cleaner and air intake (see chapter 3). Disconnect the spark plug wires from the spark plugs, release the distributor cap clamp, disconnect the high-voltage wire from the ignition coil and remove the distributor cap along with the wires.

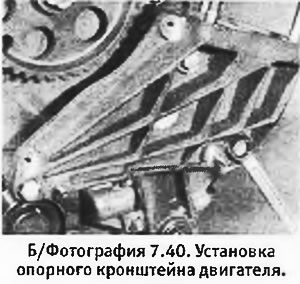
5. Loosen the bolts securing the right upper engine support bracket to the timing case and engine mount, and remove the bracket. Remove the elastic engine mount. Remove the nut securing the wire to the ground bolt on the gearbox housing and remove the wire. Remove the 3 screws securing the valve cover to the cylinder head and remove the cover. Remove the 3 nuts securing the heat shield to the exhaust manifold and remove the shield.
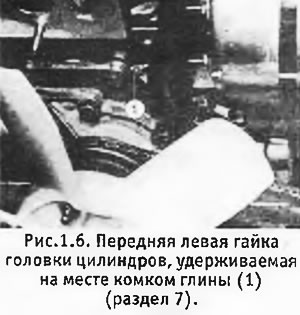
5. Loosen the bolts securing the right upper engine support bracket to the timing case and engine…


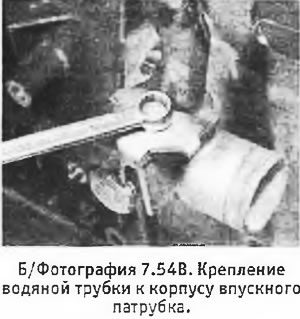
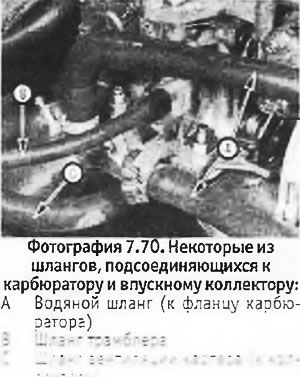
6. Select a wooden stick approximately 300 mm long and wedge it between the front upper edge of the timing case and the crosspiece at the front of the engine compartment. Disconnect the hoses from the cylinder head and the wiring from the coolant temperature sensor. Loosen the bolt and remove the water pipe bracket behind the coolant temperature sensor on the left side of the engine compartment.


7. Remove the bolt securing the intake manifold bracket and disconnect the manifold from the cylinder head. Move the manifold back, away from the head.

8. Loosen the nuts securing the exhaust manifold to the cylinder head, remove the heat shield support plate and move the manifold forward, away from the head.

9. Remove the ground bolt from the upper front hole in the timing case and the two bolts from the upper rear holes.

10. Bend back the tabs of the locking plate under the three bolts securing the camshaft sprocket. Turn the engine so that piston No. 2 reaches the top point on the compression stroke (in cylinder N 3 the valves are closed).
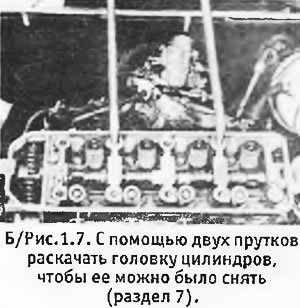
10. Bend back the tabs of the locking plate under the three bolts securing the camshaft sprocket.…


{text missing}

15. Trim the upper protruding edge of the timing case gasket flush with the surface of the cylinder block. Clean the surfaces of the block, head and casing from traces of old sealant. It is prohibited to use sandpaper or sharp tools, as there should be no scratches or burrs on the surfaces.

16. If you are not going to reinstall the head in the near future, cover the disassembled engine to prevent dirt from getting into it.
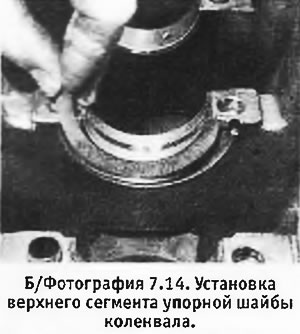
16. If you are not going to reinstall the head in the near future, cover the disassembled engine to…

16. If you are not going to reinstall the head in the near future, cover the disassembled engine to…

16. If you are not going to reinstall the head in the near future, cover the disassembled engine to…

16. If you are not going to reinstall the head in the near future, cover the disassembled engine to…

16. If you are not going to reinstall the head in the near future, cover the disassembled engine to…

16. If you are not going to reinstall the head in the near future, cover the disassembled engine to…

16. If you are not going to reinstall the head in the near future, cover the disassembled engine to…

(The source is located on the website: «peugeotbook.ru»)


16. If you are not going to reinstall the head in the near future, cover the disassembled engine to…

16. If you are not going to reinstall the head in the near future, cover the disassembled engine to…
This article is available at russian, bulgarian, belarusian, ukrainian, serbian, croatian, romanian, polish, slovak, hungarian
Article reviewed by editor: Ostrovsky Fedor
Share information:
Previous
Peugeot 305: Gasoline engines
Next

Disassembling the XU series engine
Disconnecting the gearbox from the XU series engine
Removal with gearbox (XU series engine)
Engine Disassembly — auxiliary equipment
Engine disassembly — general part
Cylinder liner protrusion value — checking and adjustment
Disassembling the cylinder head (XU series engines)
Cylinder head resurfacing (XU series engines)
Cylinder head — installation on the engine standing on the car
Cylinder head assembly (XU series engines)
See similar information for other Peugeot models

➨ Cylinder head (8-valve engines) — removal and refitting Peugeot 106 (1991-2003)
➨ Removal and installation of the cylinder head on a vehicle… Peugeot 207 (2006-2014)
➨ Removal and installation the cylinder head (2.1L engine) Peugeot 406 (1995-2004)
➨ Cylinder head — removal Peugeot 605 (1989-2000)
➨ Cylinder head — removal and installation Peugeot 806 (1994-2002)
Link to this article in different formats
Comments and feedback from visitors
No comments yet


Add two numbers 37 + 48


Peugeot 307 (2001-2008) 
  • User manual
  • Keys, doors and alarm
  • Controls and instruments
  • Driving and operation
  • Maintenance
  • Power unit
  • Petrol engines TU3 and TU5
  • Petrol engines EW10
  • Diesel engines DV10
  • Diesel engines DW10
  • Transmission
  • Clutch and drive shafts
  • Mechanical gearbox
  • Automatic gearbox
  • Chassis, running gear
  • Front suspension
  • Rear suspension
  • Steering
  • Brake system
  • Body and interior
  • Exterior (external elements)
  • Interior (internal elements)
  • Doors, locks and windows
  • Heating and air conditioning
  • Electrical equipment
  • Equipment and devices
  • Power devices
  • Airbags
  • Electrical circuits
Peugeot 306 (1993-2002) 
  • General information
  • Introduction to manual
  • Specifications
  • Gasoline engine
  • Engine repair
  • Lubrication system
  • Cooling system
  • Fuel injection
  • Ignition system
  • Diesel engine
  • Engine repair
  • Lubrication system
  • Cooling system
  • Fuel injection
  • Transmission
  • Clutch
  • Gearbox
  • Drive shafts
  • Chassis, running gear
  • Steering system
  • Front suspension
  • Rear suspension
  • Brake system
  • Electrical equipment
  • Power devices
  • Electrical circuits
Peugeot 305 (1977-1989) 
  • General information
  • Maintenance
  • Power unit
  • Gasoline engines
  • Diesel engines
  • Cooling system (gasoline)
  • Cooling system (diesel)
  • Fuel system (gasoline)
  • Fuel system (diesel)
  • Ignition system
  • Transmission
  • Clutch
  • Mechanical gearbox BB8
  • Mechanical gearbox BE1
  • Automatic gearbox ZF4
  • Shafts, hubs and wheels
  • Chassis, running gear
  • Brake system
  • Car suspension
  • Steering
  • Body and interior
  • Exterior (external elements)
  • Interior (internal elements)
  • Electrical equipment
  • Equipment and devices
  • Headlights and lighting
  • Power devices
  • Electrical circuits
  • Wiring diagrams (diesel)
PeugeotBook.ru © 2018–2026 | Mobile version | Sitemap: EN BG BY UA RS HR RO PL SK HU | Write message | Site search | Add to bookmarks | Peugeot owners
106 (1991-2003) | 206 (1998-2012) | 207 (2006-2014) | 305 (1977-1989) | 306 (1993-2002) | 307 (2001-2008) | 405 (1987-1997) | 406 (1995-2004) | 605 (1989-2000) | Partner-I (1996-2008) | Eurovans-807 (2002-2014) | Eurovans-806 (1994-2002) | J5 (1981-1993) |
Cookies are used to ensure the correct display of pages on the site.