



Table of contents: Checking flatness 🠇 Checking the valve protrusion height 🠇 Checking cylinder head bolts before…🠇 Selecting a cylinder head gasket 🠇
Note: After turning off the ignition, wait 15 minutes before disconnecting the battery (to ensure that the "learning" results of the various computers are remembered).
Disconnect the battery.
Remove the accessory drive belt.
Remove:
- timing belt;
- fuel filter;
- diesel fuel filter support;
- exhaust gas recirculation solenoid valve;
- injectors;
- integrated air intake system;
- catalytic converter.
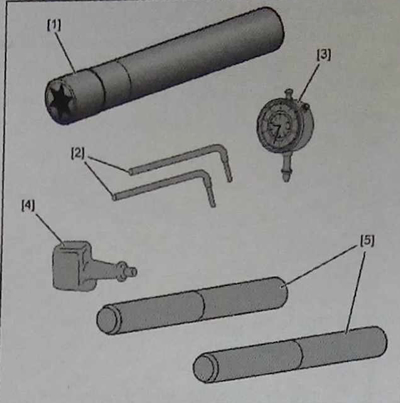
Recommended accessories:
1 - head for cylinder head bolt 0185;
2 - auxiliary levers for separating the head from the cylinder block 0188-L;
3 - indicator 1504;
4 - support for pointer indicator 0110;
5 - device for installing the camshaft in the correct position 0194-N.
Remove the turbocharger and generator.
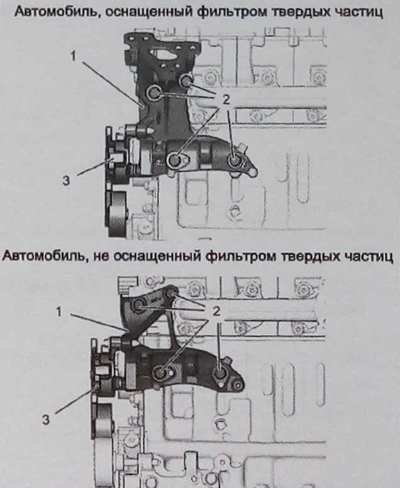
Remove the dynamic tensioner roller (3), unscrew the bolts (2) and remove the multifunctional support (1).
Remove:
- vacuum pump;
- coolant outlet block;
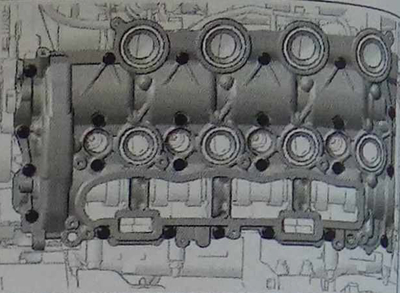
- mounting bolts and valve cover;
- sealing ring.
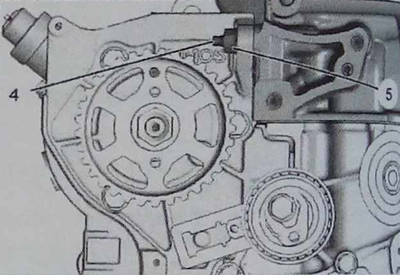
Unscrew the nut (5).
Remove the upper mounting stud (4) of the high-pressure fuel pump using two nuts or a FACOM puller.
Remove the brackets with their retainer (observe the position of each element).
Using the tool [1], loosen the cylinder head mounting bolts (in the order given). Remove the cylinder head using tool [2].
![Using the tool [1], loosen the cylinder head mounting bolts (in the order given). Remove the…](https://www.peugeotbook.ru/img/p200/0578.jpg)
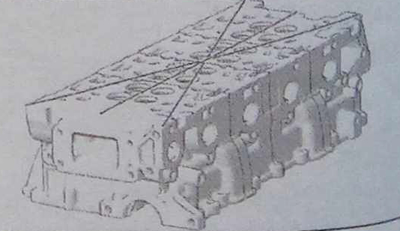
Checking flatness
Check the flatness of the cylinder head (according to the diagram).
Maximum permissible deformation: 0.05 mm.
Checking the valve protrusion height
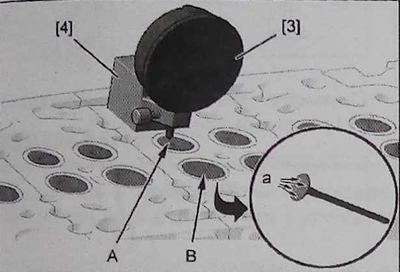
Check the valve protrusion in relation to the cylinder head plane (check points "a"):
- outlet valve "A" - 0.85 mm;
- inlet valve "B" - 0.7 mm.
Note: Calculate the average value based on the four results obtained (see tables "Data for adjustments and control of the mechanical part of gasoline and diesel engines").
Checking cylinder head bolts before reusing them
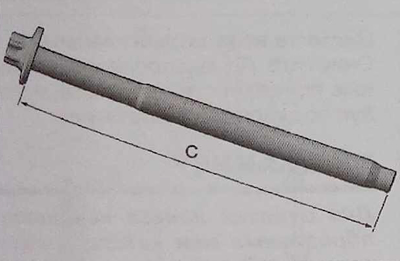
Measure the length of the reused bolts: the "C" dimension should be less than 149 mm.
Checking cylinder head bolts before reusing them
Measure the length of the reused bolts: the "C" dimension should be less than 149 mm.
Selecting a cylinder head gasket
Select the appropriate gasket (see tables "Data for adjustments and control of the mechanical part of gasoline and diesel engines").
Install tools [3], [4]. Remove the crankshaft locking pin.
Place the end of the indicator rod on the top surface of the cylinder block.
Set the dial indicator to zero.
Place the end of the indicator on one of the control points (control point "c").
Turn the crankshaft clockwise until the piston reaches top dead center, but does not go beyond it.
Calculate the obtained value.
Set the end of the indicator to one of the control points (control point "B").
Calculate the obtained value.
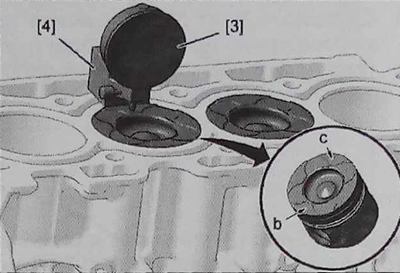
Calculate the average value based on the two results obtained.
Perform similar operations for other cylinders.
Note: Maximum difference between two pistons: 0.1mm.
Tap the threads of the cylinder head mounting holes. Clean the surface of the block gasket.
Fix the flywheel.
Make sure the pins are present (in area "d").
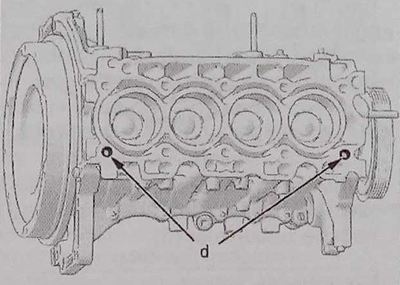
Install a new cylinder head gasket of the predetermined thickness (observing the correct installation direction). Install the cylinder head.
Clean the threads of the cylinder head bolts with a brush.
Install the cylinder head mounting bolts back into place, after applying some grease "MOLYKOTE G RAPID PLUS" on threads and under bolt heads.
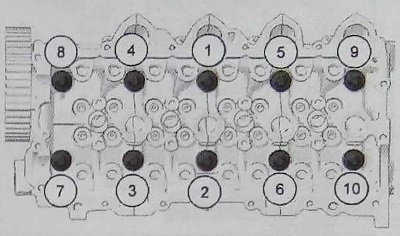
Tighten the cylinder head bolts in the sequence shown (using device 1).
Clean the connecting surface with solvent "DECAPLOC — DECAPJOINT".
Note: Do not use abrasive or sharp tools or instruments.
Apply a thin layer of sealing paste around the perimeter of the surface to be joined.
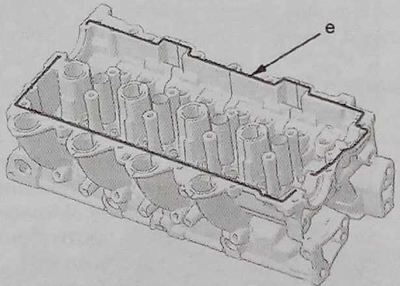
Caution: Protect the oil supply channels of the hydraulic timing chain tensioner from sealing paste (in area "e").
Retaining clips are provided to hold the stops in place when installing the shaft bearing cover housing. Install a latch in area "f" between the rocker arms (7) and hydraulic tappets (b) to hold them in place during installation of the cylinder head cover.
Make sure the tappets rotate freely in the cylinder head.
Install the roller rocker arm retaining clip onto the tappets.
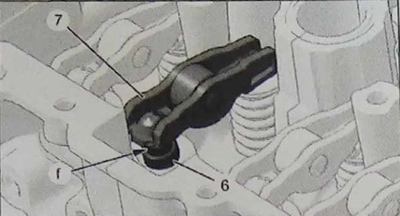
Install the valve drive levers together with their hydraulic tappets, observing their initial position.
Note: Before installing the valve cover, check that the roller rocker arms on the valve lifters are operating correctly.
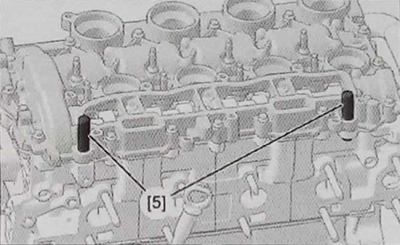
Install the fixtures [5] in place.
Install the valve cover onto the cylinder head.
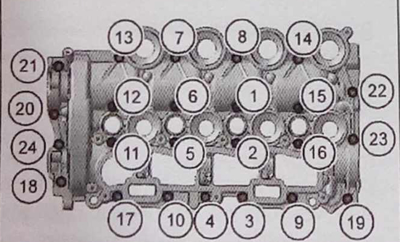
Tighten and then tighten the mounting bolts one by one in the specified order (see table "Tightening torques for mechanical parts of petrol and diesel engines").
Install the parts in reverse order.