



Caution: After turning off the ignition, wait 15 minutes before disconnecting the battery to ensure that the learning results of the various ECUs are remembered.
Before starting any work on the exhaust system, wait until its components have cooled down.
Removal
Place the car on a lift.
Drain the cooling system circuit (see the corresponding operation).
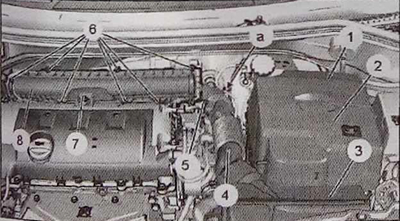
Remove the battery cover (2).
Disconnect the battery.
Remove:
- front bumper (see the corresponding operation);
- front optical units (see the corresponding operation);
- drive shafts (see the corresponding operation);
- gearbox controls (see the corresponding operation).
Remove the protective cover (1).
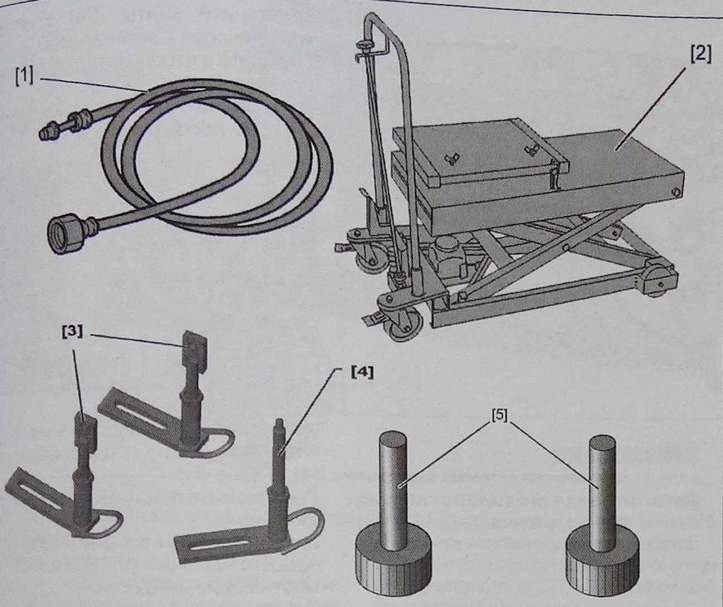
Special devices:
1 - tube with tip for valve "SHRADER" 0141-T1;
2 - lifting table 0004;
3-support set 0005-S;
4 - Engine support 0005-G;
5 - plugs for quick-release connections 1520.
Release the vacuum tube (in area "a").
Remove the air resonator (3).
Loosen the air supply tube mounting bolt (5).
Remove the air supply tube (4).
Loosen the screws (6), (7) securing the air cleaner cover.
Remove the air filter cover (8).
Disconnect the connectors (engine ECU power supply harnesses).
Remove:
- Engine control unit (see the corresponding operation);
- battery (see the corresponding operation).
Disconnect the harnesses and remove the battery tray.
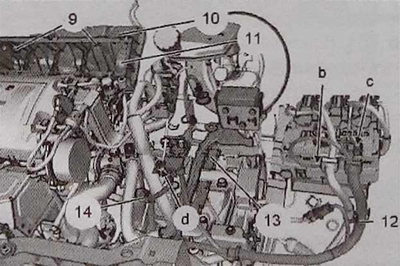
Wrap the bolts (9).
Remove the intermediate support (10) and the air filter housing (11).
Caution: Install plugs to close the air inlet to the intake manifold.
Disconnect:
- electrical wiring harness (12) from the terminal block (in zones " B " and "c");
- engine wiring harness (14) (in zone "d").
Remove the electrical harness bracket (13).
Caution: Release the fuel pressure by connecting the device [1] to the "SHRADER" 0141-T1 valve and collect the drained fuel in a collector (in zone "e").
Before disconnecting, clean all low pressure circuit connections.
Disconnect fuel pipes (15) and (16).
Caution: Close the openings of the fuel supply and return pipes (15) and (16) using the tool [5].
![Caution: Close the openings of the fuel supply and return pipes (15) and (16) using the tool [5].](https://www.peugeotbook.ru/img/p200/0642.jpg)
Disconnect:
- transmission electrical ground cable connected to the chassis;
- brake booster vacuum line.
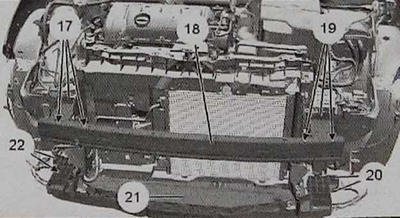
Unscrew bolts (17) and (19) and remove the upper radiator cross guard (18).
Unscrew bolts (20) and (22) and remove the lower radiator cross guard (21).
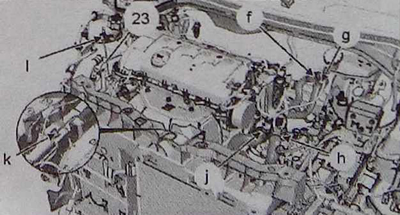
Disconnect the degassing tube from the radiator (23) (in zones "I" and "k"). Remove the bleeding tube.
Disconnect the heater inlet and outlet hoses (in areas "f" and "d").
Disconnect the lower and upper radiator hoses (at areas "h" and "j").
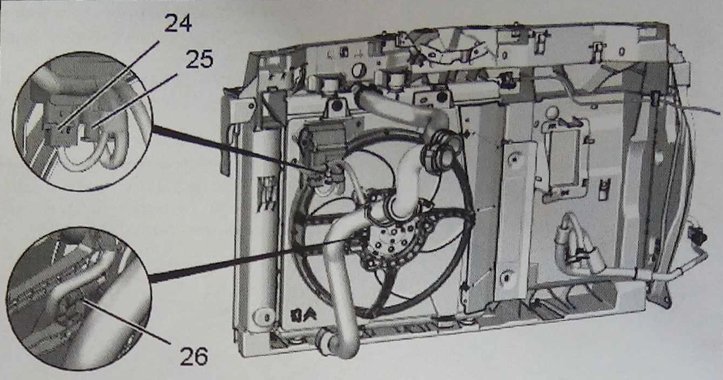
Disconnect electrical connectors (24) and (25) (electric fan relay) and connector (26) (engine cooling fan unit).
Disconnect the hood lock drive cable.
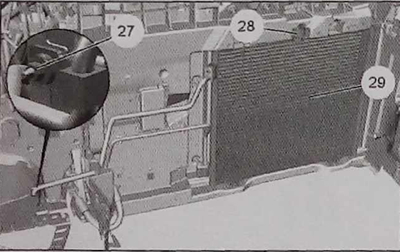
Remove the air conditioner condenser tube fastening (27).
Loosen and remove the air conditioner condenser mount (28). Slide forward and secure the air conditioner condenser (29) with a clamp, without damaging the tubes.
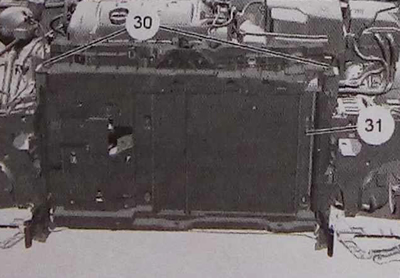
Remove fasteners 30 and the cooling system radiator (31).
Disconnect the exhaust system mounting clamp from the hose.
Release the exhaust system from the front and intermediate mountings.
Caution: Protect the rear bumper from damage when in contact with the exhaust muffler.
Remove:
- front frame (32);
- subframe extensions (33), (37):
- safety beam (34);
- stabilizer bar (35);
- fastening (36) of the active support to the gearbox.
Remove the accessory drive belt (see the corresponding operation).
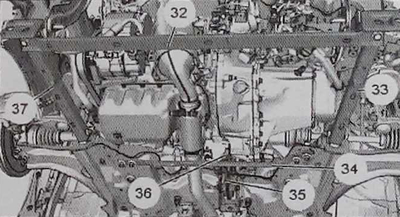
Move and tie the exhaust pipe (on the left side of the car)
Note: This operation is necessary to remove the engine and gearbox assembly.
Unscrew the bolts (40).
Remove and move aside the hydraulic clutch drive mechanism (41).
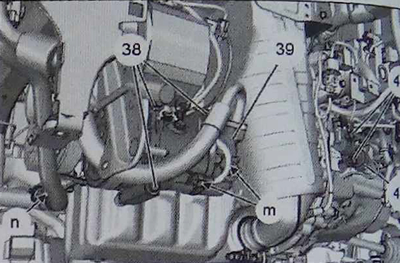
Disconnect the air conditioning compressor electrical connectors (39) (in zone "m").
Remove the screws (38) securing the air conditioning compressor.
Move aside and secure the compressor (39).
Disconnect the water supply pipe and water pump (in area "n").
You can find the original on the resource (www.PeugeotBook.ru)
Install fixtures [3] (in zones "p" and "q") and fixture [4] (in zone "r").
Position the lifting table [2] over the engine.
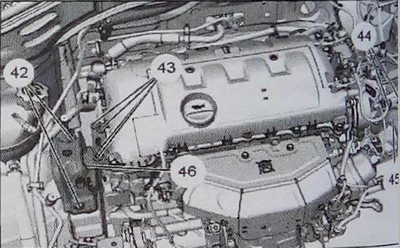
Secure the fixtures [3], [4] to the lifting table [2] (if necessary, lift the device). Unscrew the bolts (42), (43) and remove the upper right engine support (46).
Loosen the bolts (44) and remove the gearbox support (45).
Caution: Make sure that power unit No. touches the body elements.
Remove the engine and gearbox assembly (through the bottom of the car).