



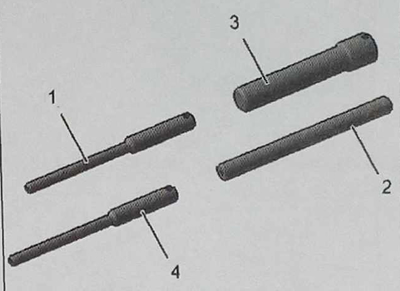
Recommended accessories:
1 - crankshaft lock 0194-A;
2 - pin for locking the camshaft 0194-B;
3 - flywheel rotation lock 0194-C;
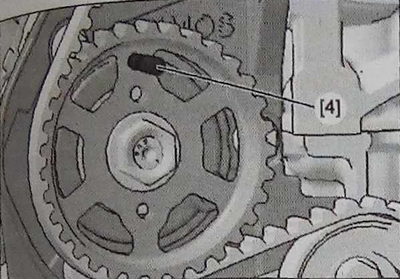
4 - calibration pin of high pressure fuel pump pulley 0194-A.
Remove:
- front right wheel;
- front right mudguard;
- accessory drive belt (see the corresponding operation).
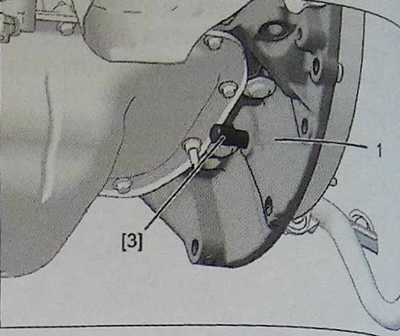
Insert tool 3 into the hole located on the crankshaft main journal bed block (1).
Remove the accessory drive pulley.
Move the electrical wiring harness away from the upper timing case.
Remove the lower and upper timing belt covers.
Remove the engine speed sensor (2).
 |
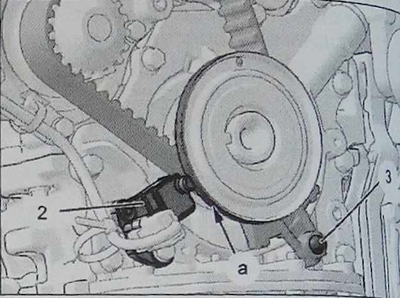 |
Note: Magnetic track "a" must not show any signs of damage and magnetized objects must not be brought near it, otherwise the crankshaft pulley must be replaced.
Remove the anti-slip angle bracket bolt (3). Replace the attachment drive pulley bolt.
Remove device 3.
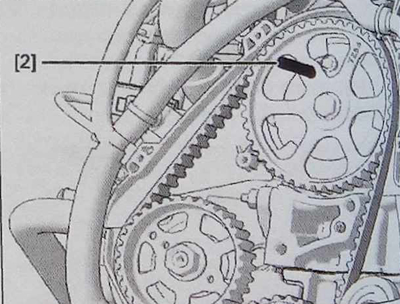
Turn the crankshaft clockwise using the accessory drive bolt.
Set the camshaft to the check point using tool 2.
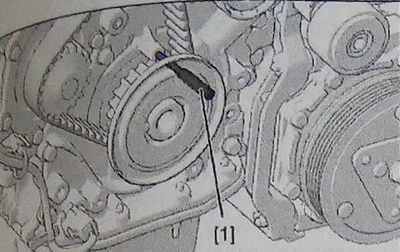
Secure the crankshaft pulley with a pin using tool 1.
Install the fuel injection pump pulley at the check point using tool 4.
 |
 |
Remove:
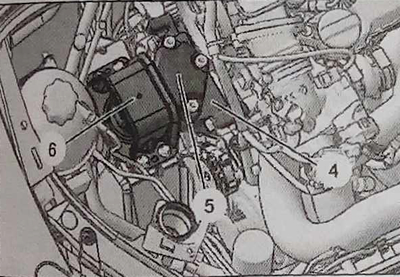
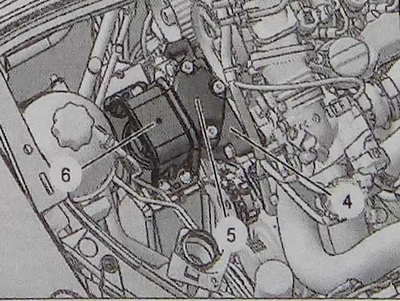
- assembly of engine support (5) and travel limiter fixing bracket (6);
- right intermediate engine support (4).
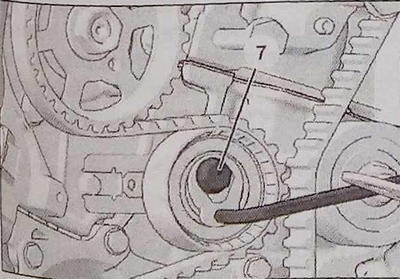
Loosen the tension roller mounting bolt (7), holding it in a tensioned position using a hex key.
Remove the timing belt.
Installation
Note: The pistons should be at half stroke during adjustment at the check point.
Note: The key must be at the top (vertical position): 90° to the position at the control point for overlapping the intake and exhaust valves in cylinder No.1.
Check the tightness of the sealing bushings at the oil pump and camshaft level. Make sure that the rollers and coolant pump rotate freely without gaps or scoring.
[Source of the article is website: Peugeotbook.ru]
Also make sure that the rollers do not make noise and/or do not spray grease.
Also check the surface condition of these rollers.
Install and tighten well in the following order:
1. Timing belt pulley.
2. Guide roller.
3. Camshaft pulley (making sure that the belt is pressed tightly against the roller).
4. High pressure pump.
5. Cooling system pump.
6. Tension roller.
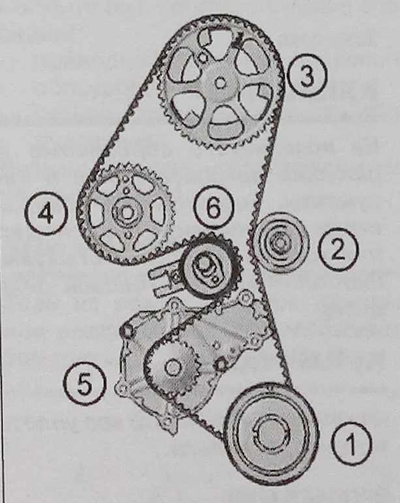
Note: Make sure the back of the belt is pressed tightly against the idler pulley and that the belt branch between the crankshaft pulley and the camshaft pulley has only 33 free teeth.
Loosen the tension roller bolt (7).
Use the hex key to move the tensioning roller pointer (8) to the middle of the control area "B". by turning the tensioner counterclockwise.
Tighten the tension roller bolt (7).
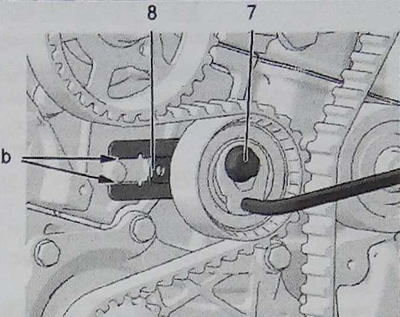
Remove tools 1 and 2. Make sure that the timing pulley is pressed tightly against the crankshaft, turn the crankshaft 10 revolutions.
Install accessories 1 and 2.
Make sure that the index (8) on the dynamic tensioner is correctly positioned, otherwise repeat the timing belt installation operation.
Remove tools 1 and 2.
Reinstall:
- engine stop mechanism bracket (3);
- speed sensor (2);
- right intermediate engine mount (4);
- assembly of engine support (5) and travel limiter fixing bracket (6);
- lower casing of the timing mechanism;
- tool 3 for flywheel;
- attachment drive pulley;
- then perform a 180° angle tightening.
Remove device 3.
Install the accessory drive belt.
Proceed in the reverse order of removal.