



- a. Generator and its drive belt.
- b. Oil filler tube and crankcase ventilation tubes (having previously memorized their location).
- c. Intake manifold and carburetor.
- mr. Clutch.
- d. Oil filter (be prepared for some oil to spill when doing this).
- e. Manifold and hoses of the cooling system (having previously memorized their location).
- f. Oil pressure relay.
- z. Power steering pump (if any).
36. The exhaust manifold can either be removed at this stage or left in place so that it can be held while removing the cylinder head.
37. Unscrew the bolt and remove the crankshaft pulley. While removing the bolt, the flywheel ring gear should be blocked to prevent the crankshaft from turning.
38. Remove the camshaft drive belt covers, paying attention to the size of the bolts located where.
39. Unscrew the bolts and remove the camshaft cover.
40. Turn the crankshaft using the flywheel so that a 10 mm diameter rod can be inserted into the hole in the camshaft sprocket and then into the recess in the timing mechanism. The pistons are now at mid-stroke so they can't hit the valves.
41. Loosen the camshaft drive belt tensioner by loosening its nuts (two in front and one behind the front plate) and, taking hold of the square shaft of the tensioner cam, move the cam to a horizontal position.
42. Remove the camshaft drive belt, being careful not to twist it. If you are not going to change the belt, you should remember how it was positioned and in which direction it moved.
43. Loosen the bolts and remove the drive belt tensioner.
Information posted on the website: www.PeugeotBook.ru
44. Remove the side belt shields and crankshaft sprocket. Pull out the woodruff key.
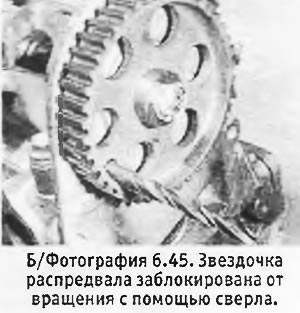
45. Unscrew the bolt and remove the camshaft sprocket. While removing the bolt, the sprocket can be held from turning by inserting a 10mm diameter rod into the mounting hole on the sprocket (see photo).
46. Loosen the bolts and remove the engine support bracket, camshaft sprocket support shield and water pump.
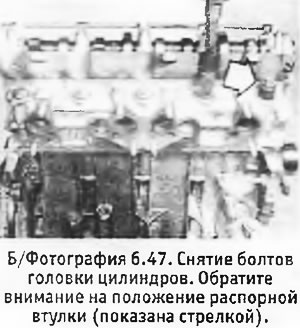
47. Loosen the 10 cylinder head bolts in the reverse order of tightening (see Figure 12.4). Remove the bolts with washers, paying attention to the spacer sleeve under bolt No. 8 (just above the water pump) (see photo).
48. Remove the cylinder head. If it does not come off, insert 2 metal bolts into the bolt holes and try to rock the head. Do not hit the head or attempt to pry it off with a lever. After removing the head, move the 2 mounting pins to the side (if they fall out).
49. Install temporary cylinder liner clamps if you are not going to remove the pistons with liners. Turn the engine over to remove the bolts and flywheel. It has special mounting slots so that it can only be installed in one position.
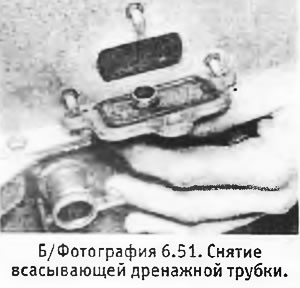
50. Disconnect the suction drain tube from the side of the pan (see photo).
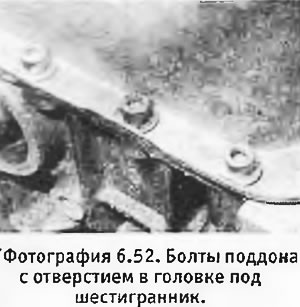
52. Unscrew the bolts and remove the pan. Note the position of the 3 Allen head bolts (see photo).
53. Unscrew the bolts securing the oil pump, paying attention to the special centering bolt at the rear.
54. Loosen the bolts and remove the oil seal housing plate.
55. Lower the oil pump into the engine so that its drive chain can be removed. Pull out the pump and remove the spacer sleeve, mounting pins and chain.
56. Remove the oil pump sprocket from the crankshaft and pull out the woodruff key.
57. Remove the connecting rod cap bolts and push the pistons out through the top of the cylinder liners. (If you are not going to replace the pistons, before removing them you will need to remove the ledge at the top of the sleeves using a special tool or scraper). Mark the pistons, connecting rods and connecting rod caps so that they are not mixed up during assembly.
58. Unscrew main cover bolts NN 1, 2, 4 and 5. Also unscrew 2 nuts and 2 side bolts from the central cover. Make marks on the lids to indicate their relative positions and remove them. If you are not going to replace the bearing shells, they should be left in the caps. Remove the thrust washer halves from both sides of main cap No. 2.
59. Remove the oil seal from the flywheel end of the crankshaft.
60. Remove the crankshaft from the crankcase. Remove the upper halves of the main bearing shells and the two remaining halves of the thrust washers.
61. If you are not going to change the cylinder liners, make alignment marks on them, loosen the clamps and remove the liners. Engine disassembly is complete.