



Table of contents: Engines with a metal canister type…🠇 Engines with a disposable cartridge…🠇 All engines 🠇
Note: A suitable square-section wrench may be required to undo the sump drain plug on some models. These wrenches can be obtained from most motor factors or your Peugeot dealer.
1. Frequent oil and filter changes are the most important preventative maintenance procedures which can be undertaken by the DIY owner. As engine oil ages, it becomes diluted and contaminated, which leads to premature engine wear.
2. Before starting this procedure, gather together all the necessary tools and materials. Also make sure that you have plenty of clean rags and newspapers handy, to mop up any spills. Ideally, the engine oil should be warm, as it will drain better, and more built-up sludge will be removed with it. Take care, however, not to touch the exhaust or any other hot parts of the engine when working under the vehicle. To avoid any possibility of scalding, and to protect yourself from possible skin irritants and other harmful contaminants in used engine oils, it is advisable to wear gloves when carrying out this work. Access to the underside of the vehicle will be greatly improved if it can be raised on a lift, driven onto ramps, or jacked up and supported on axle stands (see "Jacking and Vehicle Support"). Whichever method is chosen, make sure that the vehicle remains level, or if it is at an angle, that the drain plug is at the lowest point.
3. Slacken the drain plug about half a turn; on some models, a square-section wrench may be needed to slacken the plug (see illustration). Position the draining container under the drain plug, then remove the plug completely. If possible, try to keep the plug pressed into the sump while unscrewing it by hand the last couple of turns. Recover the sealing washer from the drain plug.
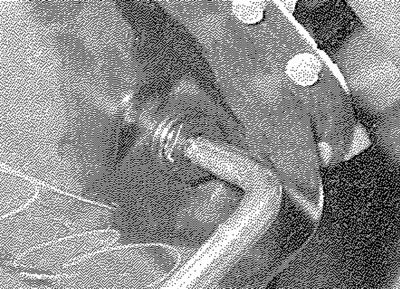
3.3. Slackening the sump drain plug with a square-section wrench
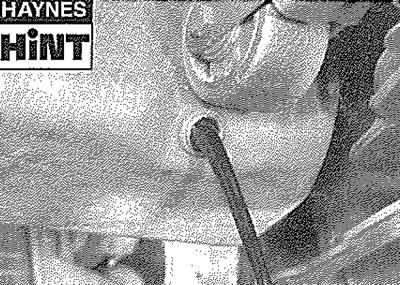
As the drain plug releases from the threads, move it away sharply so the stream of oil issuing from the sump runs into the container, not up your sleeve!
4. Allow some time for the old oil to drain, noting that it may be necessary to reposition the container as the oil flow slows to a trickle.
5. After all the oil has drained, wipe off the drain plug with a clean rag, and fit a new sealing washer. Clean the area around the drain plug opening, and refit the plug. Tighten the plug securely.
6. Move the container into position under the oil filter, which is located on the front facing side of the cylinder block.
7. On early engines, the oil filter is of the disposable metal canister type screwed into the front of the cylinder block. However, on later engines, the oil filter consists of a separate disposable cartridge contained in a plastic housing. The housing is located on the front of the cylinder block adjacent to the radiator hoses (see illustration). Proceed as follows according to filter type.
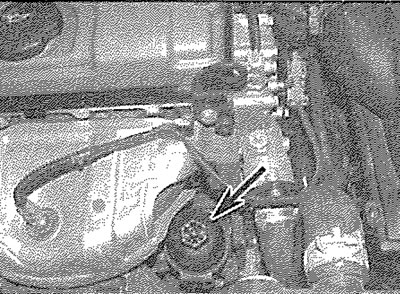
3.7. Cartridge type oil filter housing location (arrowed) - later engines
Engines with a metal canister type filter
8. Using an oil filter removal tool if necessary, slacken the filter initially, then unscrew it by hand the rest of the way (see illustration). Empty the oil in the old filter into the container. To ensure that the old filter is completely empty before disposal, puncture the filter dome in at least two places and allow any remaining oil to drain through the punctures and into the container.
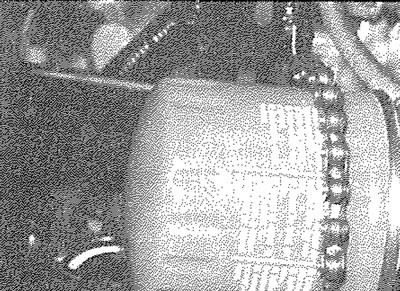
3.8. Using an oil filter removal tool to slacken the canister type oil filter
9. Use a clean rag to remove all oil and dirt from the filter sealing area on the engine. Check the old filter to make sure that the rubber sealing ring hasn't stuck to the engine. If it has, carefully remove it.
10. Apply a light coating of clean engine oil to the sealing ring on the new filter, then screw it into position on the engine. Tighten the filter firmly by hand only - do not use any tools.
Engines with a disposable cartridge type filter
11. Using a 27 mm socket or spanner, slacken the oil filter cover initially, then unscrew it by hand the rest of the way. As the cover is unscrewed, the plunger tube located internally in the housing will be lifted off its seat allowing the oil remaining in the housing to drain back into the sump (see illustration).
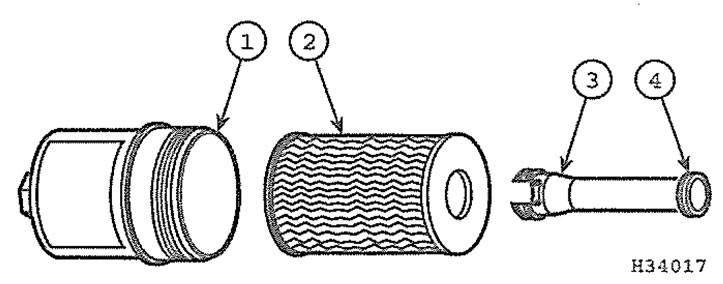
3.11. Cartridge type oil filter components - later engines 1. Oil filter cover; 2. Oil filter cartridge; 3. Plunger tube; 4. Plunger tube O-ring
12. Lift the filter cover off the housing and remove the filter cartridge. Withdraw the plunger tube from the oil filter cover. Note that a new plunger tube should always be fitted when renewing the oil filter. The tube should be supplied together with the new oil filter, but if this is not the case, obtain a new plunger tube from your Peugeot dealer.
13. Use a clean rag to remove all oil and dirt from the oil filter housing and clean the filter cover inside and out using a suitable solvent.
14. Place the new oil filter on the filter housing then insert the new plunger tube into its location in the cover. Lightly lubricate the seal in the filter cover and the O-ring on the end of the plunger tube with clean engine oil.
15. Screw the filter cover onto the housing and tighten it to the specified torque.
All engines
16. Remove the old oil and all tools from under the car. Lower the car to the ground (if applicable).
17. Remove the dipstick, then unscrew the oil filler cap from the cylinder head cover. Fill the engine, using the correct grade and type of oil (see "Weekly checks"). An oil can spout or funnel may help to reduce spillage. Pour in half the specified quantity of oil first, then wait a few minutes for the oil to run to the sump. Continue adding oil a small quantity at a time until the level is up to the lower mark on the dipstick. Adding approximately 1.5 litres will bring the level up to the upper mark on the dipstick. Refit the filler cap.
18. Start the engine and run it for a few minutes; check for leaks around the oil filter seal and the sump drain plug. Note that there may be a delay of a few seconds before the oil pressure warning light goes out when the engine is first started, as the oil circulates through the engine oil galleries and the new oil filter before the pressure builds up.
19. Switch off the engine, and wait a few minutes for the oil to settle in the sump once more. With the new oil circulated and the filter completely full, recheck the level on the dipstick, and add more oil as necessary.
20. Dispose of the used engine oil and filter safely, with reference to General repair procedures at the rear of this manual. Do not discard the old filter with domestic household waste. The facility for waste oil disposal provided by many local council refuse tips generally has a filter receptacle alongside.