
7.8L and 1.9L XUD Series Engines
1. Release the clip and disconnect the air intake line from the top of the filter housing. Loosen the clamps and remove the air duct connecting the inlet to the rear of the filter housing.
2. Release the clips and remove the filter housing cover (pic. 20.2, a, b).
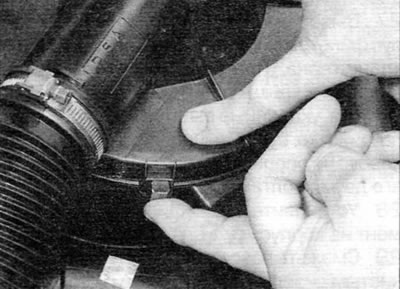
Pic. 20.2, a. Release the clips fixing the cover on the filter housing...
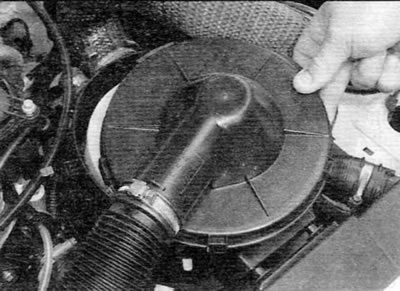
Pic. 20.2b....then remove the cover...
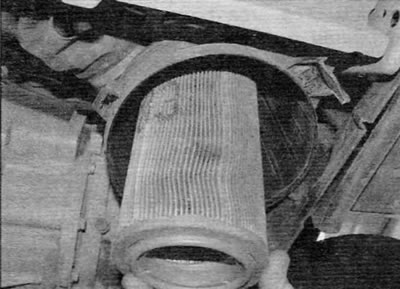
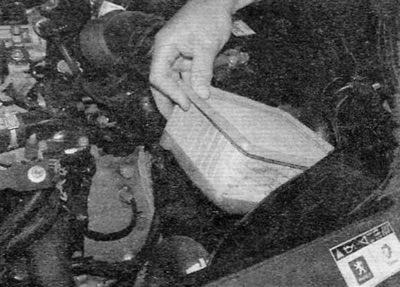
3. Remove the filter element from the housing (pic. 20.3).
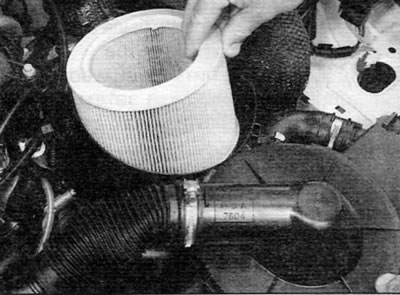
Pic. 20.3....and remove the filter element (XUD series motors)
4. Wipe the inside of the filter housing clean and install the new filter element, orienting it correctly.
5. Install the cover and fix it with clips.
6. Connect the intake air lines and secure with clamps.
Engines 1.9 l DW series
Models with WJZ engine
7. Follow the steps above for XUD series motors.
Models with WJY engine built before September 2002
8. Access to the filter element is possible from under the front of the car. If necessary, fully apply the parking brake, jack up the front of the vehicle and securely jack it up for easier access (see «Lifting and placing the car on supports»).
9. Release the clips and remove the cover from the base of the air filter housing (pic. 20.9).
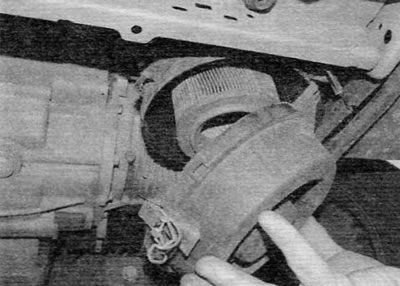
Pic. 20.9. Release the clips and remove the cover from the base of the air filter housing (early DW series engines)
10. Remove the filter element from the housing (pic. 20.10).
Pic. 20.10. Remove the filter element from the housing (early DW series engines)
11. Wipe the inside of the filter housing clean and install a new filter element,
12. Place the cover on the housing base and secure it with clips. Lower the car (if applicable).
Models with WJY engine manufactured after September 2002
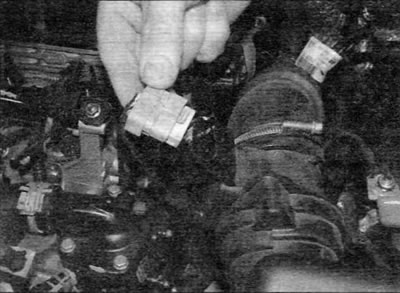
13. Disconnect the electrical connector for the air flow sensor located on the side of the air filter cover (pic. 20.13).
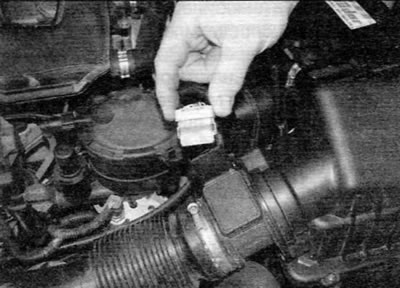
Pic. 20.13. Disconnect the air flow sensor electrical connector (late DW series engines)
14. Turn out screws of fastening of a cover to the case of the air filter (pic. 20.14).
Pic. 20.14. Remove the screws securing the cover to the air filter housing (late DW series engines)
15. Remove the cover and remove the filter element from the housing (pic. 20.15).
Pic. 20.15. Remove the cover and remove the filter element (late DW series engines)
16. Wipe the inside of the filter housing clean and install the new filter element, orienting it correctly.
17. Install the cover on the filter housing and fix it with screws.
18. Dock an electric socket of the gauge of the expense of air.
Engines 2.0 l
19. Disconnect the electrical connector of the air flow sensor located on the air filter cover (pic. 20.19).
Pic. 20.19. Disconnect the air flow sensor electrical connector (engines 2.0 l)
20. Release the clamp and disconnect the intake air line from the air flow sensor (pic. 20.20).
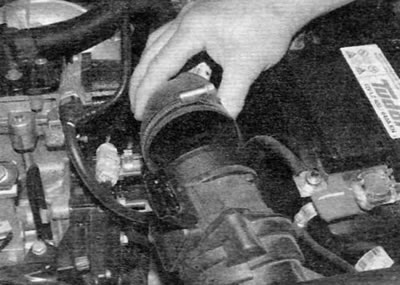
Pic. 20.20. Release the clamp and disconnect the intake air line from the air flow sensor (engines 2.0 l)
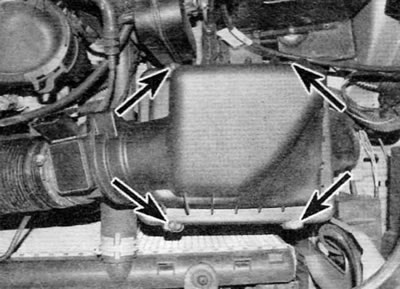
21. Turn out two screws of fastening of a cover to the case of the air filter. Lift the right side of the cover and unhook the two left locking tabs from the air filter housing (pic. 20.21, a, b).
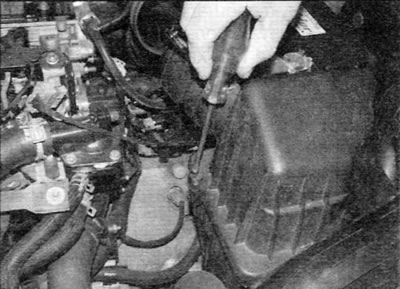
Pic. 20.21 a. Remove the two screws securing the cover to the air filter housing...
Pic. 20.21, b.... lift the cover and unhook the two locking tabs from the air filter housing (engines 2.0 l)
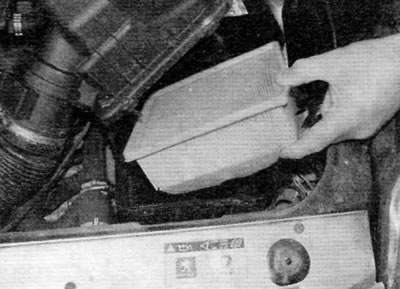
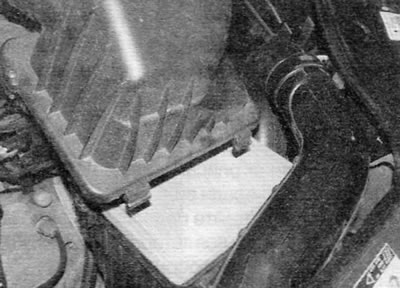
22. Remove the filter element from the housing (pic. 20.22).
Pic. 20.22. Remove the filter element from the housing (engines 2.0 l)
23. Wipe clean the inside of the filter housing and install a new filter element, orienting it correctly.
24. Place the cover on the filter housing and fasten it with screws.
25. Connect the intake air line to the air flow sensor and dock the electrical connector.