



Table of contents: Corrector installed on the headlight…🠇 Corrector installed on the headlight…🠇 Corrector installed on the…🠇
Headlight with corrector
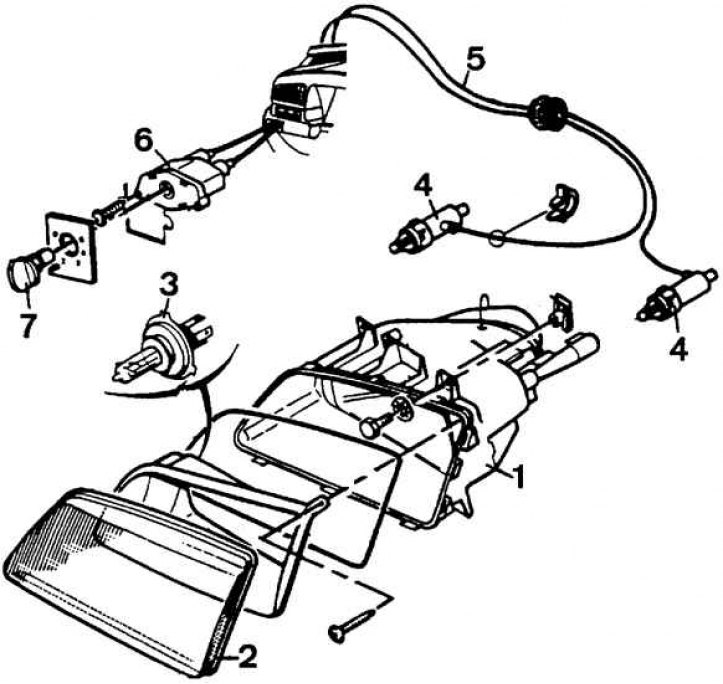
1 – headlight housing, 2 – headlight diffuser glass, 3 – bulb, 4 – cylinder, 5 – tubes, 6 – corrector, 7 – control handle
Headlight adjustment elements
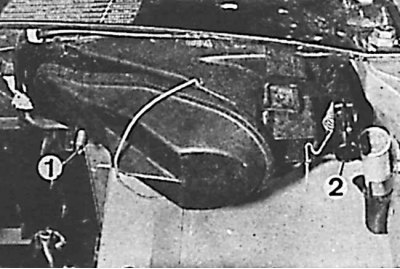
1 – horizontal adjustment screw
2 – vertical adjustment screw
Correct adjustment of headlights is of great importance for traffic safety. Precise adjustment is only possible with a special device.
Before adjusting the headlights, the following conditions must be met:
- the tire pressure must be correct;
- the car must be fully fueled;
- an unladen vehicle must have a front seat load of 75 kg (one person);
- rock the car vigorously several times to ensure that the front suspension shock absorbers are properly installed;
- if available, set the instrument cluster light range control to 0.
The adjustment is made by rotating the regulator located at the rear of the headlight. The outer regulator changes the direction of the light flow in height, and the inner regulator – in horizontal direction.
Each headlight is equipped with a headlight beam corrector, which allows you to adjust the headlight beam depending on the vehicle load.
Corrector installed on the headlight (models before 1992)
Position 1 – no load.
Position 2 – medium load.
Position 3 – maximum load.
Corrector installed on the headlight (models since 1993)
Position 1 – front seats occupied.
Position 2 – all seats and luggage compartment are occupied.
The source is located on the website www.peugeotbook.ru
Position 3 – driver and luggage compartment.
Corrector installed on the instrument panel
Position 0 – front seats occupied.
Position 1 – all seats are occupied.
Position 2 – all seats and luggage compartment are occupied.
Position 3 – driver and luggage compartment.