



Table of contents: Draining the cooling system 🠇 Filling the cooling system 🠇
Radiator drain pipe
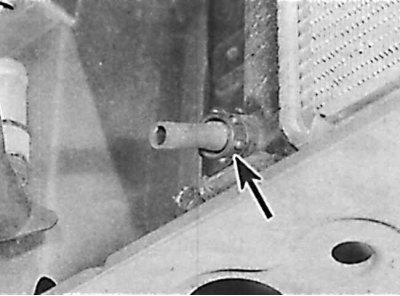
The radiator drain pipe is indicated by the arrow.
Draining the cooling system
Warning! Drain the coolant only when the engine is cold. The coolant is very toxic.
1. Remove the filler cap of the expansion tank by turning it clockwise until the first lock. Wait until the pressure in the system decreases, then press the cap down and turn it counterclockwise until the second lock, then remove it.
2. Place a suitable container under the left side of the radiator.
3. Unscrew the drain plug and drain the coolant.
 |
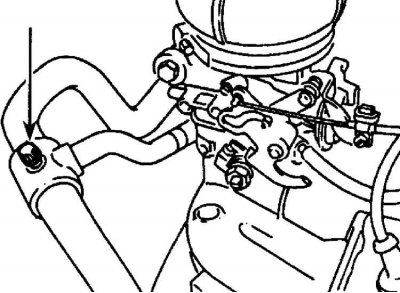 |
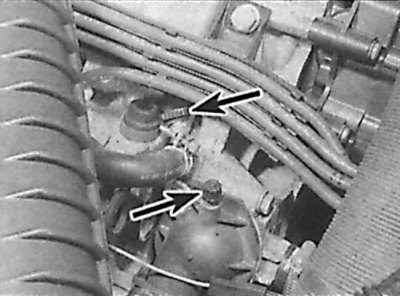
4. To completely and quickly drain the fluid from the cooling system, unscrew the air inlet screws. On all engines except the 1.4 L, the air inlet screws (indicated by arrows in the figure on the left) are located in the thermostat housing and casing. On 1.4L engines, the air intake screws (the screw is indicated by the arrow in the picture on the right) are located in the thermostat housing and in the coolant supply hose to the cylinder head.
5. Additionally, on 2.0L XU10J4 engines there is an air inlet screw located in the coolant supply hose at the rear of the cylinder head.
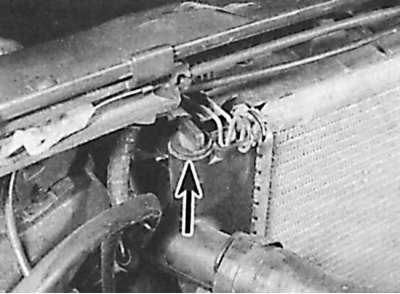
6. All models also have a screw (indicated by the arrow) air intake located in the upper left corner of the radiator.
7. Place the container back under the cylinder block drain plug, unscrew the plug and drain the fluid from the cylinder block.
 |
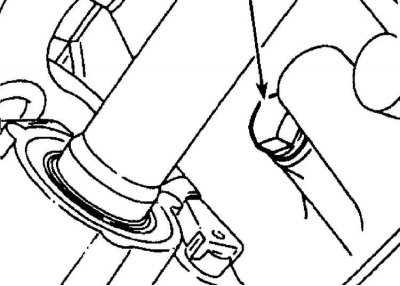 |
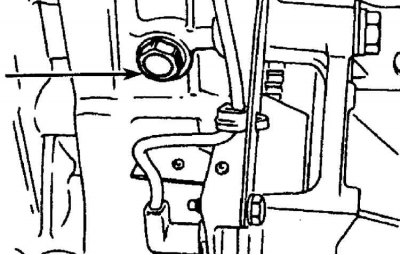
8. On 1.4L engines, the drain plug is located on the left front of the cylinder block (indicated by the arrow in the figure on the left)on 2.0L engines, the drain plug is located on the left rear of the cylinder block (indicated by the arrow in the figure on the right).
9. After draining is complete, flush the cooling system by directing a stream of clean water through the radiator and continue flushing until clean water begins to appear from the outlet of the lower radiator tank.
Filling the cooling system
1. Before filling the cooling system, make sure all hoses and clamps are in good condition. Note that the antifreeze mixture should be used all year round to prevent corrosion. Also check that the radiator cap and the cylinder block drain plugs are in place.
2. Remove the cap from the expansion tank.
3. Unscrew the screws supplying air to the cooling system.
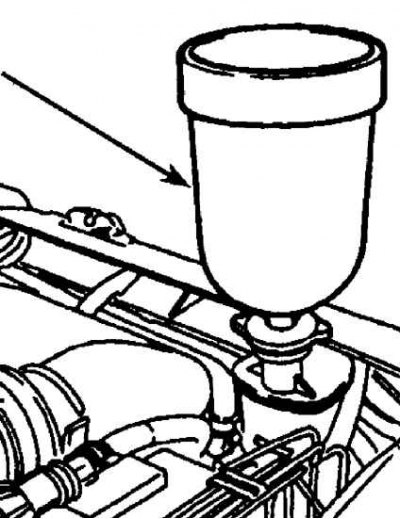
4. Install an additional tank (indicated by the arrow) onto the expansion tank and slowly fill the system. The additional tank should be installed on the expansion tank tightly, which will ensure that the highest points of the cooling system are filled. As the cooling system is filled with liquid, as soon as the coolant appears free of air bubbles from under the air supply screw, gradually, starting with the lower screws, tighten the screws.
5. The additional tank must be kept full throughout the entire system filling process.
6. After filling the cooling system, tighten all screws and install the cap on the expansion tank.
7. Start the engine and warm it up to operating temperature, then check the coolant level and, if necessary, bring it up to normal.