



Removal the timing belt (1.9 liter engines)
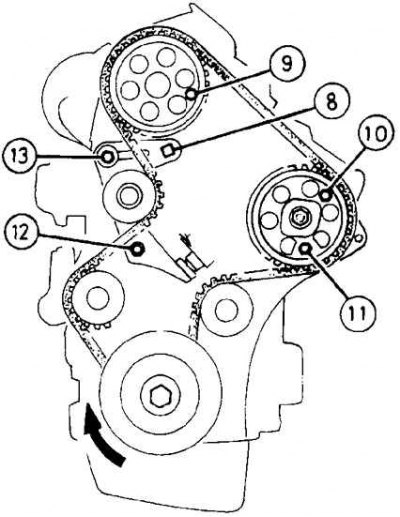
8. Square holes 10mm; 9, 10, 11. Timing mechanism mounting bolts; 12. Tensioner pivot point mounting nut; 13. Tensioner mechanism fixing bolt
The timing belt drives the camshaft, fuel pump, and water pump from the crankshaft pulley. If the timing belt breaks, the pistons and valves may collide, causing serious engine damage.
The timing belt should be changed at the specified interval or earlier if it has been contaminated with engine oil.
After removing the timing belt, check the condition of the water pump and its tightness (by coolant leaks).
Removal
Engines 1.9 liters
1. Install the timing mechanism and secure it with rods or bolts. Disconnect the negative terminal from the battery.
2. Remove the remaining timing belt covers.
3. Remove the right powertrain mount. Loosen the timing belt tensioner pivot point nut and fixing bolt, then turn the tensioner counterclockwise to release the belt tension and retighten the fixing bolt. If possible, use a 10 mm square-section bent wrench to turn the tensioner.
4. Mark the direction of rotation of the belt with an arrow and remove the belt from the pulleys.
2.1 liter engines
5. Install the timing mechanism and secure it with rods or bolts. Disconnect the negative terminal from the battery.
6. Remove the remaining timing belt covers.
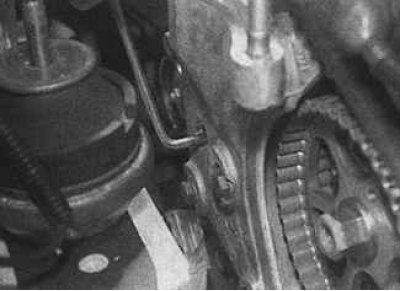
7. Loosen the timing belt tensioner pulley lock nut located to the left of the suspension mount.
 |
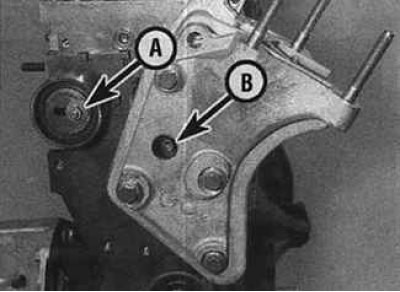 |
8. Using a 5mm offset wrench inserted through the hole in the suspension mount, loosen the timing belt tensioner clamp bolt (B) (A - lock nut).
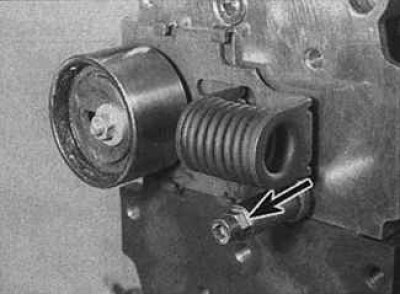
9. Using a 10mm wrench inserted through the same hole (indicated by the arrow), move the tensioning mechanism away by turning the shaft clockwise.
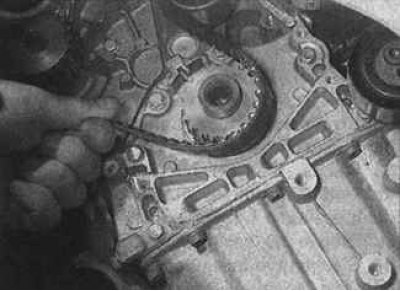
10. Mark the direction of rotation of the belt with an arrow and remove the belt from the pulleys.
Examination
Check the condition of the toothed belt for wear, delamination and oil contamination. Pay special attention to the root part of the teeth. If there is any defect, the belt must be replaced. If traces of oil are found on the belt, it is necessary to find the source of the oil leak and eliminate it. Check the condition of the tension mechanism and the rotation of the idle pulley, which should rotate easily and evenly.
Installation and tensioning
1.9 liter engine models
1. Check the presence of the fixing bolts and rods on the valve timing mechanism.
2. Install the toothed belt on the crankshaft pulley, taking into account the direction of its rotation according to the mark made earlier.
3. Install the timing belt onto the pulleys in the following order:
- guide roller;
- high pressure fuel pump;
- camshaft;
- cooling pump.
4. When installing the belt on the fuel pump pulley, install it only half the width and, after installing it on the camshaft pulley, slide the belt onto the fuel pump pulley.
5. Remove the camshaft and fuel pump pulley retaining bolts and the flywheel retaining rod.
6. Loosen the pivot nut and tensioner adjustment bolt and slowly release the tensioner until it contacts the timing belt. Retighten the adjustment bolt and pivot nut.
7. Turn the crankshaft two full revolutions in the working direction.
8. Loosen the tensioner fastening and the pivot point nut to allow the tensioner to tighten the timing belt. Retighten the adjustment bolt and pivot point nut.
9. Check that the mounting holes on the camshaft pulley, fuel pump pulley and flywheel pulley are aligned. If not, reinstall the timing belt.
10. Further installation is carried out in the reverse order of removal.
2.1 liter engine models
11. Check the presence of the fixing bolts and rods on the valve timing mechanism.
12. Pull back the timing belt tensioner and tighten the lock nut. If using a 10mm wrench, loosen the tensioner by turning it counterclockwise.
13. Install the toothed belt on the crankshaft pulley, taking into account the direction of its rotation according to the mark made earlier.
14. Install the timing belt onto the pulleys in the following order:
- guide roller;
- high pressure fuel pump;
- camshaft;
- cooling system pump;
- tensioner roller.
15. When installing the belt on the fuel pump pulley, install it only halfway across the belt and, after installing it on the camshaft pulley, slide the belt onto the fuel pump pulley.
16. Loosen the tensioner pulley lock nut to allow the tensioner to tighten the timing belt.
17. Remove the camshaft and fuel pump pulley retaining bolts and the flywheel retaining rod.
18. Turn the crankshaft two full revolutions in the working direction.
[Source available on the website peugeotbook]
19. Loosen the tensioner pulley lock nut, then rotate the crankshaft two full revolutions.
20. Loosen the tensioner pulley lock nut to allow the tensioner to tension the timing belt, and tighten the tensioner lock nut and clamp bolt.
21. Check that the mounting holes on the camshaft pulley, fuel pump pulley and flywheel pulley are aligned. If not, reinstall the timing belt.
22. Further installation is carried out in the reverse order of removal.