



Attention! The engine can only be removed from the vehicle with the gearbox.
Removal
1. Place the car on a flat horizontal surface, block the rear wheels, lift the front of the car and secure it on stands. Remove both front wheels.
2. Open the hood and secure it in a vertical position.
3. Disconnect the negative battery terminal.
4. Drain the coolant from the cooling system.
5. Remove both drive shafts.
6. Remove the air cleaner housing and intake pipe system. Unscrew the bolts and remove the air cleaner support bracket.
7. On 2.1L diesel models, remove the fuel system ECU and control unit.
8. Disconnect the accelerator cable from the throttle body or high pressure fuel pump.
9. Remove the throttle body.
10. Remove the wires, connectors and other components from the left front end of the cylinder head.
11. Drain the engine oil and remove the oil filter. Clean and install the drain plug, tightening it to the specified torque.
12. Drain the gearbox oil, install the drain and filler plugs and tighten them to the specified torque.
13. Disconnect the wires from the gearbox.
14. Remove the speedometer drive cable or converter wiring from the transmission.
15. Using a screwdriver blade as a lever, disconnect the gear selector mechanism from the corresponding ball joints on the transmission.
16. Remove the crankshaft position sensor.
17. Remove the clutch cable from the clutch release lever and disconnect it from the gearbox housing. On 2.1-liter diesel engines, remove the clutch slave cylinder.
18. Remove the power steering pump without unscrewing the hydraulic hoses from it. Using a soft wire, hang the pump away from the engine.
19. Remove the generator.
20. On models with air conditioning, unscrew the compressor mounting bolt and use a soft wire to secure it away from the engine.
21. On 2.1L engines, remove the additional suspension bolt from the front of the cylinder block.
22. Remove the radiator.
23. For vehicles with gasoline engines, follow these steps:
- depressurize the fuel system and disconnect the fuel supply and return hoses;
- disconnect the fuel system electrical connectors;
- disconnect the ventilation valve from the intake manifold;
- remove the exhaust pipe.
24. On diesel models, disconnect the fuel supply and return hoses.
25. Loosen the clamps and remove the heater hoses from the adapter on the engine compartment bulkhead.
 |
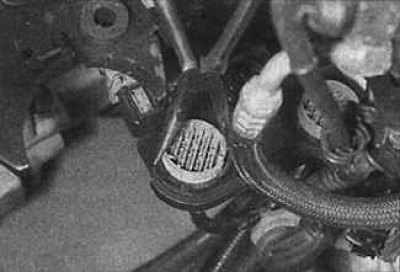 |
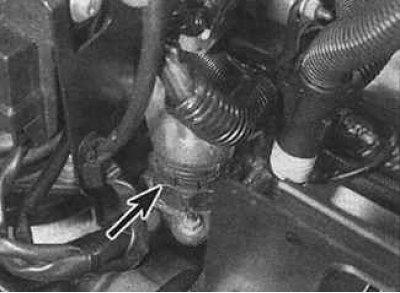
26. Trace the wiring harness from the engine to the connector in the engine compartment. Disconnect the connectors, remove the retaining rings and remove the connectors, after marking their location (arrow). Check that all connectors are disconnected and the wiring is removed from the brackets and supports and will not interfere with engine removal.
27. Attach a lifting device to the hangers on the cylinder head and lift until the weight of the engine is supported by the lifting device.
28. Remove the right and left powertrain mounts.
29. From underneath the vehicle, unscrew the nuts and bolts securing the travel limiters to the lower frame and engine and remove them.
30. Check that all components that prevent engine removal are removed or disabled.
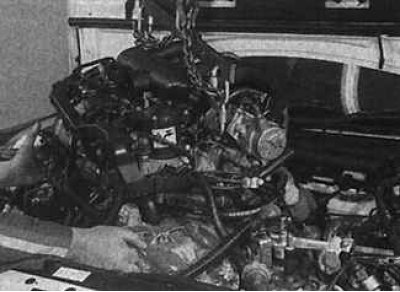
31. Lift the engine up out of the engine bay. On models with ABS, extra care must be taken to avoid damaging the ABS while removing the engine.
32. After removing the engine from the engine compartment, lower it to the ground in front of the vehicle.
Separating the gearbox from the engine
1. Mount the power unit on the appropriate bars.
2. Unscrew the mounting bolts and remove the lower flywheel protective plate from the gearbox housing.
3. On models with a cable release mechanism, unscrew the mounting bolt and remove the clutch release lever from the top of the shaft. Mark the location of the clutch release shaft relative to the gearbox housing.
4. Unscrew the mounting bolts and remove the starter.
5. Check that the engine and gearbox are securely fastened. Then unscrew the remaining bolts securing the gearbox housing to the engine.
6. Carefully separate the transmission from the engine so that the weight of the transmission does not press on the input shaft.
7. Remove the guide pins.
8. On cable operated models, make a second mark of the relative position of the fork after removal.
Installation
1. Connect the gearbox to the engine.
2. Check that the guide pins are installed in the engine or gearbox.
3. On models with a cable release drive, before installing it in its original position, install the release bearing so that the mark on the shaft is aligned with the second mark on the gearbox housing.
4. Install the gearbox to the engine on the guide pins.
5. On cable operated models, check that the release fork and release bearing are installed correctly, i.e. the mark on the fork is aligned with the original mark made on the gearbox housing.
6. Install and tighten the gearbox-to-engine mounting bolts to the specified torque.
7. Install the starter and tighten the bolts.
8. On models with a cable release mechanism, install the clutch release lever onto the shaft and secure it with bolts.
9. Install the lower flywheel guard to the transmission housing and secure with bolts.
10. Attach the engine to a lifting device and install it in the engine compartment.
11. When installing the power unit, tilt and rotate it if necessary so that it fits into place without causing damage.
12. Install the right powertrain mount, tightening the nuts and bolts by hand only at this stage.
13. Install the left powertrain mount, tightening them by hand only.
14. Install a travel limiter at the bottom of the vehicle.
15. Rock the engine from side to side until all suspension components are in place, then tighten them to the required torque and unhook the lifting mechanism.
16. Further installation is carried out in the reverse order of removal.