



The most complex types of work related to car maintenance and repair are given in great detail.
When performing maintenance and repair work on your vehicle, it is recommended to adhere to some basic rules.
1. Install bolts and nuts after cleaning them and lubricating them with a thin layer of oil. Check the condition of the nuts and bolts and make sure their threads are correct. Remove any burrs that may form. If you have any doubts about the quality of a nut or bolt, replace them with new ones. Self-locking nuts must be replaced if they have become loose. Do not apply lubricant to bolts and nuts.
2. Replace all removed seals, gaskets, sealing linings, lock washers, cotter pins and O-rings. Lubricate the working surface of the seal with oil. When installing the seal, the working surface of the seal must face the direction from which oil or grease may leak.
Particular attention should be paid to safety measures, especially when working under a raised vehicle. The jacked up vehicle must be securely supported to prevent it from shifting during any operation.
3. Place support stands under the car raised by the garage lift. They will ensure its stability (see illustration). Do not use bricks as stands. In this case, it is better to place building blocks under them by placing wooden beams on top of them.
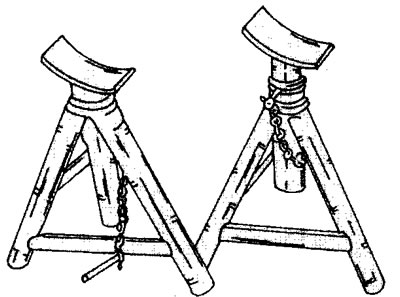
1.3. three-legged support trestles installed under a raised vehicle. the locking bolt, which is used to adjust the height of the sawhorses, cannot be replaced with a randomly selected pin of the appropriate diameter. in this case, the pin may break under the weight of the car
Various lubricants, oils, underbody corrosion protection compounds and other petroleum-based substances are aggressive towards rubber parts, as well as brake system components. Therefore, do not allow such substances, including fuel, to come into contact with hydraulic components. To clean the brake system, use brake fluid or alcohol. However, in this case, it is necessary to remember that brake fluid is poisonous and also aggressive towards paintwork.
The prerequisite for the success of repair work is the installation of original parts. To avoid problems during subsequent vehicle operation, it is not recommended to use third-party parts. An exception is electrical system parts, provided the manufacturer guarantees compatibility.
All work on the vehicle, especially on the braking system, steering and suspension, must be carried out with extreme care and caution. The repairs and maintenance performed must ensure the safety of the vehicle. We do not recommend that you perform any work yourself that you are unfamiliar with or that requires specific experience.
The workplace should be equipped with a workbench and a vice and have good lighting. The workplace must be kept clean at all times. It goes without saying that the workstation should be equipped with a sufficient number of quality tools, including a set of wrenches or a set of combination wrenches, one end of which is a regular wrench, and the other is an overhead wrench (see illustration 1.0). These wrenches are very convenient when working in hard-to-reach places, as well as when unscrewing tightly tightened nuts.
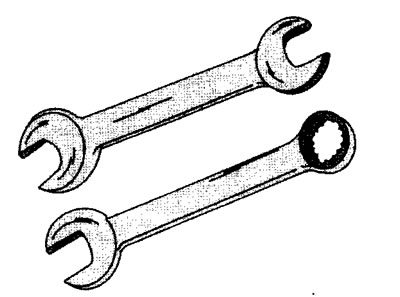
1.0. spanner and socket wrenches
You also need shaped (phillips) screwdrivers or attachments for screws and bolts with a head with a cross-shaped slot, pliers, pliers, pliers, hammers. In the automotive industry, bolts and screws with Torx heads are increasingly used, the slot of which is an asterisk (see illustration 1.0a). These bolts require a set of special attachments.
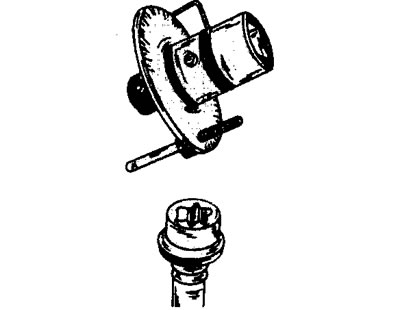
1.0a. A protractor used to tighten bolts to a specific angle and a Torx head bolt
In addition to the basic equipment specified, it is possible to purchase special devices and tools required for performing specific types of work. These include, for example, an impact driver, which is necessary for loosening factory-tightened Phillips-head bolts. Without such a screwdriver, the specified bolts are usually damaged during dismantling. The screwdriver is also used for tightening bolts, especially where a tight seal is required.
During repair work, needle-nose pliers are required to remove thrust washers, also known as Seeger washers. There are two types of needle-nose pliers, allowing you to remove and install outer and inner thrust washers (see illustration 1.0b).
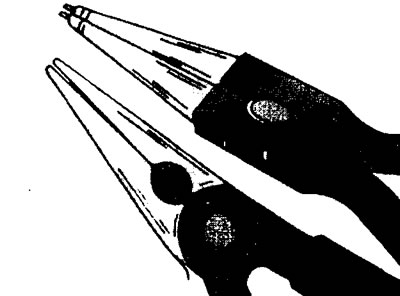
1.0b. Needle-nose pliers for removing thrust rings
In addition to the aforementioned needle-nose pliers, you can't do without various types of pliers (see illustration 1.0b).
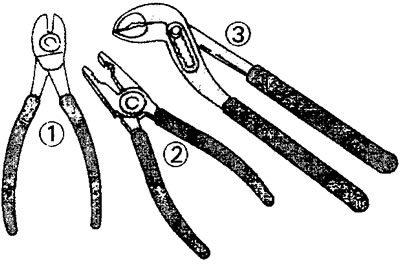
1.0v. You can't do without these pliers when repairing a car.
1 - side cutters
2 - pliers
3 - adjustable wrench
The most "useful" tool is a torque wrench, used like a regular wrench, but with the only difference that it is adjusted to a certain tightening value of a bolt or nut, upon reaching which it begins to slip, thus "refusing" further tightening (see illustration 1.0g).
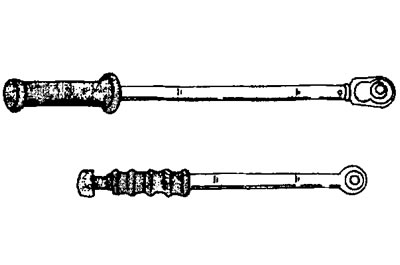
1.0g. Torque wrench
The more bells and whistles a car has, the more different tools you need for DIY repairs and maintenance. In some cases, repairs are impossible without specialized equipment, and in addition, some types of work are still best left to a specialist. Multifunctional devices for testing a car's electrical system are very useful, but without the proper experience and knowledge, using them can only cause harm.
For removal and installation of many parts, punches of different diameters (3 and 6 mm) are required (see illustration 1.0d).
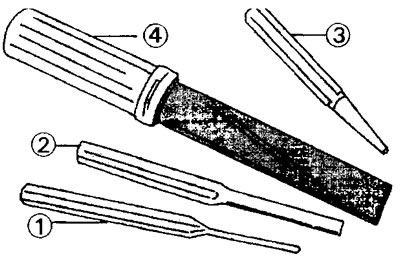
1.0d. Punches are required to remove many parts.
1 - punch with a diameter of 3 mm
2 - punch with a diameter of 6 mm
3 - core for drilling work
4 - flat chisel
In general, to take care of your car yourself, it is enough to have a certain set of tools and devices that are acquired gradually (see illustration 1.0g).
Text taken from the website peugeotbook.ru
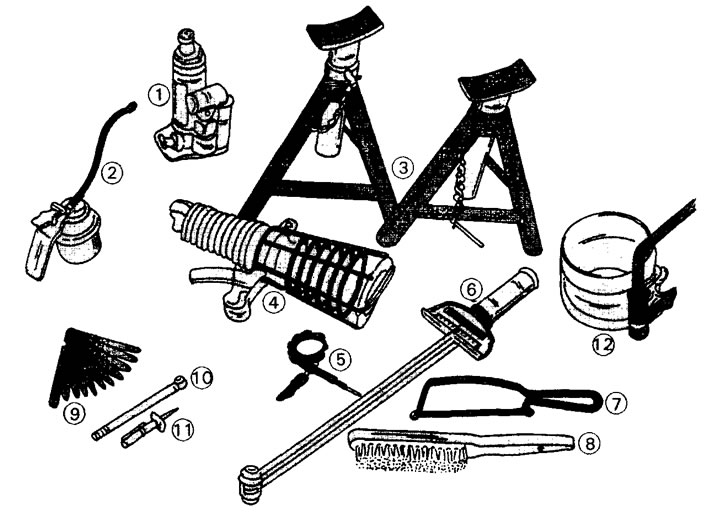
1.0g. Recommended set of tools needed for car care
1 - jack
2 - oiler
3 - stand sawhorses
4 - electric flashlight
5 - stroboscope (12 V)
6 - torque wrench
7 - hacksaw for metal
8 - metal brush
9 - measuring templates
10 - tire pressure gauge
11 - pin for measuring the profile height of tires
12 - mounting sleeve for installing pistons
Important! Before starting your trip, make sure the on-board tool kit is in place. Even the best equipment available in the garage won't help if you need tools from the on-board kit on the road. The car should always be equipped with a jack, a Phillips-head (wheel) wrench for removing wheels, screwdrivers, pliers, spare bulbs and fuses, a cable, jumper cables for starting the engine from an auxiliary battery, and a flashlight. Remember that renovation means dirty hands. A rag and a towel should also be in the trunk.