



Table of contents: Cars with BVA AL4 automatic…🠇 Vehicles with 4HP20 AT 🠇
Cars with BVA AL4 automatic transmission
Removal
1. Disconnect the wire terminals from the battery terminals.
2. Disconnect the engine control unit connector.
3. Remove the air filter by disconnecting the air supply duct from the intake manifold.
4. Remove the battery and its tray.
5. Remove the front left wheel.
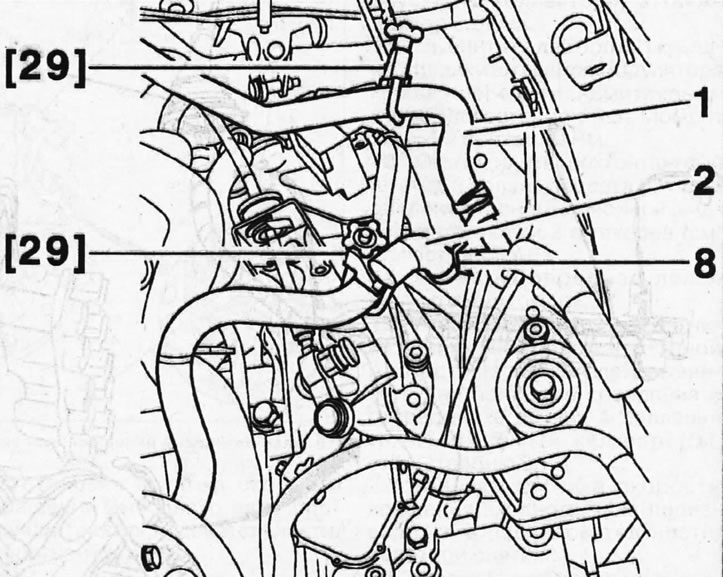
6. Clamp cooling hoses 1 and 2 with special clamps 29 (see illustration).
7.6. Clamp cooling hoses 1 and 2 with special clamps 29
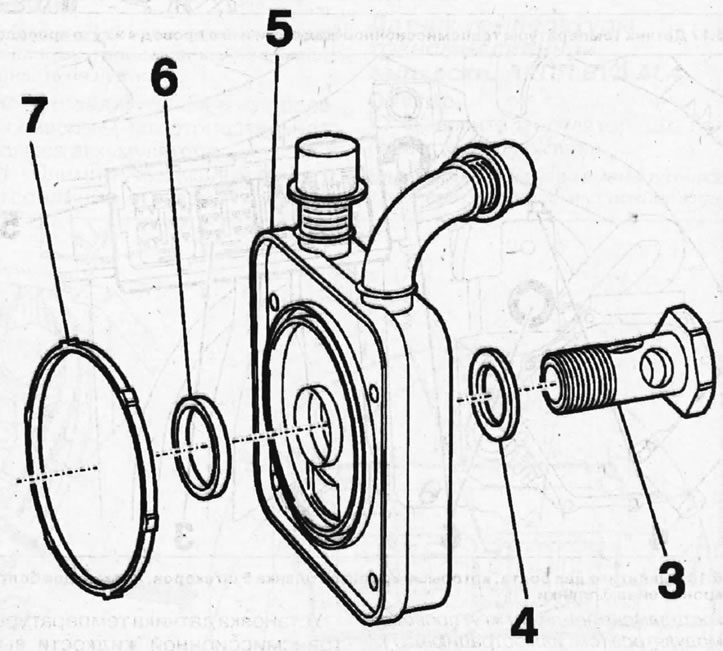
7. Unscrew bolt 3 and remove sealing ring 4 (see illustration). The tightening torque of bolt 3 is 50 Nm.
7.7 Unscrew bolt 3 and remove sealing ring 4
8. Loosen clamps 8 securing cooling hoses 1 and 2, disconnect the hoses and remove the transmission oil cooling radiator 5 (see illustrations 7.6 and 7.7).
9. Replace sealing rings 7 and 6 with new ones (see illustration 7.7).
The transmission oil cooling radiator is installed in the reverse order of removal.
Vehicles with 4HP20 AT
Removal
10. Remove the air filter and disconnect the ground (-) cable terminal from the negative battery terminal.
11. Disconnect the multi-pin connector located above the transmission fluid cooler and remove the connector holder.
12. Clamp the coolant inlet and outlet hoses on the transmission fluid cooling radiator, loosen the clamps securing them and remove them from the radiator pipes.
13. Unscrew the bolts 4 securing the radiator 3 together with the sealing rings 5 and 6 and remove the transmission oil cooling radiator (see illustration), after dismantling the radiator, the sealing rings must be replaced with new ones.
7.13. Unscrew the bolts 4 securing the radiator 3 together with the sealing rings 5 and 6 and remove the transmission oil cooling radiator
Caution! If the transmission fluid has changed color, is contaminated, or contains metal particles, the oil cooler and torque converter must be replaced with new ones.
The transmission oil cooling radiator is installed in the reverse order of removal.
14. Replace the sealing rings with new ones and install them in the mounting locations before screwing in the radiator mounting bolts. When installing, the "a" side of the radiator should face the front of the vehicle (see arrow in illustration).
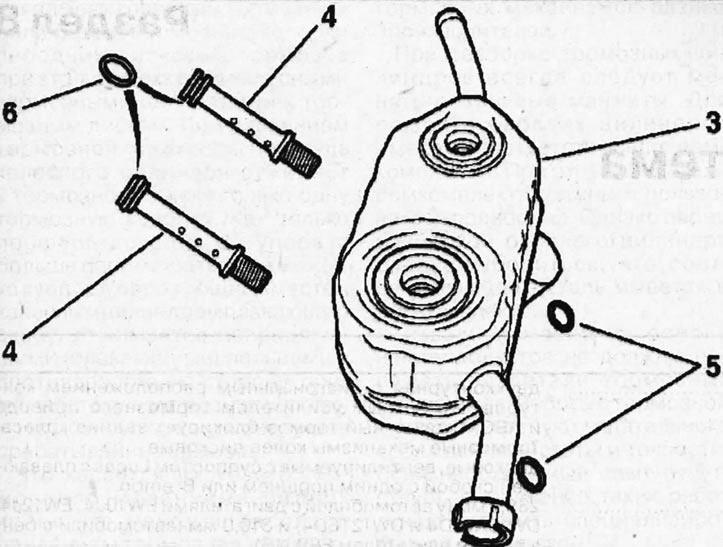
7.14. The transmission oil cooling radiator must face side "a" towards the front of the vehicle
15. Tighten the radiator mounting bolts to 45 Nm.
After installing the radiator, fill the coolant if it was drained and bleed air from the cooling system.