



Cars with BVA AL4 automatic transmission
Removal
1. Remove the gearbox, see the relevant chapter.
2 Set the torque converter removal and installation handles [2] as shown in the illustration and remove torque converter 1.
![4.2. Install the handles [2] and remove the torque converter 1](https://www.peugeotbook.ru/img/etc/3098.jpg)
4.2. Install the handles [2] and remove the torque converter 1
Caution! Proceed with caution, as the torque converter is filled with transmission oil.
3. Remove the oil seal 2 of the torque converter using tool 4 (see illustration).
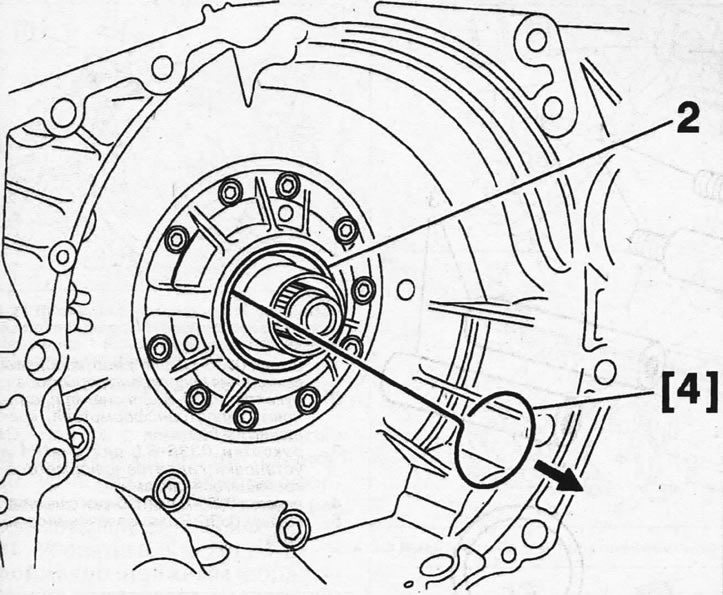
4.3. Remove the oil seal 2 of the torque converter using tool 4
Installation
4. Clean the oil seal seat.
5. Fit the new torque converter oil seal 2 with a suitable mandrel 3 (see illustration).
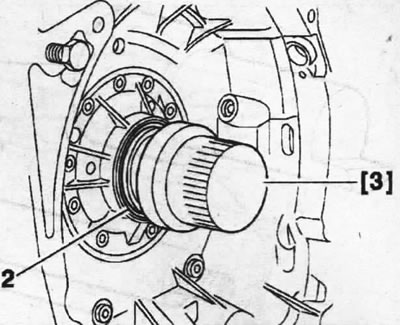
4.5. Fit the new oil seal 2 of the torque converter with a suitable mandrel 3
6. Inspect the torque converter, the ring that centers it relative to the drive disk, and the grooves in the torque converter shaft.
Caution: When replacing the torque converter with a new one, fill it with half the volume of transmission fluid recommended by the vehicle manufacturer before installing it.
7. Install the torque converter using the handles used during removal.
8. Make sure that the torque converter is properly installed in the gearbox by securing it from falling with tool 18 (see illustration).
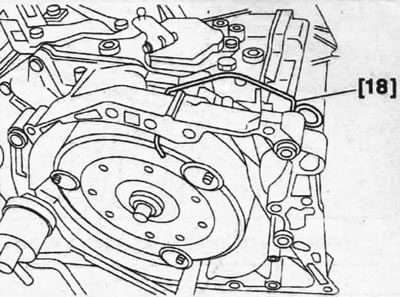
4.8. Make sure that the torque converter is properly installed in the gearbox by securing it from falling with tool 18
9. Install the gearbox, see the relevant chapter.
10. Add transmission oil to the required level.
Vehicles with 4HP20 AT
Removal
11. Remove the gearbox, see the relevant chapter.
Caution: The torque converter may be secured to the drive plate with bolts or nuts. This is due to the presence of corresponding removable handles (see illustration 4.0).
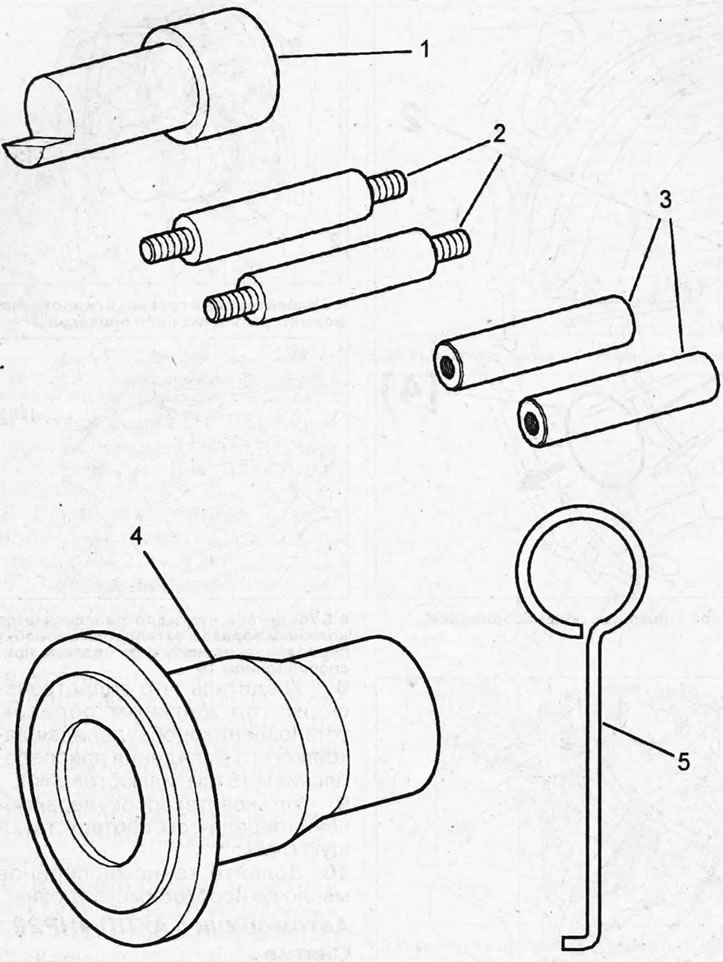
4.0. Tools required for removing and installing the torque converter 1 - pin 0336-E2 to prevent the torque converter from falling out; 2 - 0336-B handles for removing and installing a torque converter secured with bolts; 3 - handles 0336-B1 for removing and installing a torque converter secured with nuts; 4 - mandrel 0336-N for packing the seal; 5 - hook 0336-P for extracting the oil seal
12. Install special handles for removing/installing the torque converter. Select handles depending on the type of torque converter mount (see illustration 4.0).
13. Remove the thrust roller 0336-E2, which was used to prevent the torque converter from falling out when removing the gearbox.
14. Remove the torque converter using handles 2 or 3 (see illustration).
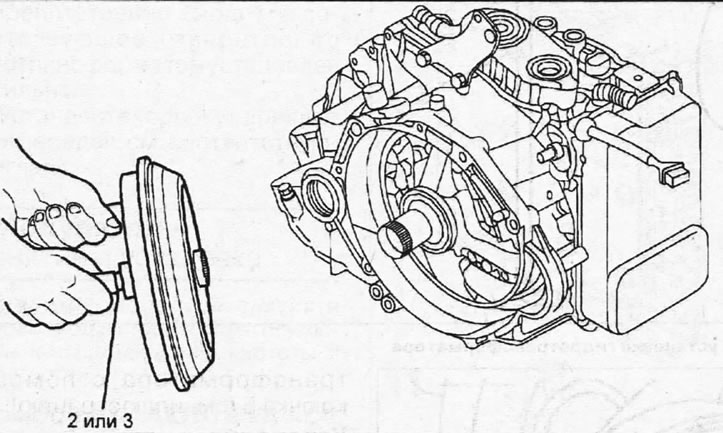
4.14. Remove the torque converter using handles 2 or 3
Caution! Proceed with caution as the torque converter is filled with oil.
15. Remove the torque converter oil seal using hook 5 (see illustration).
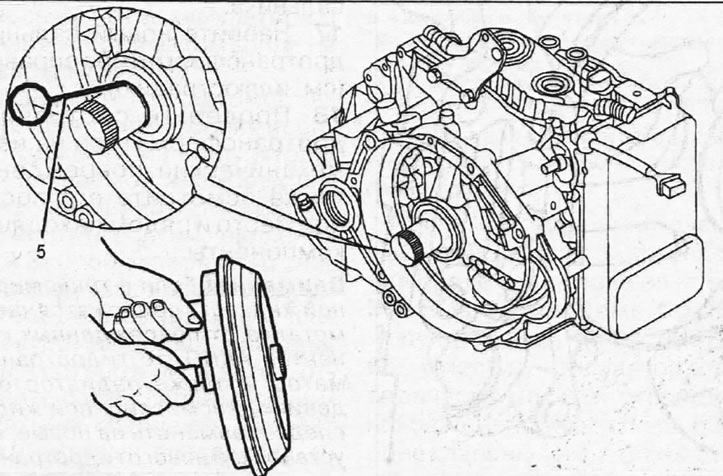
4.15. Remove the torque converter oil seal using hook 5
Installation
16. Clean the oil seal seat.
17. Press the new torque converter oil seal into place using the mandrel [1] (see illustration).
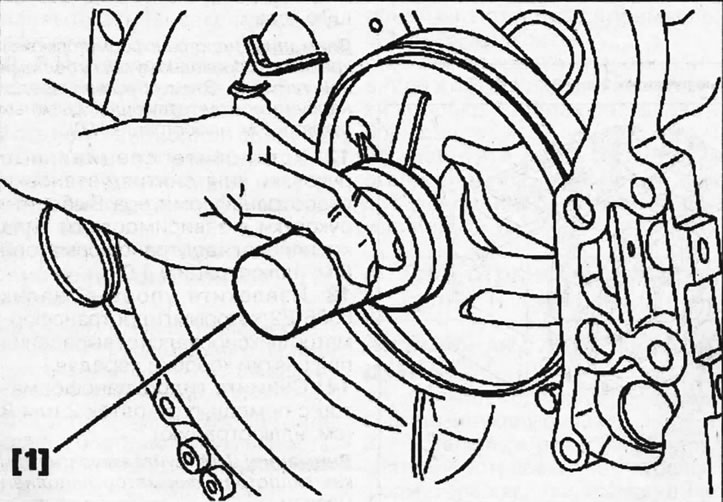
4.17. Fit a new torque converter oil seal using a suitable mandrel (1
18. Check the condition of the torque converter for wear and mechanical damage, and also inspect its mounting location and nearby components.
Caution! If the transmission fluid contains metal particles from damaged automatic transmission components, the torque converter and transmission fluid cooler should be replaced with new ones. Before installing a new torque converter, fill it with half the volume of transmission fluid recommended by the vehicle manufacturer.
19. Apply a thin layer of grease to the working surface of the seal.
20. Install the torque converter using the handles used during removal.
21. Make sure that the torque converter is properly positioned in its mounting location, and then secure it from falling out with the thrust roller 1 (see illustration). If the shaft fits into the corresponding hole without any obstacles, then the torque converter is installed correctly.
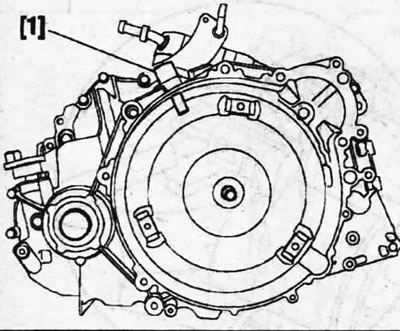
4.21. Check the correct installation of the torque converter by installing the thrust roller 1 and thereby locking the torque converter
22. Install the gearbox, see the relevant chapter.