
English Русский
Български
Беларускі
Український
Српски
Hrvatski
Română
Polski
Slovenský
Magyar
Bookmark Articles Sitemap Contacts
Company Hyundai Company Opel Company Skoda Company Kia Company Mitsubishi Company LADA Company Audi
PeugeotBook.ru


Series 100   Series 200   Series 300   400-500   Series 600   Crossovers   Others
 
Peugeot 106 (1991-2003)

Tailgate lock components — removal and refitting (Peugeot 106)

  • Main
  • 10X
  • Peugeot 106 (1991-2003)
  • Body and interior
  • Doors, locks and windows
  • Tailgate lock components — removal and refitting
0
Table of contents: Tailgate lock 🠇 Tailgate lock cylinder 🠇 Tailgate lock striker 🠇

Tailgate lock


Removal


1. Open the tailgate, then remove the two securing screws and withdraw the lock from the tailgate, disengaging the lock lever as the lock is withdrawn (see illustration).
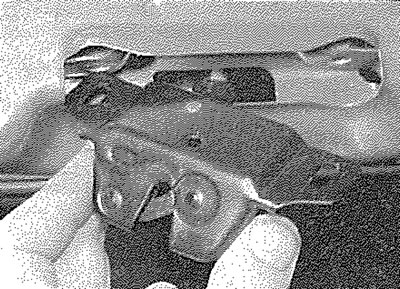
16.1. Removing the tailgate lock

16.1. Removing the tailgate lock


Refitting


2. Refitting is a reversal of removal, but ensure that the lock lever engages correctly as the lock is positioned in the tailgate.

Tailgate lock cylinder


Removal


3. Open the tailgate.

4. Remove the two screws securing the tailgate trim panel, then release the securing clips and withdraw the panel from the tailgate.

5. Where applicable, remove the tailgate wiper motor as described in Chapter 12.

6. Remove the lock cylinder assembly securing screw (see illustration).
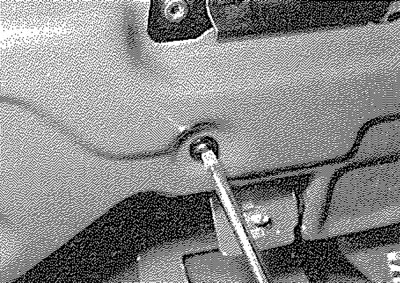
16.6. Removing the tailgate lock cylinder assembly securing screw

16.6. Removing the tailgate lock cylinder assembly securing screw


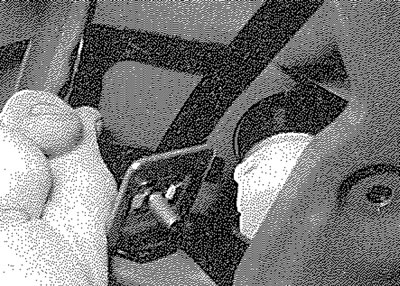
7. Prise out the lock cylinder securing clip (see illustrations).
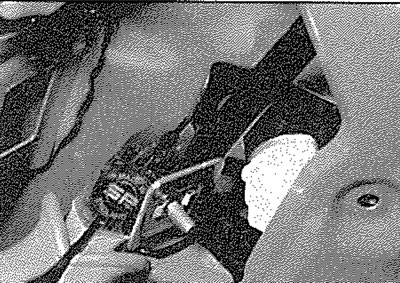
16.7a. Using a pair of pliers...
16.7a. Using a pair of pliers...


16.7b.... prise out the lock cylinder securing clip...

16.7b.... prise out the lock cylinder securing clip...


8. Withdraw the lock cylinder assembly from the tailgate, disengaging the lock lever from the lock as it is removed (see illustration).
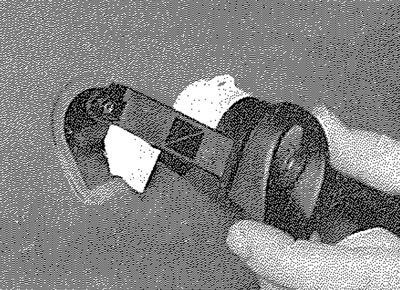
16.8. ... and withdraw the lock assembly

16.8. ... and withdraw the lock assembly


Article based on material from the website: peugeotbook

Refitting


9. Refitting is a reversal of removal. Ensure that the lock lever engages correctly as the lock cylinder is refitted and refit the wiper motor with reference to Chapter 12.

Tailgate lock striker


Removal


10. Mark the position of the striker on the body, for use when refitting. Unscrew the two securing bolts and remove the striker from the body.

Refitting


11. Refitting is a reversal of removal. Before tightening the securing bolts, the position of the striker should be altered (the securing bolt holes are elongated) until satisfactory lock operation is obtained. Use the marks made prior to removal, if appropriate.
This article is available at russian, bulgarian, belarusian, ukrainian, serbian, croatian, romanian, polish, slovak, hungarian
Article reviewed by editor: Matveev Demid
Share information:
Previous
Peugeot 106: Doors, locks and windows
Next

Tailgate and support struts — removal, refitting and adjustment
Door window glass and regulator — removal and refitting
Doorhandle and lock components — removal and refitting
Door inner trim panels — removal and refitting
Door — removal, refitting and adjustment
Central locking components — removal and refitting
Electric window components — removal and refitting
Exterior mirror and associated components — removal and refitting
Windscreen, tailgate and fixed windows — general information
Opening rear quarter windows — removal and refitting
See similar information for other Peugeot models

➨ Replacing the tailgate lock bracket Peugeot 207 (2006-2014)
➨ Replacing the tailgate lock Peugeot 307 (2001-2008)
➨ Door lock Peugeot 405 (1987-1997)
➨ Exhaust system — replacement of components Peugeot 605 (1989-2000)
➨ Sliding Door Handle and Lock Components — removal and… Peugeot Partner I (1996-2008)
Link to this article in different formats
Comments and feedback from visitors
No comments yet


Add two numbers 35 + 13


Peugeot 106 (1991-2003) 
  • General information
  • Introduction to manual
  • Weekly checks
  • Maintenance (petrol)
  • Maintenance (diesel)
  • Troubleshooting
  • Power unit
  • Petrol engines
  • Diesel engines
  • Engine overhaul
  • Cooling and heating
  • Fuel system (carburetor)
  • Single point injection (petrol)
  • Multipoint injection (petrol)
  • Fuel system (diesel)
  • Emission control system
  • Engine electrical equipment
  • Ignition system
  • Diesel heating
  • Transmission
  • Clutch
  • Manual gearbox
  • Automatic gearbox
  • Drive shafts
  • Chassis, running gear
  • Brake system
  • Car suspension
  • Steering
  • Body and interior
  • Exterior (external elements)
  • Interior (internal elements)
  • Doors, locks and windows
  • Electrical equipment
  • Equipment and devices
  • Electrical diagrams
PeugeotBook.ru © 2018–2026 | Mobile version | Sitemap: EN BG BY UA RS HR RO PL SK HU | Write message | Site search | Add to bookmarks | Peugeot owners
106 (1991-2003) | 206 (1998-2012) | 207 (2006-2014) | 305 (1977-1989) | 306 (1993-2002) | 307 (2001-2008) | 405 (1987-1997) | 406 (1995-2004) | 605 (1989-2000) | Partner-I (1996-2008) | Eurovans-807 (2002-2014) | Eurovans-806 (1994-2002) | J5 (1981-1993) |
Cookies are used to ensure the correct display of pages on the site.