
- lower the window about 2/3 of the way to make it easier to access the locks and guides of the power window;
Note. The front door glass has two retainers and two power window guides, the rear door glass has one retainer and one guide.
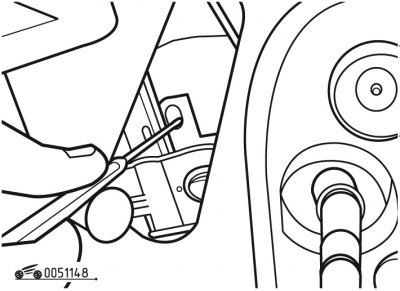
Pic. 11.48. Compression of door latches: 1 - retainer
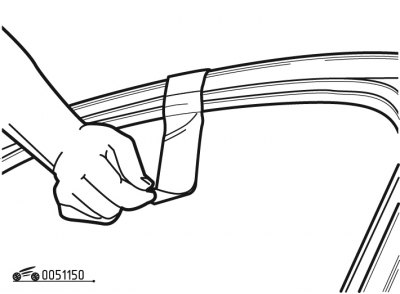
Pic. 11.50. Fixing the door glass in the upper position
- squeeze the latches 1 with a screwdriver (see fig. 11.48), then remove the glass from the window guides, lift it up as far as possible and fix it in this position with adhesive tape (pic. 11.50);
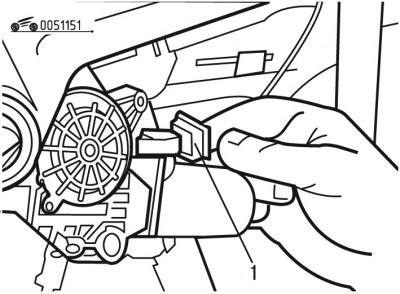
Pic. 11.51. Disconnecting the power window motor connector: 1 - pin connector
- on models with electric windows, disconnect the clips, then disconnect the connector 1 (pic. 11.51) electric motor;
- carefully drill out the heads of the rivets securing the power window to the door;
Note. At removal of a window regulator of a forward door disconnect fastening of a cable of a window regulator to a door.
Attention! Be careful when drilling out the rivets, do not damage the door or the power window.
- remove the window regulator from the door.
Install the power window in the following order:
- remove the remains of the rivets from the door;
- install the window lifter in place and turn it so that the holes for its fastening are aligned;
Attention! When installing the front door power window, do not allow the cable to be twisted.
- make sure that the power window is positioned correctly and fix it with new rivets;
- release the glass from the adhesive tape, lower it down and insert it into the window guides;
- make sure that the glass is securely held by the latches;
- connect the power window motor connector and check its operation;
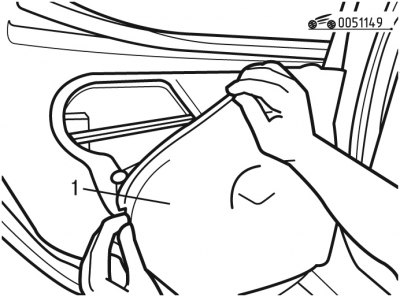
Pic. 11.49. Door gasket installation: 1 - gasket
- stick an insulating gasket on the door;
Note. In case you are installing a new gasket, remove the old adhesive with a solvent. Align the gasket with the door, then insert the liners and glue the gasket 1 (see fig. 11.49) to door.
- install the interior door trim.