
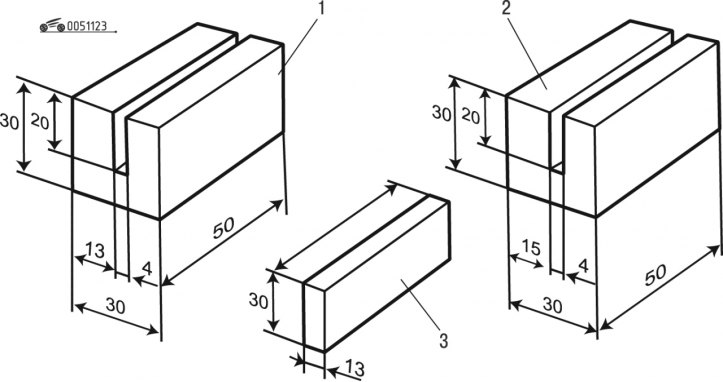
Pic. 11.23. Details for mounting the front door: 1, 2, 3 - gaskets
To install the front door, it is necessary to make three parts, 2 pieces each, in accordance with fig. 11.23.
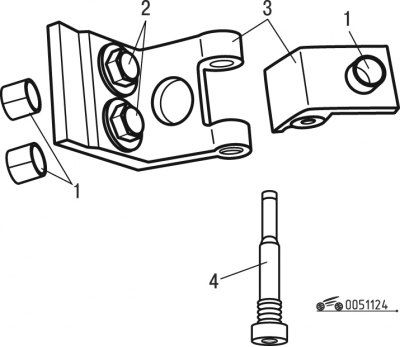
Pic. 11.24. Mounting kit: 1 - centering bushings; 2 - bolts; 3 - loops; 4 - axis
When installing the front door, you need to purchase the mounting kit shown in fig. 11.24.
Install the front door in the following order:
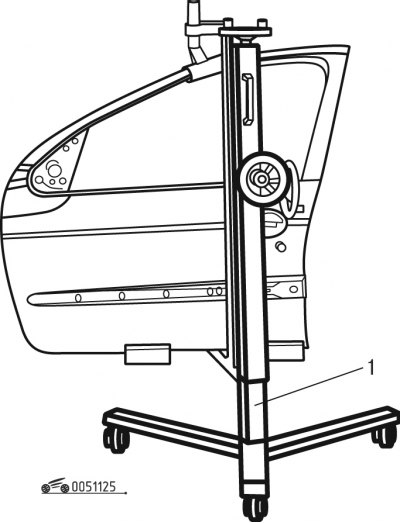
Pic. 11.25. Installing the door on the support: 1 - support
- put the door on support 1 (pic. 11.25);
Note. The rear door must be in place.
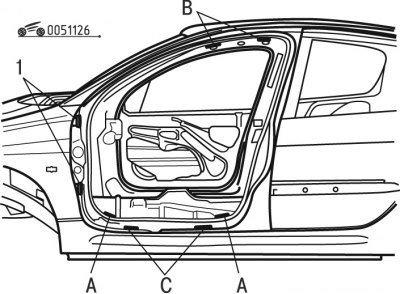
Pic. 11.26. Installation of gaskets in the doorway: 1 - loops; A, B - gaps
- install gaskets 1 (see fig. 11.23) in zone A (pic. 11.26) (dimension 13 mm outward);
- install spacers 2 (see fig. 11.23) in zone B (see fig. 11.26) (dimension 15 mm outward);
- install two support pads 3 13 mm thick in area C;
- install hinges 1 with centering bushings on the front pillar;
- tighten, without tightening, bolts 2 (see fig. 11.24) on the door pillar;
- install the door opposite the hinges;

Pic. 11.27. Front door fixing: 1, 2 - bolts
- tighten, without tightening, bolts 1 (pic. 11.27) hinges on the door;
- tighten bolts of fastening of draft on a forward rack;
- move support 1 (see fig. 11.25).
Check and adjust the gaps of the front door in the following order:
- close the front door and check the gaps:
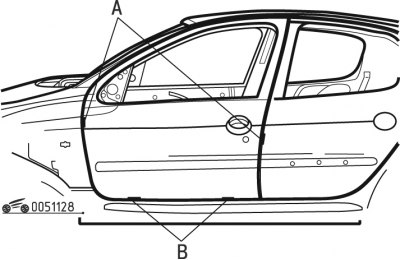
Pic. 11.28. Clearance check: A, B - gaps
1) clearance B (pic. 11.28) height should be (5±2) mm;
2) gap A should be (5±1,5) mm;
- keep the door closed;
- tighten bolts 2 (see fig. 11.24) on the front pillar with an open-end wrench;
- open the door and tighten the hinge bolts on the door;
- recheck the gaps and align if necessary.
Perform the final installation of the front door in the following order:
- install tool 1 on the door (see fig. 11.25);
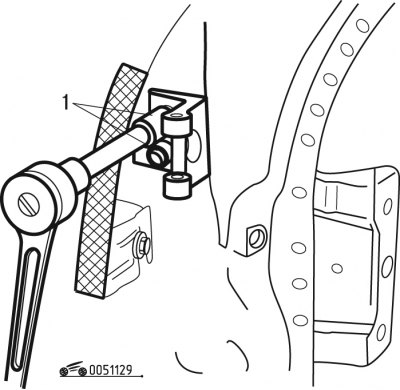
Pic. 11.29. Tightening the hinge bolts: 1 - bolts
- finally tighten bolts 1 (pic. 11.29) torque 20 Nm;
- finally tighten bolts 2 (see fig. 11.27) torque 14 Nm.