



The test is carried out with a density meter. When determining the density of the electrolyte, it is necessary to take into account the battery temperature. If the electrolyte temperature is below 15°C, for every 10° below this temperature, subtract 0.007 from the measured density. For every 10° above 15°, add 0.007.
Density of electrolyte in battery
Temperature | ||
Above 25°C | Below 25°C | |
| Full charge | 1,210 – 1,230 | 1,270 – 1,290 |
| Charging 70% | 1,170 – 1,190 | 1,23 – 1,250 |
| Discharged | 1,050 – 1,070 | 1,110 – 1,130 |
Measure the specific gravity of the electrolyte in each can. A difference in specific gravity of 0.04 or more between any two cans indicates electrolyte loss or plate sulfation.
If the electrolyte density between any two cans differs by more than 0.04, the battery must be replaced. If the electrolyte density is lower than required, but the same in all cans, the battery must be charged.
If you are using a maintenance-free battery, the battery condition can only be checked with a voltmeter.
In batteries with a built-in charge level indicator, the battery status is determined by the color of the indicator. A green indicator corresponds to a full charge of the battery. A black indicator indicates the need to charge the battery. A blue indicator indicates a low electrolyte level in the battery.
Charger
Charging the battery must be done with the battery removed from the vehicle.
Original is located at: www.peugeotbook.ru
1. Charge the battery with a charging current of 3.5 to 4 amperes until the density of the electrolyte in the battery increases within 4 hours.
2. Using high currents to quickly charge the battery is not recommended, as this may cause the plates to warp due to overheating.
3. During battery charging, the electrolyte temperature should not exceed 37.8°C.
Removal
1. The battery is located on the front left side of the engine compartment. Remove the battery cover, loosen the negative battery terminal and remove it.
2. Disconnect the positive terminal and remove it.
3. Unscrew the two bolts and remove the battery mounting clamp.
4. Remove the battery from the engine compartment.
5. To remove the battery box, remove the air filter housing.
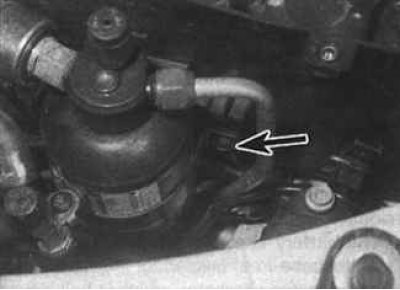
6. On models with air conditioning, remove the screw securing the moisture separator belt to the front of the battery box (indicated by the arrow).
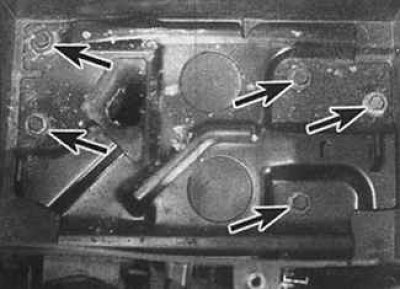
7. Unscrew the inner bolts (indicated by arrows) fastening the battery box to the metal base.
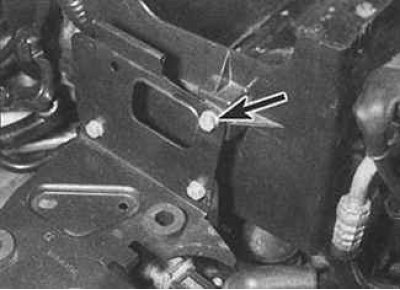
8. Unscrew one outer bolt as well (indicated by the arrow) fastening to the air filter installation suspension.
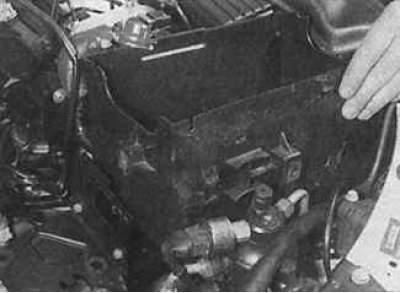
9. Move all wires and hoses to the side and remove the battery box from the engine compartment.
Installation
1. Installation is carried out in the reverse order of removal.
2. After connecting the terminals to the battery, lubricate them with petroleum jelly.
3. After connecting the battery, turn on the ignition for 10 seconds before starting the engine. This will allow the electronic systems and control units to enter operating mode.